IN THIS ARTICLE
Finding Nearby Locations with Public Data Sets and PubNub
Are you a foodie and do you like to code? If so, you’re in luck! This entry will take you through a GoogleMaps journey. You’ll learn how to take data from your city and use it to map out your favorite restaurants.
Not a foodie? There’s something here for you as well. Like the previous article about determining location with HTML5, you’ll learn how to detect and broadcast geolocation, and compare it to destinations surround you. Transportation, navigation, the list of use cases goes on and on!
Programming Scope
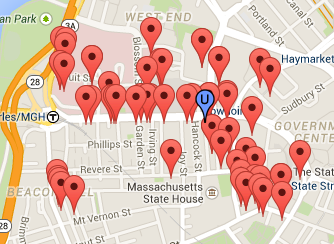
The idea is simple. Find yourself on a map. Find the restaurant locations nearby. In practicality, the concept becomes more complex. You first need to determine where you are. This is performed via HTML5 geolocation. Then you need to find the restaurants in your area. Once you have all these locations you need a way to compare your location to the restaurants locations. This is performed via geohashing.
The geohash string of your location is then compared to the restaurant geohashes. With a certain degree of matching, you determine restaurants within distance (the geolocation proximity). Finally you plot those locations on the map as well.
For the full source code, click here to download the entire repository.
Setup
We’ll need a couple things for setup:
- You need to use a few node packages, but you also want to display in the browser. For this purpose you should use Browserify.
- To parse CSV you may want to use a parsing package like PapaParse. (babyparse in JavaScript’s case)
- To convert coordinates to geohashes, use node geohash.
- For the map, use the GoogleMaps API.
If you just want to just get started with the example code, navigate to the project directory (click to download all the files).
npm install in the command line will install browserify and ngeohash. Go to the babyparse github link. Copy the link. navigate tonode_modules in the project directory. git clone https://github.com/Rich-Harris/BabyParse. This will get you set-up to run index.html.
For the DIY crew, set the basic dependencies in index.html
Also include bundle.js for browserify. This file will be generated by using browserify.
Like the example code you need to have a folder to store your javascript files. This is the js folder. Addapp.js to the js folder.
Next you need to set up Browserify.
npm install -g browserify
browserify js/app.js -o bundle.js
This generates the bundle.js, which allows you to easily load node modules into the browser using require.
Running the Application
When you’re ready to test the app… – Navigate to the project directory and start a local server, like: python -m SimpleHTTPServer – Open a window in your browser for the html file, localhost:8000.
Getting the Data
This article uses data pulled from the City of Boston. If you’re looking for your hometown, or a specific city, here’s a great place to start looking.
For this example, we’re talking restaurants. The Boston link has a map and a list of active restaurants in Boston. This includes chains, privately-owned businesses; basically everywhere that serves food.
The list itself provides a Business Name, Description, Telephone, and Geolocation.
Export this data as a CSV. For this article the CSV was saved to the data folder as Active_Food_Establishment_Map-20150122.csv. Now that you have the data, you need to pull the file into your code and parse.
Use JQuery and ajax the file.
Import babyparse into the project.
Create a function to parse the CSV.
Format Data & Geohash
Now that you have the data you need to format it for use. This portion has been combined with the creation of the geohashes for the restaurants.
First import ngeohash into the project.
Set up a function to take the parsed json_data.
Inside this function initialize the variables.
Set up a loop for the array, which looks at the nested_object and does something.
This function has try and catch for errors. The empty catch is technically a production faux-pas but you may need to use it here so that the loop doesn’t break. After initializing the variables get the coordinates and the name of the business at those coordinates.
Parse the location to extract the latitude and longitude.
Hop over to the geohash portion. Outside, in the body of app.js you need a function to return the geohash.
Swing back into the extractHash method. continuing from the regex…
This gives you the geohash. The next few lines in the extractHash method then format and return the data.
Matching
Assuming you calculate your own hash using the geoToHash method, you need to be able to match this against the restaurant hashes, located in hash_table.
Inside this function, for each value match the user’s hash string to 6 characters of the value string.
After combining and formatting the data you should have these four pieces stored in memory.
that.json_data// the original parsed datathat.json_data_formatted// formatted data for coordinates and business namethat.hash_table// a 1x(restaurant count) size array of the restaurant location hashesthat.hash_matches// the matches to the user location and their indexes in hash_table
Note to simplify scope var that = this; has been declared at the top. That way you don’t have to keep track of this. It makes all the data reachable through the app object. Note this set up may be inherently insecure to prying eyes. You wouldn’t want to do this with anything remotely sensitive.
Google Maps API
This uses a file from Displaying Live Location Points & Tracks with JavaScript & Google Maps and PubNub.
Create the gmap.js in the same folder. Here you import the app.js file.
var app = require(“./app.js”);
Note that the latitude and longitude have been hard-coded for example.
By uncommenting some code you can replace these hard-coded values with your own location!
Set data from app.js as local variables.
Then inside the initialize method take each hash_match and add it to the map.
Inside this function you get the relevant data, then add a new marker to the map with the relevant info.
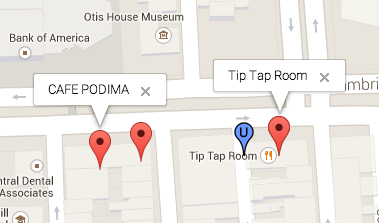
Finally add two event listeners to show tooltips when the user mouses-over the restaurant location.
Next add a few things to the user_maker, which used to be named map_marker prior to this blog entry. It uses an icon from this icon package.
Note that the package is available freely under the MIT and GPL licenses and it can even be for commercial use!
Then add an info window and event listener.
PubNub Integration
Currently the app shows you your location and the surrounding restaurants. The original gmap.js moves theuser_marker with every location message sent to the “mymaps” channel.
This app will still move the marker but it needs a few lines to re-calculate all the data. Though this is not in the code, it would require you to find the user’s new location, recalculate the data, delete all previous business markers, and finally populate the new business markers.
And that’s it! If you want more on realtime mapping and geolocation using mapping APIs like MapBox, MapKit and Google Maps, we’ve got a ton of other tutorials. Check them out!


