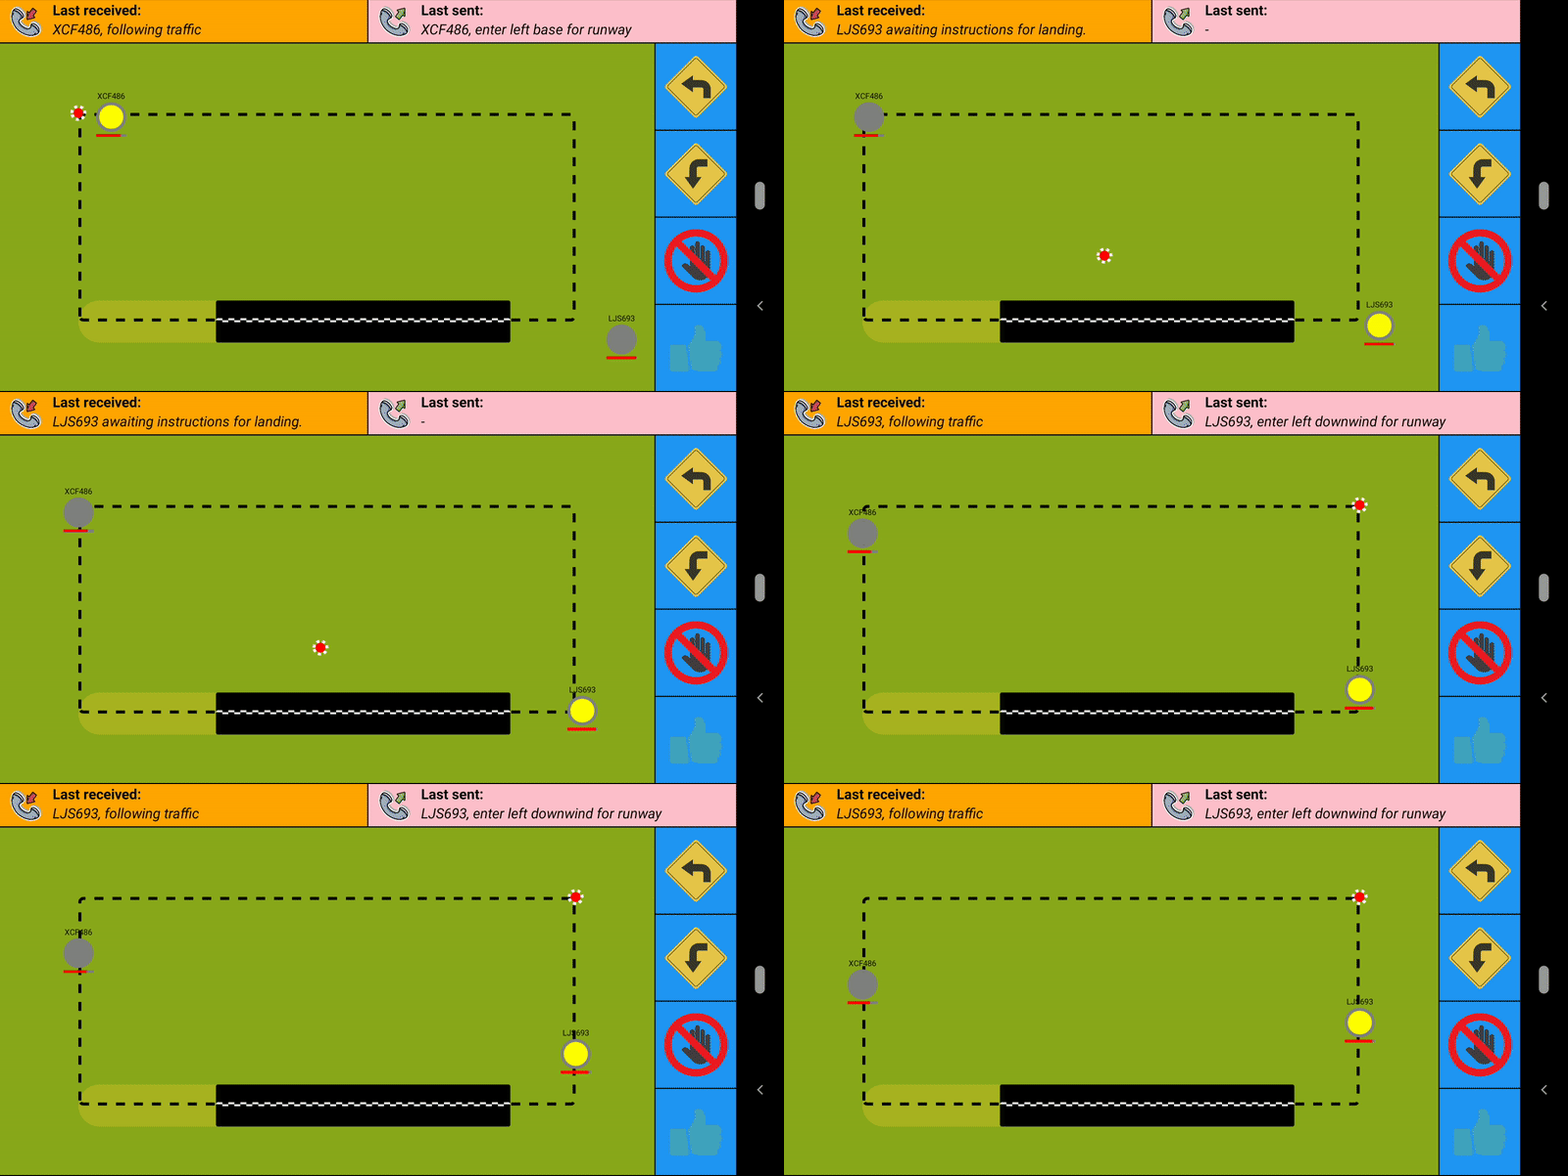
Creating a Realtime React Native App
Welcome to part 2 of this Air Traffic Control React Native game blog series. In part 1, coding a realtime airport application with Node.js, we discussed the overall roadmap of the series and created a simple server-side application using Node.js.
In this post, we will be making a React Native app that uses PubNub to subscribe and publish data to our server-side application. As a recap, the app will be representing an ATC tower responsible for issuing commands to aircraft, whilst the server-side application represents the airfield and airspace around it.
Accompanying code available at https://github.com/lukehuk/pubnub-airport
Designing a Redux and PubNub Powered React Native ATC Game
Our ATC app will need to provide:
- A user interface (UI) to visualize the airfield and aircraft, allowing the user to select individual aircraft to issue commands.
- Code for receiving plane data and broadcasting commands using PubNub publish and subscribe.
To create the UI, we will be using React, React Native and Expo.
To manage game events and the state of the game we will be using PubNub and Redux.
The technologies we will be using are all summarized below, don’t worry if you haven’t used them before!
React, Redux, PubNub… What Are These?
React
React is a JavaScript framework for building user interfaces. One of the main motivations for using this framework is that it promotes a hierarchical, component-based architecture. This naturally compartmentalizes projects in a way that promotes reusability and logical separation. It also allows the framework to do more performant rendering by only updating components that change over time. React uses JSX (a syntax extension to JavaScript) which can look a little odd at first, however it’s fairly straightforward. The React documentation introduces this syntax nicely and has additional information if you want to learn more about React.
React Native
React components, when used in a web environment, will compile into HTML. React Native, by contrast, will compile differently depending on the platform to which it is being deployed. For example, a React View component could become an iOS UIView class, a HTML <div> element or an Android view class depending on the platform the application is running on. It also includes some platform-specific components if needed.
Expo
Expo allows us to easily deploy our code to real or emulated devices. This makes it easy to test our app on a variety of different platforms. Another handy feature of Expo is that it allows us to do live reloading. This means that once we deploy our code to a web browser or smartphone, the app will be updated straight away if we make a change in our code. This can be particularly useful when tinkering with UI changes!
Redux
Each React component can store its own state. This could be used for something elaborate or simply to store whether a checkbox is checked or not. As applications grow and get more complicated, it’s typical to encounter situations where a change in one component’s state affects the state of several others. The primary motivation of Redux is to make it simpler to determine what is going on inside our app and to better manage state in applications as they become more complex.
Rather than having each component try to modify each other’s state in strange and convoluted ways, Redux introduces the idea of an application-wide state. Detached from any one component, it uses actions and reducers to alter it. This means that, rather than modifying state directly, a component fires an action which a reducer will then receive. The reducer will be the sole modifier of a particular part of the application state and will update the state based on the action fired.
PubNub
PubNub allows us to connect devices with minimal setup by hosting all of our communication architecture. We can simply hook our applications up to the network and then we send messages between devices all over the world in realtime. It offers numerous features beyond message transfer but we will, at least in this post, only be focusing on its publish/subscribe functionality to instantly relay game data between our client and server applications.
Prerequisites for a Realtime React Native ATC Game
This guide assumes that you have read and followed the setup steps covered in part 1, coding a realtime airport application with Node.js, of this series. To recap, you should have:
- Installed Node.js and checked both Node.js and NPM are installed
- Signed up for PubNub and obtained your free PubNub API keys
- An executable server-side application that will provide the app with plane data
We will walk through the remaining setup steps for our React Native development environment next.
Setting up the development environment
We first need to install the Expo command-line interface NPM package so we can create and run our project.
Open up a terminal at the project root directory and enter npm install expo-cli --global
Create the project expo init atc --template blank --name atc
Enter the project directory cd atc
It is worth trying to run the project before going any further with expo start
With Expo running, you can view the blank template app using one of the methods below:
- Run with an iOS device using the Expo app
- Run with an iOS emulator
- Run with an Android device using the Expo app
- Run with an Android emulator
- Run in a web browser
Once you have confirmed Expo has been installed correctly, we can add our other packages. For this application, we will be using the PubNub and ESLint dependencies. The pubnub package will be used for our communications with PubNub whilst eslint is used to keep our code adhering to recommended style guidelines and coding standards. Our 3rd party dependencies can be installed with npm install --save pubnub and npm install --save-dev eslint.
You should now find a directory with the 3rd party code and a package.json file. The information you entered during setup will be contained here.
State Management and Game Events with Redux
If you want to fully understand how the state of components are managed in React and Redux, then their respective guides are a great place to learn. However, below are a few key concepts that are helpful to know for this guide:
- React introduces the concept of ‘state‘ and ‘props‘.
- For static properties, components can be configured by passing props to them
- For dynamic properties, components can be configured by passing state data
- Redux introduces the concept of a ‘store‘ to hold application-wide state
- Redux introduces design principles that manage how the store is modified throughout the application lifecycle:
- Components dispatch ‘actions’ when they want to change the state
- When an action is dispatched a ‘reducer’ will process the action and update the store
- React components connected to the store detect changes that trigger a re-render with the updated data
The following files are responsible for the data workflow in our application:
- actions.js
- reducers.js
- App.jsx
- broadcaster.js
- GameScreen.jsx
Actions
In our application we have three actions:
- Select plane
- Update planes
- New game event
// Actions
export const SELECT_PLANE = 'SELECT_PLANE';
export const UPDATE_PLANES = 'UPDATE_PLANES';
export const NEW_GAME_EVENT = 'NEW_GAME_EVENT';

export const PLANE_COMMANDS = {
  DOWNWIND: 'DOWNWIND',
  BASE: 'BASE',
  LEAVE: 'LEAVE',
  CLEARED: 'CLEARED'
};

// Action creators
export function selectPlane(planeName) {
  return {type: SELECT_PLANE, planeName};
}

export function updatePlanes(planeData) {
  return {type: UPDATE_PLANES, planes: planeData};
}

export function newGameEvent(eventDetails) {
  return {type: NEW_GAME_EVENT, event: eventDetails};
}
As you can see, all our action creator functions return an object with the action type and action data.
Reducers
To understand reducers more fully, I would highly recommend reading the Redux Reducers Basics page. However, to summarize, for each top-level state property, an associated reducer should be created to manage that portion of the state. When an action is received, the reducers will be called with the action object (defined above) and the previous state. The action “type” property can be used to determine what, if anything, each reducer needs to do. Each relevant reducer will then determine the new value of their portion of the state based on the action and previous state.
Taking the ‘plane selected’ action as an example, we can see that the default state is set to be an empty string. When a plane is selected and a plane selection action received, the action type should match the switch statement’s case within the reducer. The reducer function then returns the plane name as the new state for the “selectedPlane” state property.
// Reducer to handle a plane selection action
function selectedPlane(state = '', action) {
  switch (action.type) {
    case SELECT_PLANE:
      return action.planeName;
    default:
      return state;
  }
}

const atcApp = combineReducers({
  selectedPlane,
  planes,
  gameStatus
});

export default atcApp;
App
As the main entrypoint into the application, this file is responsible for the application’s initialization. Besides loading game images and initializing the broadcaster, this component is responsible for creating the Redux store and passing the store to the broadcaster.
const store = createStore(atcApp);

const broadcaster = Broadcaster.init({
  publishKey: PUBLISH_KEY,
  subscribeKey: SUBSCRIBE_KEY,
  dispatch: store.dispatch
});
The store is also passed to a Provider Redux React component which contains the rest of the application to be rendered. this allows all nested components to connect to the Redux store.
Broadcaster
This file is very similar to the broadcaster in the previous blog post. One difference, however, is that our channel listeners now trigger actions.
pubnub.addListener({
  message: (message) => {
    if (message.channel === PLANES_SUB_CHANNEL) {
      config.dispatch(updatePlanes(message.message));
    } else {
      config.dispatch(newGameEvent(message.message));
    }
  }
});
Game Screen
Now that we have our store, our actions, our reducers and something that dispatches actions, we just need to read from the store! The following code snippet highlights the relevant parts of the code which connects to the Redux store and updates our component with state properties mapped to the components ‘props’.
// Used for selecting the needed data from the Redux store
const mapStateToProps = (state) => {
  return {
    selectedPlane: state.selectedPlane,
    planes: state.planes,
    gameStatus: state.gameStatus
  };
};

// Used for dispatching actions to the Redux store
const mapDispatchToProps = (dispatch) => {
  return {
    onPlaneSelect: (planeName) => {
      dispatch(selectPlane(planeName));
    }
  };
};

// Connects the React component to the Redux store
export default connect(
    mapStateToProps,
    mapDispatchToProps
)(GameScreen);
Creating a React Native User Interface
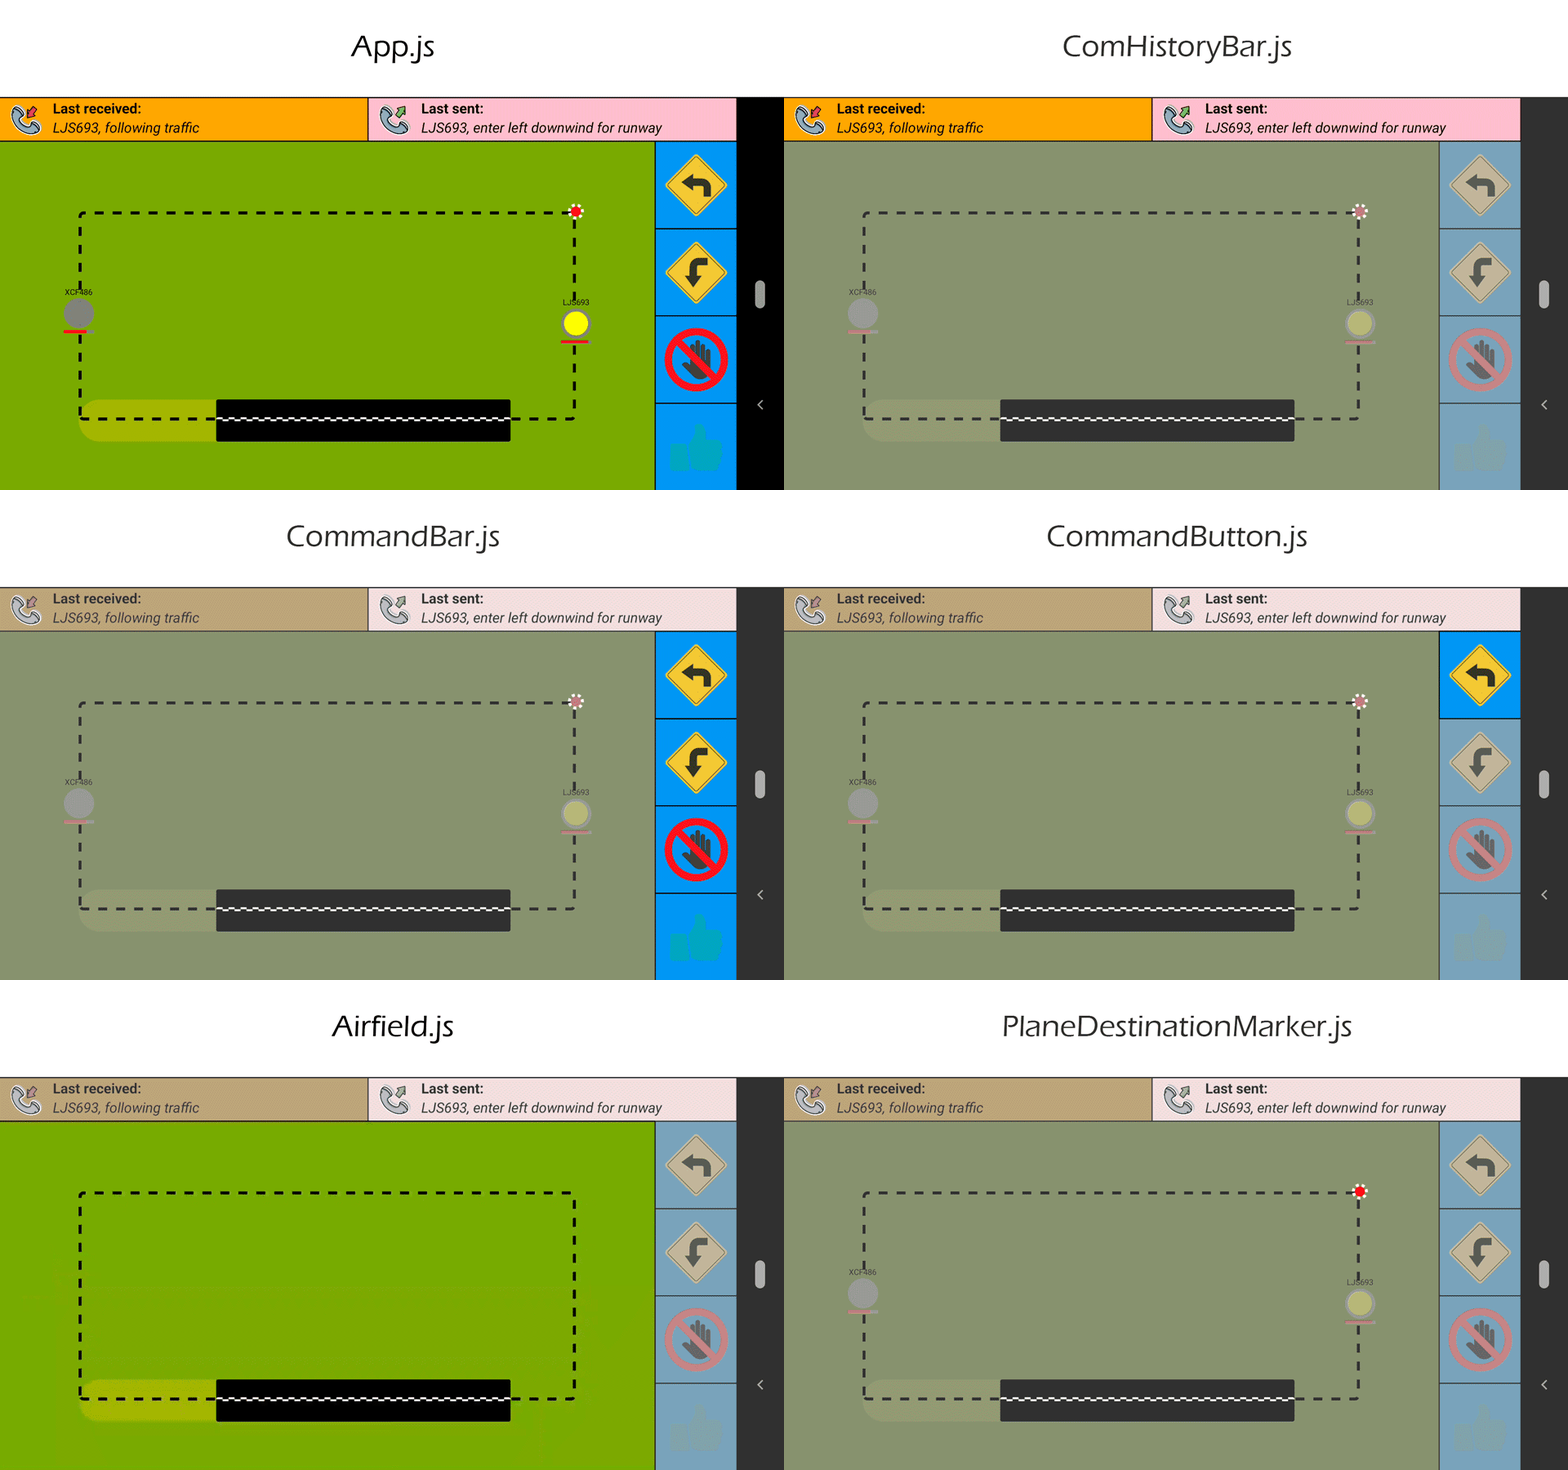
The above GIF provides a visual breakdown of how the different React components contribute to the UI. We will go through the key concepts, design decisions and review some code snippets below. You can find the complete code for each of these files in my React Native ATC Game GitHub repository.
Our React Native interface is made from 10 components and therefore 10 files:
- App.js
- Airfield.js
- ComHistory.js
- ComHistoryBar.js
- CommandBar.js
- CommandButton.js
- GameScreen.js
- Plane.js
- PlaneDestinationMarker.js
- SatelliteView.js
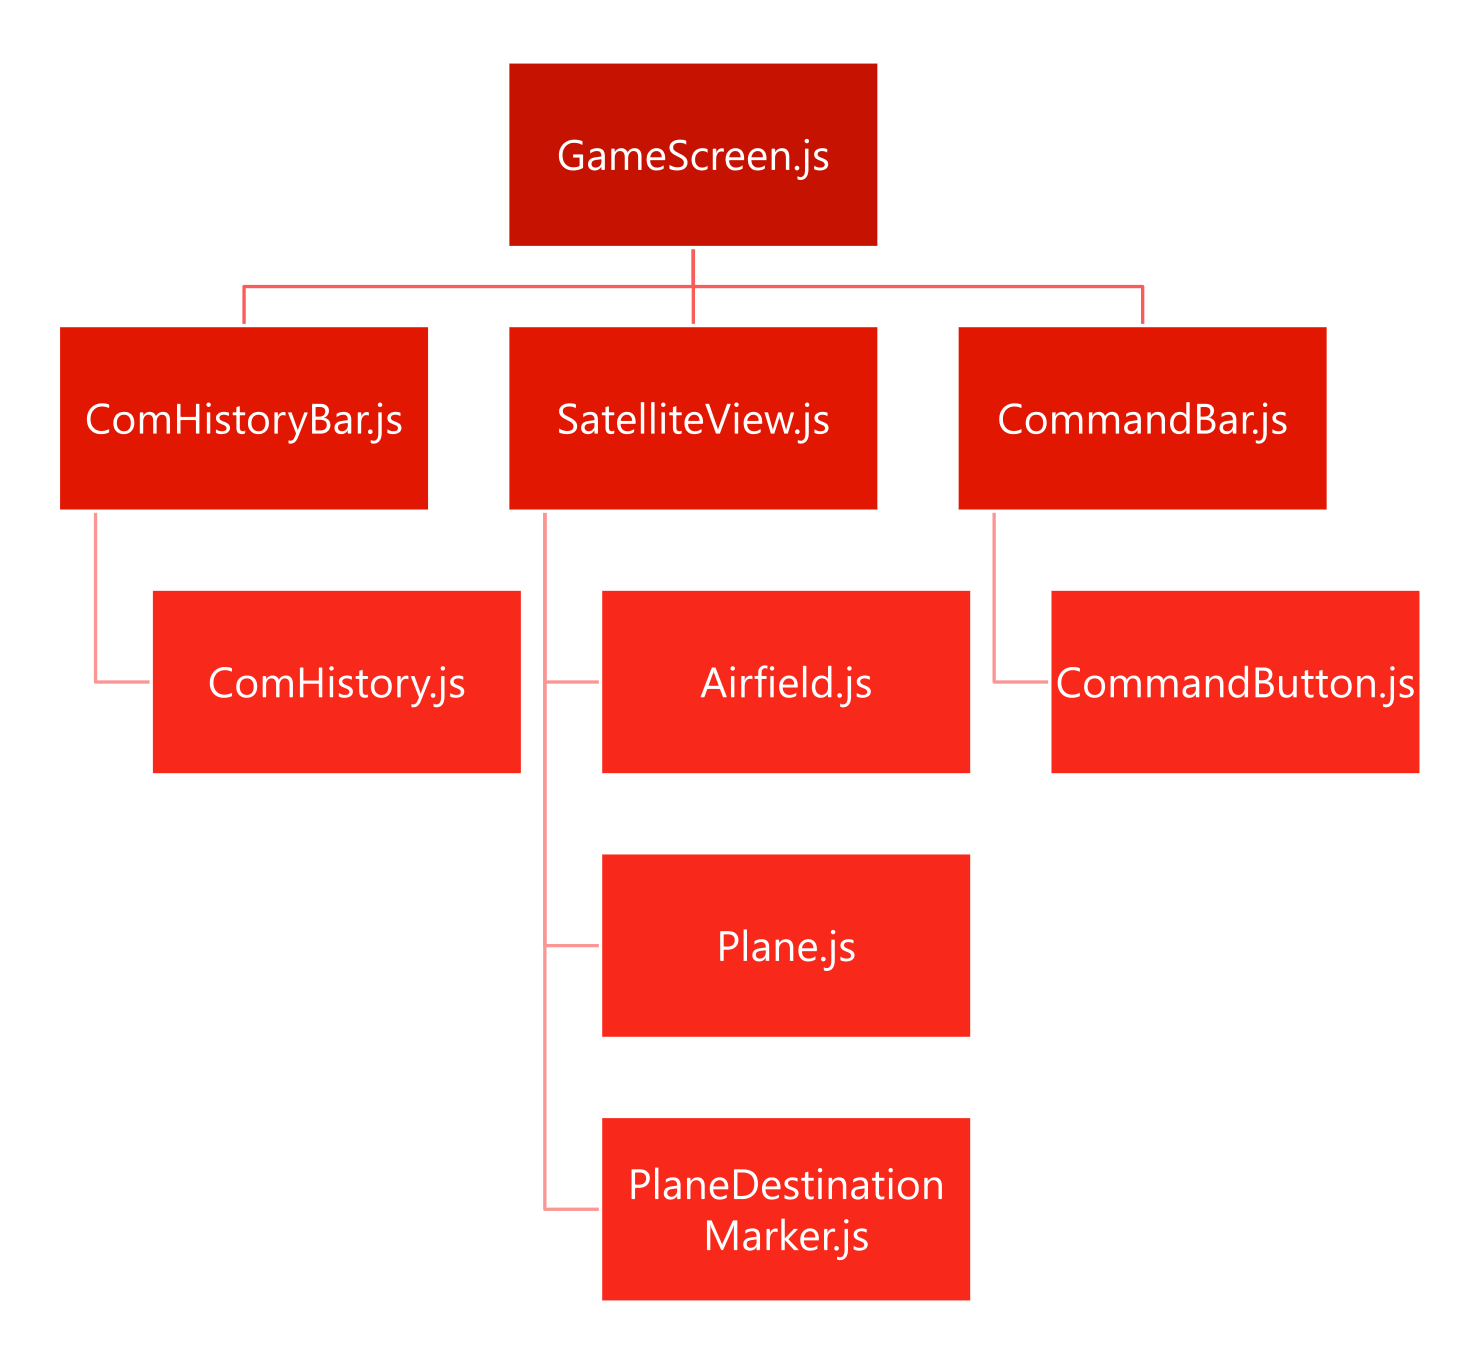
We have already discussed App.js so let’s look at the rest of the component hierarchy. Visualizing this hierarchy makes it easier for us to understand how data is passed from parent to child.
We have already seen that GameScreen is responsible for connecting to our Redux store. It is also responsible for passing relevant parts of this data to child components.
ComHistoryBar is given the latest communication messages about the selected plane and creates two ComHistory components. One ComHistory is configured to provide details about the last message sent from the aircraft, the other is configured to show the last message sent as a result of the user’s last command.
The CommandBar is told whether a plane is currently selected, whether the plane (if selected) is on the final approach and is also given a function to call when a command is issued.
Side note – The passing of functions is a common design pattern in JavaScript that might be unfamiliar to you. Why do we do this? Passing functions allows us to keep child components generic. Child components don’t have to know what the passed function does, just to simply call it at the relevant time. It’s the job of the parent component to pass the appropriate functions to the different child instances.
SatelliteView is given three pieces of information. The first is an object containing information about all the planes. The second is the name of the selected plane (if a plane is selected). The third is a function to call if a plane is selected. SatelliteView always renders a single Airfield child component, a single PlaneDestinationMarker if a plane is selected and then zero or more Plane components depending on how many planes exist in the planes dataset.
Airfield consists of styling only. It is responsible for rendering the runway and flight pattern.
The PlaneDestinationMarker is only shown if and when a plane has been selected. It simply renders a marker at the selected plane’s coordinates to show the user where the selected plane is heading.
The Plane component is responsible for drawing a single plane. All the information about the plane it represents is passed to it, including whether it is already selected. The function to call if it is selected is passed also. The component renders the plane’s name, the plane’s fuel level and a marker at the plane’s current position. The appearance of the plane changes if it is currently selected.
Running our Realtime ATC App
The application can be started by running expo start
Refer back to “Setting up the development environment” above to see the different ways to view the app with Expo.
The game should now be running on your chosen device or emulator. Simply start the game server we created in part 1 and planes appear on our screens.
Landing them is in your hands now!
Next Steps for Making a Multiplayer React Native Game
We have now reached the conclusion of part 2, having made both our airport server and ATC app fully operational! Although we now have a working game, there is more to do! In the next part, using TypeScript and PubNub Presence, we will be making our ATC app code more robust by switching to TypeScript. We will also explore PubNub Presence to enhance gameplay with multiple players!


