IN THIS ARTICLE
Artificial intelligence powered voice apps have become a key player in the recent smart home movement. With Google’s Dialogflow, developers can quickly create conversational apps that facilitate tasks for users. What Dialogflow does not provide, however, is an easily implementable server that allows developers to perform certain functions with user data.
In this demo, we will utilize PubNub Functions alongside Dialogflow in order to create a sample app that plays the right music for a user, based on their current mood. Dialogflow does not provide any means of analyzing the sentiment of a user’s speech input, but through PubNub Functions and our Amazon Comprehend BLOCK, developers can easily analyze the sentiment of a user’s speech input and carry out a certain action depending on that result.
Tutorial Overview
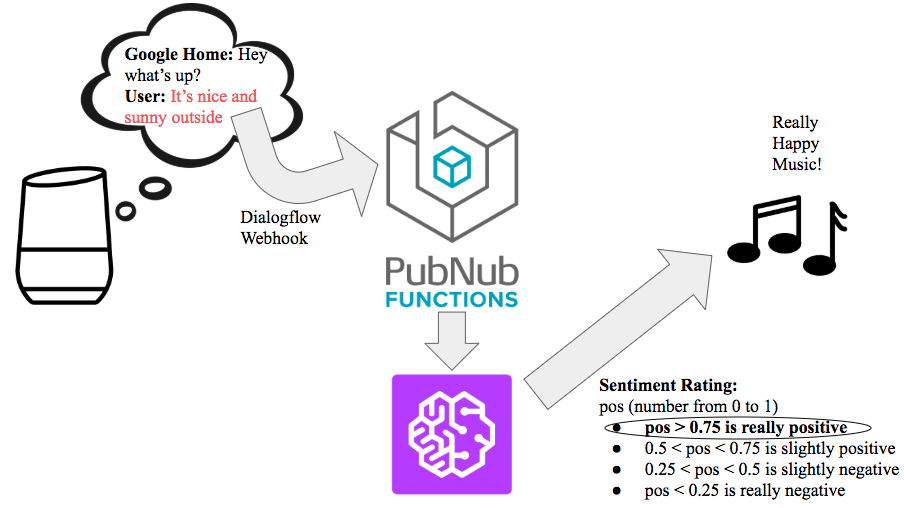
Once our demo app MoodTunes is activated, it will ask the user “Hey, what’s up?” The user will reply with a sentence or two describing their overall mood. The app will then obtain the user’s speech input and analyze it to determine the mood of the user using the Comprehend BLOCK.
Finally, it will categorize the mood as either really positive, slightly positive, slightly negative, or really negative. The following diagram displays the structure of the app and a test response.
Initial Setup
Our first step will be to create a new agent on the Dialogflow Console. The agent is the term for your app, since it helps a user carry out a certain action.
Let’s name our agent Mood Tunes.
This new agent will have two intents by default: Default Fallback Intent and Default Welcome Intent. Think of an intent as a specific part of the whole conversation that is triggered when the user says a certain phrase. The Default Welcome Intent is triggered when the user invokes your app by saying “Talk to (Agent Name)” and the Default Fallback Intent is triggered when the user says something that the app does not understand or is not trained to respond to.
For our demo, we will only be using two intents: Default Welcome Intent and another intent we will create called Get_Emotion. In our Default Welcome Intent, we will add a standard text response “Hey what’s up?”, which will prompt the user to describe how they’re feeling in a sentence or two.
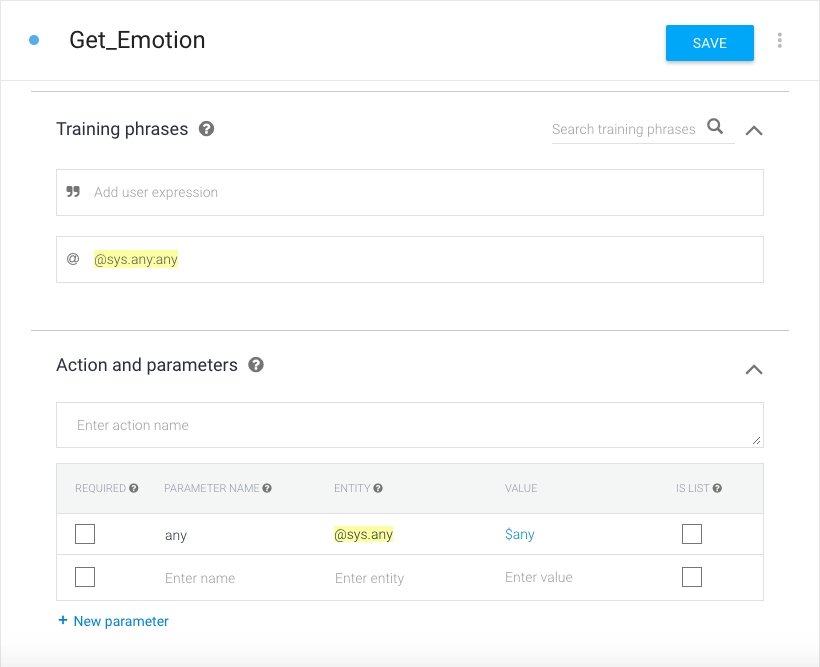
This new speech will trigger our new intent Get_Emotion. In order to create a new intent, click on the plus button on the side navigation bar of your console. We want our user to be able to say any sort of sentence with no specific pattern to trigger our Get_Emotion intent. Thus, we must specify this in our Training Phrases section of the intent. We will do this by clicking on the ” icon to change it to an @ icon and then typing @sys.any:any.
Finally, we must scroll down to the fulfillment section and click on the toggle button to enable webhook calls for the Get_Emotion intent. The webhook call is what will allow us to establish the connection between our Dialogflow app and our PubNub functions server, so that our function can be activated after the user describes how they’re feeling.
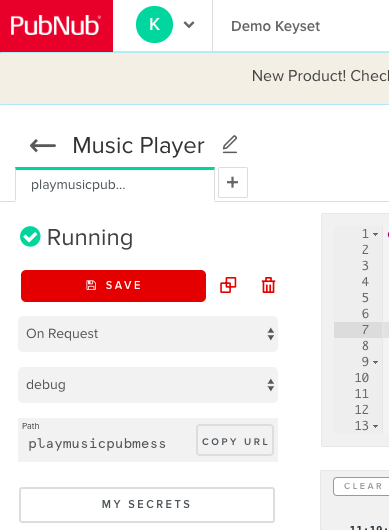
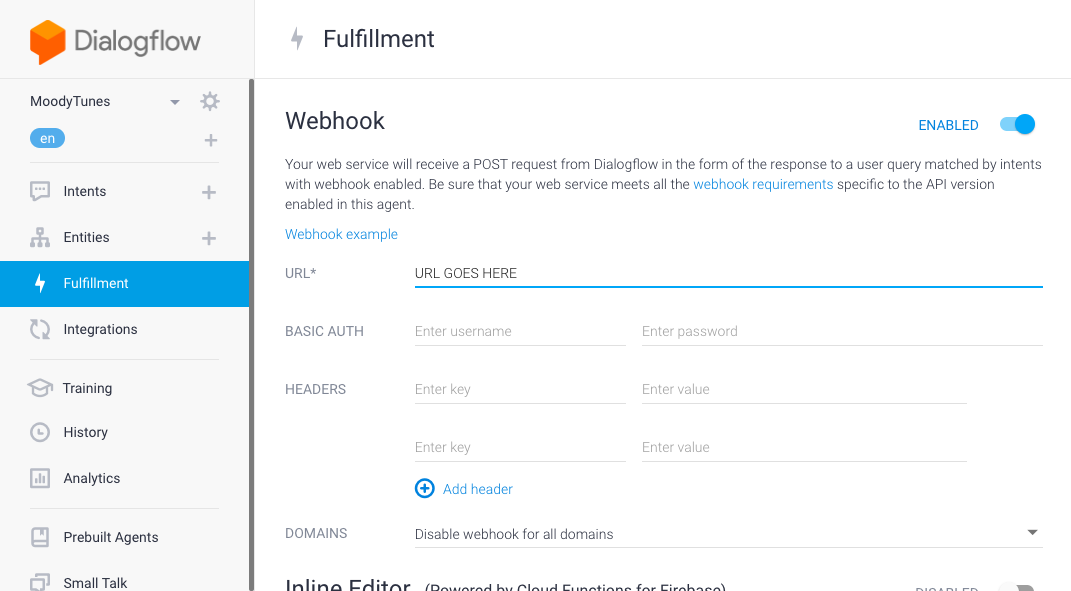
Now we will head over to the PubNub Admin Dashboard, to create a new project called MoodTunes. In this new project, we will navigate to the side bar and click on functions. Here, we will create a module called Music Player and within the module create an onRequest function, which we call playmusic. Click on the copy URL button to copy the path of the function. We will then paste this URL in our Dialogflow app’s fulfillment tab, under Webhook where it says URL.
Now we have successfully set up our Dialogflow App and its connection through webhook to our PubNub Function. In the remainder of this tutorial, we will write our app’s JavaScript code in the PubNub functions editor.
PubNub Function
We can break down our PubNub function into three parts.
- Receiving the webhook request from Dialogflow
- Processing data from request
- Forming response to send to Dialogflow
In our PubNub function, we have two parameters, request and response. The request from Dialogflow will be in the form of JSON and it contains the user’s speech input which we must extract. The structure of the JSON request is in the following form according to Google’s documentation. 
To obtain the queryText value from this request, we must first parse its body so that it is in proper JSON format. We will do this using JSON.parse(). Now that it is in proper JSON format, we may extract the queryResult value and then the queryText value. This is shown in the following line.
var text = JSON.parse(request.body).queryResult.queryText;
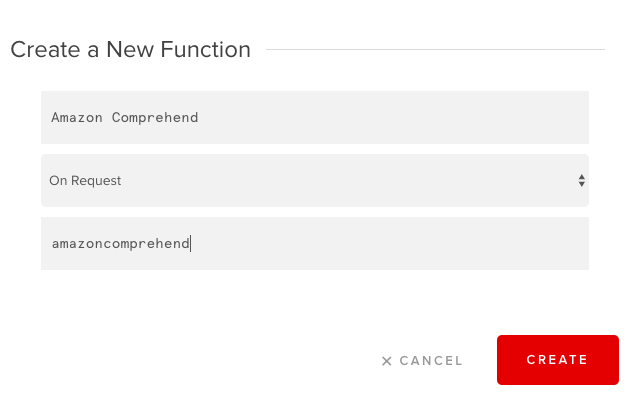
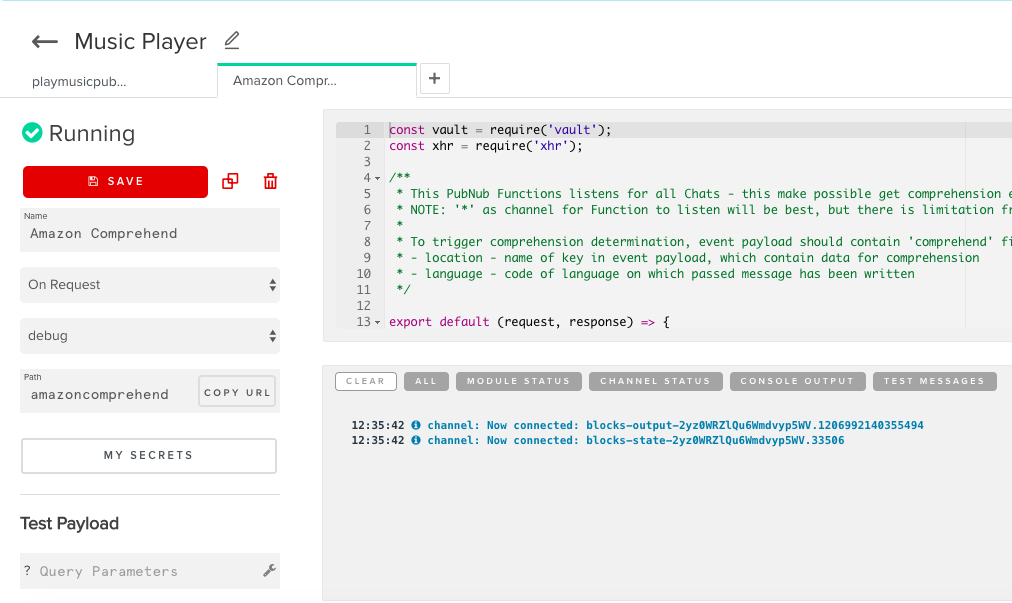
Now, that we have a reference to the user’s speech input, the next step is to process this data. We will do this by passing it into our Amazon Comprehend BLOCK. To add the block into your project, click the plus button and you will be prompted to add a function to your module. We will name our function Amazon Comprehend and set the event type to onRequest. Then set the URL path to amazoncomprehend. The default Amazon Comprehend BLOCK code is for a Before Publish handler. However, we want our block to be a OnRequest handler, so copy and paste this code into your editor.
Next, we will make an AWS account, if you don’t have one already. We need to obtain the following credentials: Comprehend access key and secret key (find out how here). Once we have these credentials, we will enter them into PubNub’s My Secrets Key Value Store. You can find this on the left side of your module view in a large button labeled “My Secrets.” The key for the access key must be AWS_access_key and the key for the secret key must be AWS_secret_key. Then enter the corresponding values and click Save, so you know your credentials are correct in your vault reference in the function code.
With our Amazon Comprehend Function set up, we must now make a HTTP request to it using the xhr module, provided by PubNub functions. With the xhr.fetch method, we can make a HTTP request to a specified URL, while also passing an object that defines the type, body parameters, and header parameters. Obtain the URL from the copy URL button on the Amazon Comprehend function and store it in a variable, amazon_url. Our amazon_request_options, in the code below, defines the necessary parameters for the HTTP request.
We pass the text we want to analyze in the key, speechInput. We must also specify inside a field named comprehend, the keys language and location. The language is simply the language that the text is in (en for English) and the location is the name of key in the request which holds the text to analyze (in our case speechInput). Also we must specify the type of the request which is POST, as the value of the method key. Passing both the amazon_url and amazon_request_options objects into the xhr.fetch method, we use a promise to obtain the JSON response to the HTTP request, once it is ready.
const amazon_url = "PASTE AMAZON COMPREHEND FUNCTION URL HERE";
const amazon_request_options = {
        "method": "POST",
        "body": {
            "speechInput": speech_input,
            "comprehend": {
                "language": "en",
                "location": "speechInput"
            }
        }
    };
    return xhr.fetch(amazon_url, amazon_request_options).then((sentiment_response) => {
...
Now that we have our response stored in the variable sentiment_response, we must now parse it so we can obtain the measure for how positive the user’s speech input was. The JSON response’s body should contain a field sentiment, which will contain key SentimentScore, which will contain a key Positive. You can see this if you use the console to log the response’s body. Thus, in order to obtain this numeric value from 0 to 1 that shows how positive the user’s speech input was, we must use the following line of code.
var positive_measure = JSON.parse(sentiment_response.body).sentiment.SentimentScore.Positive;
Next, we will use this value and if-else logic to choose which song to play for the user. As explained earlier, if positive_measure is greater than 0.75, we will play our really positive song. In the case that it is between 0.5 and 0.75, we will play our slightly positive song. If it is between 0.25 and 0.5, we will play our slightly negative song and it it is less than 0.25, we play our really negative song. The respective songs are all hosted in my GitHub project under the URLs shown in the code snippet below.
// Really happy song
if (positive_measure > 0.75) {
    song_url = "https://github.com/kaushikravikumar/MoodTunes/blob/master/music_files/reallypositive.mp3?raw=true";
}
// Slightly happy song
else if (positive_measure > 0.5) {
    song_url = "https://github.com/kaushikravikumar/MoodTunes/blob/master/music_files/slightlypositive.mp3?raw=true";
}
// Slightly sad song
else if (positive_measure > 0.25) {
    song_url = "https://github.com/kaushikravikumar/MoodTunes/blob/master/music_files/slightlynegative.mp3?raw=true";
}
// Really sad song
else {
    song_url = "https://github.com/kaushikravikumar/MoodTunes/blob/master/music_files/reallynegative.mp3?raw=true";
}
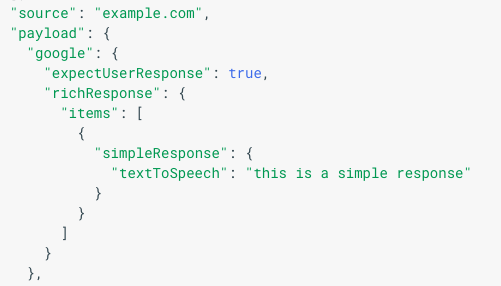
With our analysis of the user’s speech input done, we are ready for the final step of our app, which is forming the response to send to Dialogflow. In this response, we need to pass the URL that will play the right song on the Google Home device. As specified in Google’s Documentation, this response must resemble the following format.
In our case, the key expectUserResponse should have value false, since the playing of music is the end of a user’s conversation with our app. Additionally, we will have our simpleResponse, let the user know that their music is being played. We will also include a mediaResponse field, which will contain a mediaObjects array, with keys name, description, and contentUrl.
The keys name and description, will be for the music player view that shows up when a user uses our app on a google assistant device with a display. The contentUrl will be the URL of our song to play (we will set this to our variable song_url which we set before). Inside richResponse, we must include a suggestions array, according to Google’s documentation. Since it is not pertinent to our app, however, we will make it an empty array. This JSON response must be a string, since response.send only accepts strings, so we will use the method JSON.stringify. This is all shown in the following code.
response.send(JSON.stringify({
    "payload": {
        "google": {
            "expectUserResponse": false,
            "richResponse": {
                "items": [{
                        "simpleResponse": {
                            "textToSpeech": "Playing song!"
                        }
                    },
                    {
                        "mediaResponse": {
                            "mediaType": "AUDIO",
                            "mediaObjects": [{
                                "name": "Song",
                                "description": "Based on your mood",
                                "contentUrl": song_url
                            }]
                        }
                    }
                ],
                "suggestions": []
            }
        }
    }
}));
return response;
Congrats!
Now that we’ve obtained the user’s speech input through the Dialogflow webhook request, analyzed it for sentiment using PubNub function’s Amazon Comprehend BLOCK, and formed a response playing a song matching the user’s mood, we have completed MoodTunes.
If you are testing your app, ensure that you have started your functions module, so the server side code is running live and deployed. In order to test your app on a Google Home device, ensure that you have completed these steps. Click here for the full source code.


