IN THIS ARTICLE

We’ve updated our SDKs, and this code is now deprecated.
Articles about ride-sharing services have blotted every tech blog on the internet. but try doing a quick search on the technology behind these mobile apps. Techcrunch’s RSS feed on ride-sharing seems to focus exclusively on the business aspects. Though the business side may be exciting, what about the technology!
This is where geolocation, the Internet of Things (IoT), and realtime meet.
Imagine you need to build a transportation solution. How would you manage the communication of thousands of devices? There would be millions of messages pulsing through the Internet of Things! Let PubNub take care of that part. Instead, concentrate on saving the transportation world.
Tutorial Overview
All the source code for the project is available here for download. In our previous part, we got started with broadcasting geolocation data using HTML5 location services. We recommend checking that out too!
This article will focus on receiving and displaying geolocation realtime data using the Google Maps API. You will also learn how to create a flight path, which is a line drawing on the map. This entry focuses on an HTML5 implementation. Note: there are solutions that convert your web applications into mobile applications.
Are you ready to connect the world, with a scope from maps to the Internet of Things? Let’s Go!
Set Up the Basics
There are only two dependencies being used.
- PubNub is used for realtime data streaming
- Bootstrap is used for styling
- Google Maps is used for its map API
Google Maps is similar to other canvas-like DOM manipulations. You create a height for the container, set an id to the container, and then add visuals to the instantiated object. For a simple Google Maps app, see “hello world”.
If you complete that app you should have a map that focuses on Sydney Australia. I recommend using this version of the script for your testing. It does not require an API key.
API keys are for apps so Google can track usage.
To run your app you may use: python -m SimpleHTTPServer. You could also use any other web server.
For example, the Chrome dev editor has a web-server built-in. This allows you to launch your app to the browser with a few clicks. If you have made it this far then congratulations! You now have a simple hello world app that can display in the browser.
Set a Default Location
You should set a default location for your app. How about you use your own location? HTML5 has geolocation support. This means modern browsers can find your location by your IP address. See this link for detailed information. This is the basic snippet of code which will display your coordinates in the dev console of your browser.
Google Maps API
Now that you’ve found your location, it is time to add the map functionality. In “gmapExample.html” a style tag has been added. It sets the height of the canvas. Download gmapExample.html here.
A div is added to the body with the id of “map-canvas”. This allows you to display in that div.
This should seem very similar to the “hello world” app mentioned earlier in the blog entry. Next you need to add some real-time functionality. Integrating PubNub Create a function that wraps the PubNub methods.
Next, let’s initialize PubNub. To get your unique pub/sub keys, you’ll first need to sign up for a PubNub account. Once you sign up, you can get your unique PubNub keys in the PubNub Developer Dashboard. Our free Sandbox tier should give you all the bandwidth you need to build and test your messaging app with the web messaging API.
Subscribe to the “mymaps” channel and listen for coordinate information.
Go back to the beginning “if” statement. Make sure to call the method.
Use the broadcast portion of the example app to send coordinates.
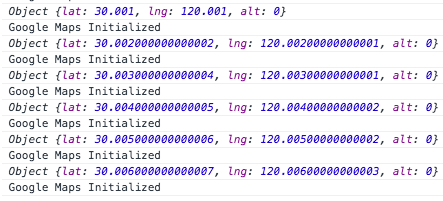
You should be able to listen for coordinate information in the console.
Moving the Map
The next portion involves getting the map to center and move with the location information sent through PubNub. In the map initialization you should center your map on the “lat” and “lng” variables. Then set a marker at the same location.
Create a “redraw” method, which moves the map.
Add “redraw” to the list of tasks upon receiving a message.
Flight Paths: Track Where You’ve Been
Let’s say you want to track where you have been. This is simply a matter of drawing a polyline. Instantiate an array to hold your coordinates.
Then push the coordinates each time a message is received. Add this functionality to the “redraw” method.
There you have it! You should now be able to track location information sent over the mymaps channel. It will also draw a line to indicate where the marker has been. The possibilities are limitless with geolocation and PubNub!


