

IN THIS ARTICLE
Recently, PubNub hosted an IoT workshop at PubNub HQ partnered with Soracom. Soracom provides an IoT solution that allows your Raspberry Pi to connect to LTE instead of the Raspberry Pi’s built in WiFi. Soracom Air and Soracom Beam allows data to be sent from the Raspberry Pi to the PubNub Network all over a cellular connection.
PubNub provides a powerful pub/sub and serverless platform that enables data to be sent globally with less than a 1/4 second latency. Working together with Soracom, we developed a fun workshop where attendees connected an ultrasonic sensor to their Raspberry Pi, and sent data using Soracom Beam to PubNub. All of the attendees ultrasonic sensor data was graphed on the big screen in realtime. In this post, we are going to be walking through the process of how attendees accomplished this in just a few easy steps.
The Workshop
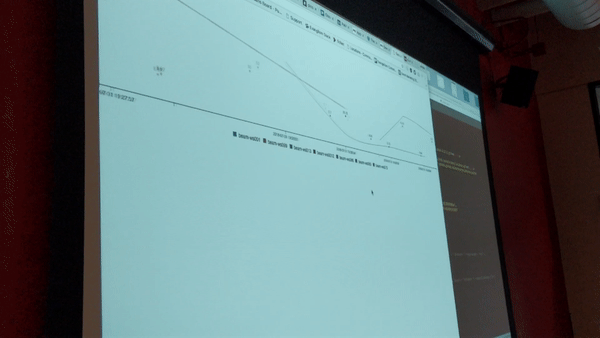
The below photo is a shot from the workshop. As you can see, the graph up on the screen is displaying sensor data in realtime. This graph is generated using PubNub’s Project EON.

There was even a demo for a smart trash that could detect whether the garbage was empty or full. You can see the trash can on the table, along with the ultrasonic sensor data on the big screen. Each beam- device on the X axis represents a different Raspberry Pi, and the Y Axis shows the distance that the object is away from the ultrasonic sensor.

Set Up
In order to set up your Raspberry Pi, there is a great tutorial on our blog here that you can follow. This tutorial will run you through how to set up your Pi, setup PubNub, and also how to register your SIM Card. Additionally, you will have to follow the MQTT setup using Mosquitto which is documented all on the blog post linked here.
The following script gets the distance from the ultrasonic sensor and publishes the data to a PubNub channel using Soracom Beam.
param2="mosquitto_pub -h beam.soracom.io -t {0} -m {1}".format (str(sys.argv[1]), str(distance)
After you set up Soracom and PubNub, install this Python script on your Raspberry Pi. In order for this script to work, you have to make sure you set up your PubNub keys in the Soracom portal.
import time
import os
import sys
# function to read distance from sensor
def read_distance():
    # import GPIO library
    import RPi.GPIO as GPIO
    # specify GPIO pins to use
    GPIO.setmode(GPIO.BCM)
    TRIG = 2 # GPIO02
    ECHO = 3 # GPIO03
    # set pin mode and initialize
    GPIO.setup(TRIG,GPIO.OUT)
    GPIO.setup(ECHO,GPIO.IN)
    GPIO.output(TRIG, GPIO.LOW)
    # send a very short (10 micro seconds) pulse to "TRIG" pin
    GPIO.output(TRIG, GPIO.HIGH)
    time.sleep(0.00001)
    GPIO.output(TRIG, GPIO.LOW)
    # wait for "ECHO" pin becomes HIGH
    signaloff = time.time()
    while GPIO.input(ECHO) != GPIO.HIGH:
        signaloff = time.time()
    # wait for "ECHO" pin becomes LOW
    signalon = signaloff
    while time.time() < signaloff + 0.1: # timeout in 0.1 seconds
        if GPIO.input(ECHO) == GPIO.LOW:
            signalon = time.time()
            break
    # cleanup GPIO state
    GPIO.cleanup()

   # calculate distance from time difference
    # sound(ultrasonic) travels 340 m / seconds
    # distance (cm) can be obtained by 340(m/s) x 100(m/cm) * time(s) / 2
    time_passed = signalon - signaloff
    distance = 340 * 100 * time_passed / 2
    # since the sensor cannot guage over 500 cm,
    # distance over 500 is considered as a noise
    if distance <= 500:
        return distance
    else:
        return None
# if executed directly (not import as library)
if __name__ == '__main__':
    while True:
        start_time = time.time()
        distance = round(read_distance(),2)
        if distance:
            print "distance: %.1f cm" % (distance)
            param2="mosquitto_pub -h beam.soracom.io -t {0} -m {1}".format (str(sys.argv[1]), str(distance))
            os.system(param2)
        # wait for next loop
        wait = start_time + 1 - time.time()
        if wait > 0:
            time.sleep(wait)
Then once you create this python script and install it on your Raspberry Pi, the next step is to create a PubNub Function. PubNub Functions are serverless, which means you don’t need to setup any servers yourself.
A PubNub Function can be created by going to your PubNub Admin Dashboard, click on your application, on the left hand-side navigation bar, click the Functions button. Then create a Module, name it whatever you wish, then create a Function called “GetSensorData” with the Before Publish or Fire selection.

Next, copy and paste the below code into your PubNub Function. Setting the Channel to beam.* allows the Function to listen to all channels that contain beam.anythingaftertheperiodisokay. You can learn more about wildcard subscribe here. Once the Function receives information on a channel, it then publishes that information in a format that Project EON understands.
export default (request) => {
    const kvstore = require('kvstore');
    const xhr = require('xhr');
    const pubnub = require('pubnub');
    console.log(request.message.text);
    console.log(request.channels);

    var channelname = request.channels[0]
    let key = channelname.replace('.', '-');
    console.log("channelname", channelname)
    pubnub.publish(
    {
        message: {
            "eon" :{
                [key] : request.message,
            }
        },
        channel: 'eongraph',
    },
    function (status, response) {
        if (status.error) {
            // handle error
            console.log(status)
        } else {
            console.log("message Published w/ timetoken", response.timetoken)
        }
    }
);

    console.log('request',request); // Log the request envelope passed
    return request.ok(); // Return a promise when you're done
}
On the front end, the EON chart graphs the data that is published every time the distance changes. In this case, we are using demo keys, however, you need to use your PubNub keys that are connected to your PubNub Function. As you can see, the Project EON API is super easy to integrate. You can learn more about different graphs and options for the project here.
<!doctype html>
<head>
    <title>Soracom</title>
    <meta charset="utf-8">
</head>
<body>
  <div id="myDiv"></div>
  <div id="chart"></div>
  <script src="https://cdn.pubnub.com/sdk/javascript/pubnub.4.21.2.js"></script>
  <script type="text/javascript" src="https://pubnub.github.io/eon/v/eon/1.0.0/eon.js"></script>
  <link type="text/css" rel="stylesheet" href="https://pubnub.github.io/eon/v/eon/1.0.0/eon.css"/>
  <script>
    function publish() {
      pubnub = new PubNub({
          publishKey : 'demo',
          subscribeKey : 'demo'
      })

      pubnub.addListener({
        status: function(statusEvent) {
          console.log(statusEvent)
        },
        message: function(msg) {
          console.log(msg);        },
        presence: function(presenceEvent) {
          // handle presence
        }
      })
      eon.chart({
        debug: true,
        pubnub: pubnub,
        channels: ['eongraph'],
        generate: {
          bindto: '#chart',
          data: {
            labels: true,
            type: 'spline'
          },
          tooltip: {
              show: false
          }
        }
      });
    };
    publish();
</script>
</body>
</html>
Here’s a short gif showing what the chart looks like with multiple Raspberry Pi’s publishing to the chart in realtime.
Setting up Soracom, PubNub, and Project EON was a breeze and only took a few hours to hack together. Additionally, there was very little code needed to set up the project and the integration with Soracom and PubNub Functions was seamless. You can learn more about Soracom here and if you want to get involved in a future workshop, join their meetup group in SF. If you have any questions related to PubNub, reach out to me at schuetz@pubnub.com
Try PubNub today!


