

IN THIS ARTICLE
As we approach 2019’s advent of new Internet of Things technologies, smart homes and home automation have become increasingly common rather than inaccessibly luxurious. Numerous IoT products have risen, like Google Clips Amazon Alexa and INSTEON, to provide easy-to-install smart home technologies to even the least technologically-savvy consumers. However, with so many products available today, that doesn’t mean you can’t do it yourself.
At PubNub we specialize in bridging the wondrous world of IoT to anyone who seeks it. With our numerous APIs and simplistic programmable Data Stream Network, one can avoid spending tons of money on products by building their own. While it may seem like an intimidating DIY path, we will show you that you can intellectualize your home with instructions no more complicated than an IKEA manual.
We’ll show you exactly what we mean by walking you step-by-step in building three fun and simple DIY smart home projects.

Let’s start by asking, what makes a home smart? The answer is simple: automation and centrality. A household must automate all of its basic tasks and be able to transmit information to and from a central location (typically a mobile app).
We’re going to tackle these two dogmas of IoT in building these three technologies using PubNub:
- Smart Light – automation of lights
- Light Detector – data centralization
- Door Detector – data centralization
Required Materials
Raspberry Pi
In order to program our IoT technologies and have them communicate between you and your home, you’re going to need what’s called a microcontroller. While there are many options for microcontrollers, perhaps the easiest one to use is the Raspberry Pi3.
If you’ve never set one up before, the instructions are incredibly simple and can be found here.
Relay
In order to make sure that we can plug in any electronic (no matter how strong the voltage) into our RPI without frying it, we’ll need what’s called a relay. A relay is essentially a switch that will be able to handle high current and voltages so that the RPI doesn’t have to.

A Lamp
You’ve heard of a lamp. To make a smart lamp, you’ll obviously need a lamp; however, since this will be your first time building a connected lamp, make sure you use a cheap lamp you don’t care about in case you mess up.
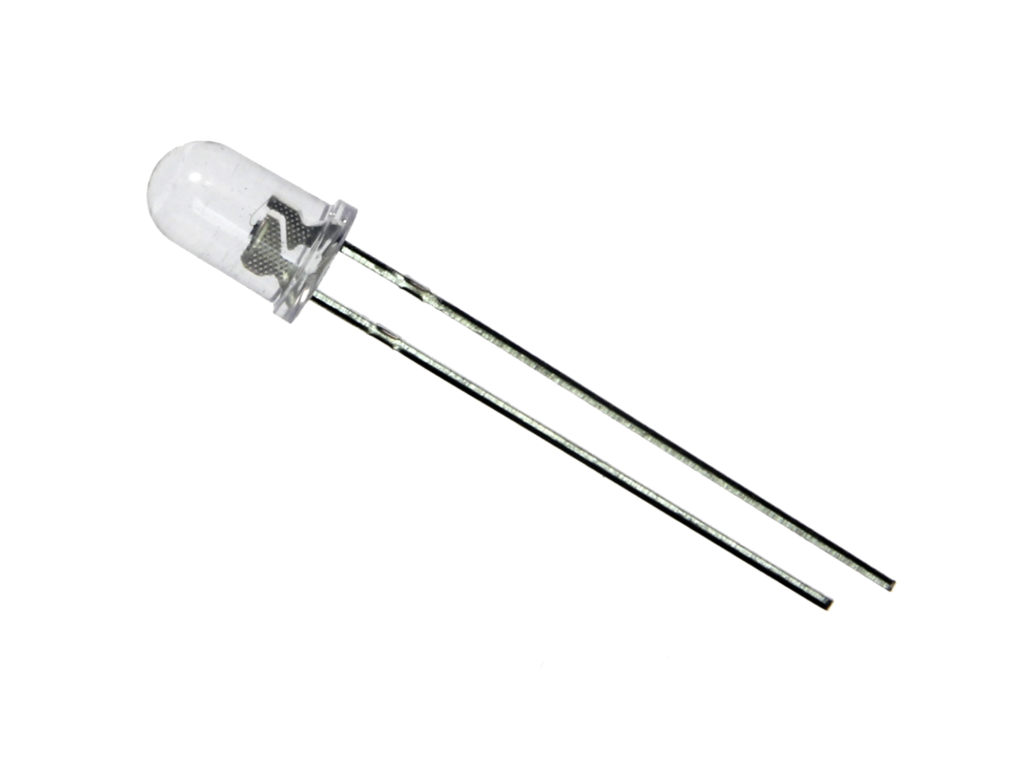
Phototransistor
In order to build a smart light sensor, you’ll need a phototransistor. Like the relay, the phototransistor acts as a switch. The phototransistor will only allow current to flow through it in the presence of light, so this will be a perfect sensor to see if your house lights are on when you don’t want them to.
Tin Foil and Wire
In order to create a door sensor, we’re going to use tinfoil contact pads that allow electricity to pass if the pads come into contact. This way, we can attach a pad to a door and its frame so that everytime the door is closed, the pads make contact, and let the Raspberry Pi know that our door is closed.


Hardware Setup
Smart Lamp
In order to make a smart lamp out of any ordinary lamp, you need to splice the power cable into two parts (when unplugged of course) and strip some of the casing to expose the wires. Every lamp has a power cable (typically red) and a ground cable (typically black).

Now grab your relay and connect the ground wires back together, connect one end of the power wire into the NO (Normally Open) port of the relay, and the other end into the NC (Normally Closed) port of the relay.

Now in order to connect the lamp-relay module to the Raspberry Pi, connect them to the GPIO pins of the Raspberry Pi like so:

Light Sensors
The light sensor circuit is much more simple to implement. Simply wire your phototransistor to one of the RPI’s GPIO pins like so:

Door Sensor
For the door sensor, just wire one pad up to a GPIO pin on the RPI and the other pad to ground (for diagram purposes we represent pads as LEDs).

Let’s Get Coding!
Before you do anything, make sure you sign up for a free PubNub account in the form below. This is how you get your pub/sub keys.
Step 1: Enable SSH
Secure Shell protocol (SSH) allows users to remotely access their Raspberry Pi terminals from their computers over WiFi. If supplemented with GitHub, users can push code from their computers to a remote repository, SSH into the Pi terminal, and pull the code wirelessly. This allows for a quicker and smoother development process.
To enable SSH on your RPI, follow the simple and quick instructions.
Step 2: Download Device Libraries and Dependencies
Raspberry Pi GPIO Library
For our devices, we need to operate an output voltage of 1 or 0 from the RPI to turn things on. Conversely, our sensors give the RPI an input voltage 1 or 0, depending on whether it is wet or dry. Both of these functions require the use of the RPI’s GPIO pins.
Since we’ll be coding in Python, it will be useful to install the GPIO Zero library, which will allow us to make simple function calls to activate or read in the pins.
NOTE: Remember that these libraries must be installed onto the RPI by SSH-ing into your device and running the commands below.
sudo apt install python-gpiozero
Step 3: Build Your App with PubNub
The full code for this project is located in this repository for reference.
Let’s create a python script to interface our sensors to the internet. Open up a new document in your favorite text editor and let’s begin!
First, let’s import our libraries and other dependencies to enable the devices and PubNub functionality.
#---------------Library Setup----------------#
import pubnub
from pubnub.pnconfiguration import PNConfiguration
from pubnub.pubnub import PubNub
from pubnub.callbacks import SubscribeCallback
from pubnub.enums import PNOperationType, PNStatusCategory

from gpiozero import Button, LED
from time import sleep

#--------------------------------------------#


#----------------PubNub Setup----------------#
pnconfig = PNConfiguration()
pnconfig.subscribe_key = "YOUR SUBSCRIBE KEY"
pnconfig.publish_key = "YOUR PUBLISH KEY"
pnconfig.ssl = False
pubnub = PubNub(pnconfig)
#--------------------------------------------#
Now, we need to tell our Raspberry Pi which devices are connected to which of its pins:
#------------Sensor Declarations-------------#
#lamp is connected to GPIO4 as an LED
lamp = LED(4)

#door sensor is connected to GPIO3 as a Button
door_sensor = Button(3)

#light sensor is connected to GPIO14 as a Button
light = Button(14)
#--------------------------------------------#
NOTE: we declare the lamp as an LED as we want to control it as if it were a simple LED. We initialize the sensors as buttons as they output a constant active signal in the same way a button does when held down or pressed. This is the magic of the GPIO Zero library as it is very simple to interface with sensors and devices.
We should also create a counter variable to let us know how many times our door has been opened:
#door counter
doorCount = 0
In order to make sure that our IoT lamp can communicate with a client, we need to enable PubNub’s 2-way pub/sub capability. To make sure we can receive messages we need to add a listener to handle the incoming messages and declare a subscription to listen in on a particular channel.
class MySubscribeCallback(SubscribeCallback):
    def status(self, pubnub, status):
        pass
        # The status object returned is always related to subscribe but could contain
        # information about subscribe, heartbeat, or errors
        # use the operationType to switch on different options
        if status.operation == PNOperationType.PNSubscribeOperation \
                or status.operation == PNOperationType.PNUnsubscribeOperation:
            if status.category == PNStatusCategory.PNConnectedCategory:
                pass
                # This is expected for a subscribe, this means there is no error or issue whatsoever
            elif status.category == PNStatusCategory.PNReconnectedCategory:
                pass
                # This usually occurs if subscribe temporarily fails but reconnects. This means
                # there was an error but there is no longer any issue
            elif status.category == PNStatusCategory.PNDisconnectedCategory:
                pass
                # This is the expected category for an unsubscribe. This means there
                # was no error in unsubscribing from everything
            elif status.category == PNStatusCategory.PNUnexpectedDisconnectCategory:
                pass
                # This is usually an issue with the internet connection, this is an error, handle
                # appropriately retry will be called automatically
            elif status.category == PNStatusCategory.PNAccessDeniedCategory:
                pass
                # This means that PAM does allow this client to subscribe to this
                # channel and channel group configuration. This is another explicit error
            else:
                pass
                # This is usually an issue with the internet connection, this is an error, handle appropriately
                # retry will be called automatically
        elif status.operation == PNOperationType.PNSubscribeOperation:
            # Heartbeat operations can in fact have errors, so it is important to check first for an error.
            # For more information on how to configure heartbeat notifications through the status
            # PNObjectEventListener callback, consult <link to the PNCONFIGURATION heartbeart config>
            if status.is_error():
                pass
                # There was an error with the heartbeat operation, handle here
            else:
                pass
                # Heartbeat operation was successful
        else:
            pass
            # Encountered unknown status type

    def presence(self, pubnub, presence):
        pass  # handle incoming presence data

    def message(self, pubnub, message):
#message handler for Lamp commands
        #Turn the lamp on if client receives the message “ON”
        if message.message == 'ON':
        	lamp.on()
              #let your subscriber client know that the lamp has been turned off
        	pubnub.publish().channel('ch1').message("lamp has been turned on").async(publish_callback)
        	sleep(3)
        #Turn the lamp on if client receives the message “OFF”
        elif message.message == 'OFF':
        	lamp.off()
              #let your subscriber client know that the lamp has been turned off
        	pubnub.publish().channel('ch1').message("lamp has been turned off").async(publish_callback)


pubnub.add_listener(MySubscribeCallback())
#make sure to subscribe to the channel of your choice. In this case, we #chose to create a channel called “ch1” to publish to
pubnub.subscribe().channels('ch1').execute()
Take note of the message event handler. Any time our program receives a message from our application client, we open up the message using “message.message”. We then create event handlers with if statements to either turn the lamp on or off with the GPIO command .on() or .off().
Lastly, notice that we publish a message back to the client, letting the user know that we have completed their request. In this case, we let the client know whether the lamp is on or off.
This part is optional (since we are not using it for this program), but you can create a publisher callback to execute a function every time you publish a message.
def publish_callback(result, status):
    pass
    # Handle PNPublishResult and PNStatus
The last part of our program is going to constantly check the sensor inputs to see if our sensors detect anything. We can achieve this by creating a main while the loop repeatedly checks the inputs.
while True:
Within the main while loop, we can create sub-while loops to poll the sensors specifically. Since we initialized our sensors as Buttons from the GPIO Zero library, we must call the function .is_held.
Although we are not using a button, our sensors act as if they were buttons as they simulate the same signal of holding down a button, while they are active (detecting something)
#polling loop to check if the door sensor is on
while door_sensor.is_held:
      #increment the door counter to count how many times the door has been opened
  doorCount = doorCount + 1
  door = "door has been opened: " + str(doorCount) + "times"
  pubnub.publish().channel('ch1').message(door).async(publish_callback)


door = "door is closed"
pubnub.publish().channel('ch1').message(door).async(publish_callback)

#polling loop to check if the lights are on
while light.is_held:
  pubnub.publish().channel('ch2').message("lights are on").async(publish_callback)

pubnub.publish().channel('ch2').message("lights are off").async(publish_callback)

sleep(3)
Here we check if the sensor is active. If so, we publish a message back to the client letting it know whether the sensor is on or off.
Step 4: How to Upload Your Code
In order to upload your code to your Raspberry Pi, you should always commit your code to your repository and then pull it to your Raspberry Pi. The process always follows this order
1.) Save your code on your computer.
2.) Open up your terminal and enter your working directory. Then commit your code to the cloud using these commands.
git add .
git commit -m "updates"
git push
3.) SSH into your RPI and cd into the proper directory.
ssh pi@<YOUR IP ADDRESS>
cd <your directory>
4.) Pull the code from the cloud and run it.
git pull
python <Your program>.py
Step 5: Build a Client with PubNub
Next, we need to build a client script that will allow us to use a mobile phone or computer to send and receive data to our sensors. To do this we will need to create an HTML file that will use buttons to publish commands to the RPI and Text boxes to retrieve data from the RPI.
Start with a blanked HTML script like this:
<!DOCTYPE html>
<html>
  <body>
    <script>
    //your Code Here
    </script>
  </body>
</html>
Then we’ll create two buttons to publish ON or OFF commands to our RPI.
<button type="button" onclick="publish('ON')">Lamp ON</button>
<button type="button" onclick="publish('OFF')">Lamp OFF</button>
We should also create an ID tag to later inject the light sensor data we subscribe from the RPI.
<p id="lights">Lights are on?</p>
We must not forget to import the PubNub JavaScript SDK so we can actually enable pub/sub capabilities.
<script src="https://cdn.pubnub.com/sdk/javascript/pubnub.4.20.2.js"></script>
We need to also set up our channel using our given pub/sub keys like so:
<script>
var pubnub = new PubNub({
  publishKey : 'pub-c-2d8f55f6-daa7-467b-923b-6a1e6570c9fc',
  subscribeKey : 'sub-c-1575c412-2116-11e8-a7d0-2e884fd949d2',
  });
  function publish(a){
    var publishConfig =
    {
      channel : "ch1",   //Your publishing channel name
      message : a
    };
    pubnub.publish(publishConfig, function(status, response){
      console.log(status, response);
    });

  }
Lastly, we need to listen in on the channel the RPI is publishing our light sensor data. We can instantiate a listener with this block of code:
pubnub.addListener({
        message: function(m) {
            // handle message
            var channelName = m.channel; // The channel for which the message belongs
            var channelGroup = m.subscription; // The channel group or wildcard subscription match (if exists)
            var pubTT = m.timetoken; // Publish timetoken
            var msg = m.message; // The Payload
            var publisher = m.publisher; //The Publisher
            document.getElementById("lights").innerHTML = msg;
            console.log(msg)
        },
        presence: function(p) {
            // handle presence
            var action = p.action; // Can be join, leave, state-change or timeout
            var channelName = p.channel; // The channel for which the message belongs
            var occupancy = p.occupancy; // No. of users connected with the channel
            var state = p.state; // User State
            var channelGroup = p.subscription; //  The channel group or wildcard subscription match (if exists)
            var publishTime = p.timestamp; // Publish timetoken
            var timetoken = p.timetoken;  // Current timetoken
            var uuid = p.uuid; // UUIDs of users who are connected with the channel
        },
        status: function(s) {
            var affectedChannelGroups = s.affectedChannelGroups;
            var affectedChannels = s.affectedChannels;
            var category = s.category;
            var operation = s.operation;
        }
    });
    pubnub.subscribe({
        channels: ['ch2'],

    });
</script>
Take note that we subscribed to ch2. This is because we want a dedicated channel for our light sensor data so that we do not need to actually differentiate the data from other sensors. If you forgot to publish to a dedicated channel in the Application process from before, make sure you go back and do so.
Once you save your script, open the file up in a web browser and you should have something like this:

You have now completed the steps into implementing three simple smart home devices on a Raspberry Pi! Test your code out by ssh-ing into your Raspberry Pi to run your python code and then interact with your client program. You should be able to control your smart lamp with the two buttons as well as seeing text prompts if your door is open or your lights are on!
If you like our IoT content, we have many more IoT-related tutorials below!
- Build A Smart, Automated IoT Plant Irrigation System With Raspberry Pi And PubNub
- Cloud State Machines: The Future Of IoT And Edge Computing
- Create An IoT Twitter Bot In 5 Easy Steps
- Build A Cloud Server State Machine With PubNub Functions
- A Developer’s Guide to Getting Started with Magic Leap and Unity
- Create a IoT UV Index Monitor with Mobile iOS/Android Push Notifications
Try PubNub today!


