IN THIS ARTICLE
Imagine a world where you walk into your home, look at a smart lightbulb in the room, make a gesture with your hands, and the light turns off or on. Or you swipe with a hand to change the channel on your TV. Or you even glance at a thermostat and speak your preferred temperature. This isn’t the future. This is all possible now with the Magic Leap One and PubNub.
This is part two of our Magic Leap series. Check out the other posts Getting Started with Magic Leap and PubNub and Create a Multiplayer Augmented Reality Game with Magic Leap and Unity.
Tutorial Overview
In this tutorial, we will walk through how to interface with internet-connected devices using the Unity Video Game Engine for Magic Leap and the PubNub Unity SDK. In this case, we’ll turn on and off, and change the color of an internet-connected lightbulb.
Be aware that the Magic Leap SDKs are changing as new features are added and some parts of this tutorial may change. The following steps were tested with Lumin SDK Version 0.17.0 and Unity Version: 2018.1.9f1-MLTP8.1.
Looking for the completed project? Download it from the GitHub repo. In addition to the gesture recognition from this post, the finished project has a UI that indicates the gesture you’re using and implements a custom vignette.
Before continuing with this tutorial, you should read the Getting Started with Magic Leap and Unity tutorial first to familiarize yourself with Unity Video Game Engine development for Magic Leap and setup your development environment.
There are a few requirements before you can get started:
- Become a Magic Leap Creator.
- Install Lumin SDK and Unity Magic Leap Test Preview.
- Know how to use the Magic Leap Remote and Play Mode.
- A Magic Leap One (or you can use the simulator).
- A NodeMcu Development Board.
- RGB LED (common cathode), breadboards and jumper wires.
- A PubNub account (always free).
- Once you sign up, you can get your unique PubNub keys from the PubNub Admin Dashboard.
Create a New Unity App for Magic Leap
- Start Unity and create a new project.
- Change the product name to “Control,” set the template to “Magic Leap,” and set the location for your project. Create the project.

- Click “File” and then “Build Settings.”
- In the “Platform” section:
- Close the window.
- See the Configuring a Magic Leap Project in Unity guide from Magic Leap for more information on creating a new Unity app for Magic Leap.
Integrating PubNub Into a Unity Project
- Clone or download the PubNub Unity SDK.
- Inside the “PubNubUnity” directory you should see another directory called “Assets.” Drag the “Assets” directory into the “Assets” directory of your unity project. Ignore the console errors for now.

- Navigate inside the “Assets/Serialization” directory and then edit the “JSONSerializer.cs” script so that the second line is commented and the third line is uncommented. Save the file. The top of the file should look like this:
#if((!USE_JSONFX_UNITY_IOS) && (!USE_MiniJSON))
//#define USE_JSONFX_UNITY_IOS
#define USE_MiniJSON
#endif
- Click “Window” and then “Test Runner”.
- Click on the drop-down menu in the top right corner and enable playmode tests. Close the window.

- Click “Edit”, “Project Settings”, and then “Player”.
- In the Inspector click “Settings for Lumin OS”.
- Expand “Publishing Settings” and check the box next to “Internet”.
- Expand “Other Settings” and change the “Scripting Runtime Version” to “.NET 4.x Equivalent”. Restart the editor. The console errors resulting from importing the PubNub Unity SDK should now be gone.
Import the Magic Leap Unity Package
You first need to import the Magic Leap Unity Package in order to use the Hand Tracking API.
- Click “Assets”, “Import Package”, and then “Custom Package”.
- Select the Magic Leap Unity Package you downloaded using the Package Manager. For example, “C:/Users/<username>/MagicLeap/tools/unity/v0.17.0/MagicLeap-0.17.0.unitypackage“.
- In the Import Unity Package window, select only the “Libs” and “Scripts” directories.
- Then click “Import.”

Detecting Hand Gestures
Check out the Hand Tracking, Hand Tracking – Key Points in Unity®, and Hand Poses in Unity® guides by Magic Leap to learn more about using hand poses and hand key points in your apps.
- Click on “Main Camera” in the project hierarchy.
- Click “Add Component”, scroll to the bottom of the list, and click “New script”. Name the script “Gestures”.
- Edit the script and replace the code with the code below.
using System.Collections; using System.Collections.Generic; using UnityEngine; using UnityEngine.UI; using UnityEngine.XR.MagicLeap; using PubNubAPI; public class Gestures : MonoBehaviour { public float sendTimeController; public static PubNub pubnub; private MLHandKeyPose[] gestures; // Holds the different hand poses we will look for. void Awake () { PNConfiguration pnConfiguration = new PNConfiguration(); pnConfiguration.PublishKey = "YOUR_PUB_KEY_HERE"; pnConfiguration.SubscribeKey = "YOUR_SUB_KEY_HERE"; pnConfiguration.Secure = true; pubnub = new PubNub(pnConfiguration); MLHands.Start(); // Start the hand tracking. gestures = new MLHandKeyPose[3]; //Assign the gestures we will look for. gestures[0] = MLHandKeyPose.Fist; gestures[1] = MLHandKeyPose.Thumb; gestures[2] = MLHandKeyPose.Finger; MLHands.KeyPoseManager.EnableKeyPoses(gestures, true, false); // Enable the hand poses. } void OnDestroy() { MLHands.Stop(); } void Update() { if (sendTimeController <= Time.deltaTime) { // Restrict how often messages can be sent. if (GetGesture(MLHands.Left, MLHandKeyPose.Thumb) || GetGesture(MLHands.Right, MLHandKeyPose.Thumb)) { pubnub.Publish() .Channel("control") .Message("on") .Async((result, status) => { if (!status.Error) { Debug.Log(string.Format("Publish Timetoken: {0}", result.Timetoken)); } else { Debug.Log(status.Error); Debug.Log(status.ErrorData.Info); } }); sendTimeController = 0.1f; // Stop multiple messages from being sent. } else if (GetGesture(MLHands.Left, MLHandKeyPose.Fist) || GetGesture(MLHands.Right, MLHandKeyPose.Fist)) { pubnub.Publish() .Channel("control") .Message("off") .Async((result, status) => { if (!status.Error) { Debug.Log(string.Format("Publish Timetoken: {0}", result.Timetoken)); } else { Debug.Log(status.Error); Debug.Log(status.ErrorData.Info); } }); sendTimeController = 0.1f; // Stop multiple messages from being sent. } else if (GetGesture(MLHands.Left, MLHandKeyPose.Finger)) { pubnub.Publish() .Channel("control") .Message("changel") .Async((result, status) => { if (!status.Error) { Debug.Log(string.Format("Publish Timetoken: {0}", result.Timetoken)); } else { Debug.Log(status.Error); Debug.Log(status.ErrorData.Info); } }); sendTimeController = 0.9f; // Stop multiple messages from being sent. } else if (GetGesture(MLHands.Right, MLHandKeyPose.Finger)) { pubnub.Publish() .Channel("control") .Message("changer") .Async((result, status) => { if (!status.Error) { Debug.Log(string.Format("Publish Timetoken: {0}", result.Timetoken)); } else { Debug.Log(status.Error); Debug.Log(status.ErrorData.Info); } }); sendTimeController = 0.9f; // Stop multiple messages from being sent. } } else { sendTimeController -= Time.deltaTime; // Update the timer. } } bool GetGesture(MLHand hand, MLHandKeyPose type) { if (hand != null) { if (hand.KeyPose == type) { if (hand.KeyPoseConfidence > 0.98f) { return true; } } } return false; } } - In this script:
- In the Awake() method:
- Imports the PubNub API and Magic Leap APIs.
- Configures a connection to PubNub.
- Starts and configures a new hand tracking instance.
- In the OnDestroy() method:
- Disables hand tracking when the application ends.
- In the Update() method:
- Checks for four distinct gestures.
- When a gesture is detected a message is sent to the ‘control’ channel with the intended action to PubNub.
- Left or right hand and thumb gesture = turn device on message sent.
- Left or right hand and fist gesture = turn device off message sent.
- Left hand and finger gesture = change mode left message sent.
- Right Hand and finger gesture = change mode right message sent.
- In the GetGesture() method:
- Checks if the given hand pose is recognized with at least 98% accuracy.
- In the Awake() method:
- Get your unique PubNub keys from the PubNub Admin Dashboard. If you don’t have a PubNub account, you can sign up for a PubNub account for free. Replace “YOUR_PUB_KEY_HERE” and “YOUR_SUB_KEY_HERE” with your keys from the PubNub Admin Dashboard.
PubNub offers an Arduino SDK that we will use to control an RGB LED via the Magic Leap One.
- Download the latest Arduino IDE.
- Install Silicon Labs CP210x USB to UART Bridge driver for your OS.
- Update the Arduino Board Manager with a custom URL. Open up Arduino and then go to the Preferences (File > Preferences). Then, towards the bottom of the window, copy this URL into the “Additional Board Manager URLs” text box:
http://arduino.esp8266.com/stable/package_esp8266com_index.json
- Navigate to the Board Manager by going to “Tools”, “Boards” and then “Boards Manager”. Search for “ESP8266”. Click on that entry, then select Install.
- Connect your development board and select it by going to “Tools” and then “Boards”. You may need to select the correct port.
- Verify that everything works by uploading the example blink sketch. The built-in led should be blinking.
- Install the PubNub Arduino SDK by going to “Sketch”, “Include Library”, and then “Manage Libraries”. Search for PubNub. Click on that entry, then select Install.
- Test the ability for your ESP8266 Development board to connect to PubNub by uploading this gist to your development board with the Arduino IDE. Replace “YourSSID” and “YourPASSWORD” with the SSID and password for your WiFi network. You don’t need to change the demo keys used for the PubNub configuration.
- Open the Arduino Serial Monitor and you should see the device sending and receiving messages from PubNub.
- Connect the common ground on the RGB LED to ground on your development board. Connect the red pin to pin 14 (D5), green pin to pin 12 (D6), and blue pin to pin 15 (D8).

- Create a new sketch by going to “File”, then “New”.
- Replace the code with the code below.
#include <ESP8266WiFi.h> #define PubNub_BASE_CLIENT WiFiClient #include <PubNub.h> const static char ssid[] = "YOUR_SSID"; const static char pass[] = "YOUR_PASSWORD"; int rled = 14; // The PWM pins the LED is attached to. int gled = 12; int bled = 15; int mode = 0; bool on = false; void setup() { pinMode(rled, OUTPUT); pinMode(gled, OUTPUT); pinMode(bled, OUTPUT); Serial.begin(9600); WiFi.begin(ssid, pass); if(WiFi.waitForConnectResult() == WL_CONNECTED){ PubNub.begin("YOUR_PUB_KEY_HERE", "YOUR_SUB_KEY_HERE"); } else { Serial.println("Couldn't get a wifi connection"); while(1) delay(100); } } void loop() { PubNub_BASE_CLIENT *client; Serial.println("waiting for a message (subscribe)"); PubSubClient *pclient = PubNub.subscribe("control"); // Subscribe to the control channel. if (!pclient) { Serial.println("subscription error"); delay(1000); return; } String message; while (pclient->wait_for_data()) { char c = pclient->read(); message = message+String(c); // Append to string. } pclient->stop(); if(message.indexOf("on") > 0) { on = true; Serial.print("on"); } else if (message.indexOf("off") > 0) { on = false; } else if (message.indexOf("changel") > 0) { if (mode > 0) { mode=mode-1; } else if (mode == 0) { mode=5; } } else if (message.indexOf("changer") > 0) { if (mode < 5) { mode=mode+1; } else if (mode == 5) { mode=0; } } if (on == true) { // Turn on led. if (mode == 0) { // White analogWrite(rled, 255); analogWrite(gled, 255); analogWrite(bled, 255); } else if (mode == 1) { // Less Bright White analogWrite(rled, 255); analogWrite(gled, 165); analogWrite(bled, 0); } else if (mode == 2) { // Red analogWrite(rled, 255); analogWrite(gled, 0); analogWrite(bled, 0); } else if (mode == 3) { // Green analogWrite(rled, 0); analogWrite(gled, 255); analogWrite(bled, 0); } else if (mode == 4) { // Blue analogWrite(rled, 0); analogWrite(gled, 0); analogWrite(bled, 255); } else if (mode == 5) { // Purple analogWrite(rled, 255); analogWrite(gled, 0); analogWrite(bled, 255); } } else { // Turn off led analogWrite(rled, 0); analogWrite(gled, 0); analogWrite(bled, 0); } Serial.print(message); Serial.println(); delay(5); } - In this script:
- Include the ESP8266 and PubNub libraries.
- Declare WiFi config.
- Set the pins for the LED.
- In Setup() method:
- Set the led pins as output pins.
- Start WiFi.
- Begin connection to PubNub.
- In the Loop() method:
- Wait for and get messages from the ‘control’ channel.
- Parse the message for the intended action:
- Turn device on message received = Turn on LED.
- Turn device off message received = Turn off LED.
- Change mode left message received = Change mode to previous mode.
- Change mode right message received = Change mode to next mode.
- Write to values to LED pins.
- Replace “YOUR_SSID” and “YOUR_PASSWORD” with the SSID and password for your WiFi network.
- Get your unique PubNub keys from the PubNub Admin Dashboard. If you don’t have a PubNub account, you can sign up for a PubNub account for free. Replace “YOUR_PUB_KEY_HERE” and “YOUR_SUB_KEY_HERE” with your keys from the PubNub Admin Dashboard.
- Upload the script.
Run Your App
There are three ways to test your app:
- Using the Magic Leap Remote and Play Mode to test on the simulator.
- Using the Magic Leap Remote and Play Mode to test on the device.
- Deploy to Magic Leap One.
Using the Magic Leap Remote and Play Mode
See the Launch Magic Leap Remote and Play Mode with Magic Leap Remote guides from Magic Leap for more information about using the Magic Leap Remote.
-
You can change your code and see the results immediately while in play mode.
-
If you do not have a device, play mode simulates the Lumin SDK API layers and composites the graphics with input from a virtual room.
-
If you do have a device, play mode simulates the Lumin SDK API layers and then streams the rendered frames to the headset display.
Windows
- In Windows Explorer, navigate to the “VirtualDevice\bin\UIFrontend” directory inside your Lumin SDK location.
- Double-click “MLRemote.exe”.
macOS:
- In Finder, navigate to the “VirtualDevice/bin/UIFrontend” directory inside your Lumin SDK location.
- Double-click “Magic Leap Remote.app”.
Iterate on the Simulator
- Click “Start Simulator”.
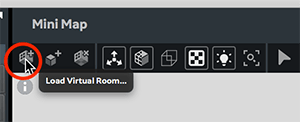
- In the Simulator window, click the “Load Virtual Room” button on the toolbar.

- Navigate to VirtualDevice\data\VirtualRooms\ExampleRooms and then open an example room file.
- Read the Magic Leap guide on simulating input on magic leap remote to simulate hand gestures.
Iterate on Device
- Connect a device to your computer over USB.
- The device should appear in the Magic Leap Remote window.
- Click “Start Device”.
Start Play Mode
You won’t see anything if you look around in the simulator on a device. However, messages are being sent to PubNub while the app is running whenever you make an enabled gesture. The finished project has a UI that indicates the gesture you’re using. Download the complete project from the GitHub repo.
If you’re using the simulator: Read the Magic Leap guide on simulating input on magic leap remote to simulate hand gestures.
To use the Magic Leap Remote you will need to enable Magic Leap zero iteration mode. In Unity click “MagicLeap” and then “Enable Zero Iteration”. Restart the editor.
- Open the Unity project.
- Click “Edit” and then “Play”.
- The app should start on the simulator or on the device. Try making a thumb, fist, or finger gesture and observe the LED
Deploy to a Magic Leap Device
See Deploying a Unity App to the Device from Magic Leap for more information about deploying an app a device.
We did not build a UX for this app as this post focuses on detecting gestures and sending messages to PubNub. You won’t see anything if you look around in the simulator on a device. However, messages are being sent to PubNub while the app is running whenever you make an enabled gesture. The finished project has a UI that indicates the gesture you’re using. Download the complete project from the GitHub repo.
- You’ll first need to follow the steps from Magic Leap to set up your device for development.
- Connect a device to your computer over USB.
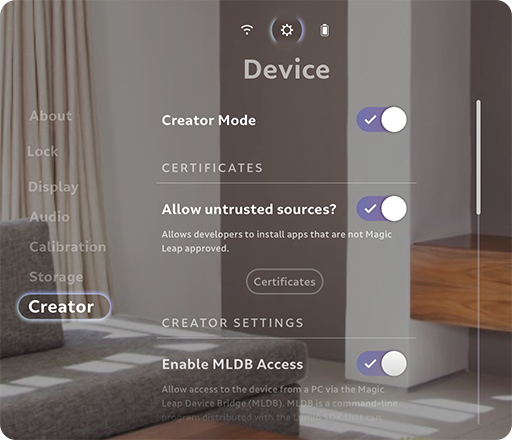
- On the device navigate to “Settings”, “Device”, and then “Creator Mode”.
- Select the following:
- Enable Creator Mode – Make Creator Mode options available for selection.
- Allow Untrusted Sources – Install apps signed with a development certificate.
- Enable MLDB Access – Allow Magic Leap Device Bridge to connect to your device.

- Navigate to the Magic Leap Creator Portal and click “Publish” and then “Certificates”.
- Click “Create Certificate” or “Add New”.

- Enter a name for the certificate and click generate. The “privatekey.zip” file will download. You can only download the private key at this step. You must generate a new certificate if you misplace this file.
- The certificate takes a few minutes to generate. Refresh the page until the certificate status changes from “pending” to “active”.
- When the certificate has generated, click the download button next to your certificate to download the file.
- Extract the private key from the “privatekey.zip” file and move the “.privkey“ and “.cert” files into the same folder.
- Go back to your Unity project.
- Click “File” and then “Build Settings”.
- Check the box next to “Sign Package”.
- Close the window.
- Click “Edit”, “Project Settings”, and then “Player”.
- Expand “Publishing Settings” and set the path to “ML Certificate” to point to the certificate you downloaded.
- Connect your device to your computer.
- Click “File” and then “Build and Run”.
- Save the .mpk. Unity will transfer the app to the device when the build has completed.
- Put on the device.
- The first time you install an app with your Magic Leap developer certificate, you are prompted to accept the certificate on the device.
- If you do not accept the certificate, your app won’t install.
- If you take too long to put on the device, the prompt will dismiss itself, and your app won’t install.
- The app should start on the device.
Testing and Debugging
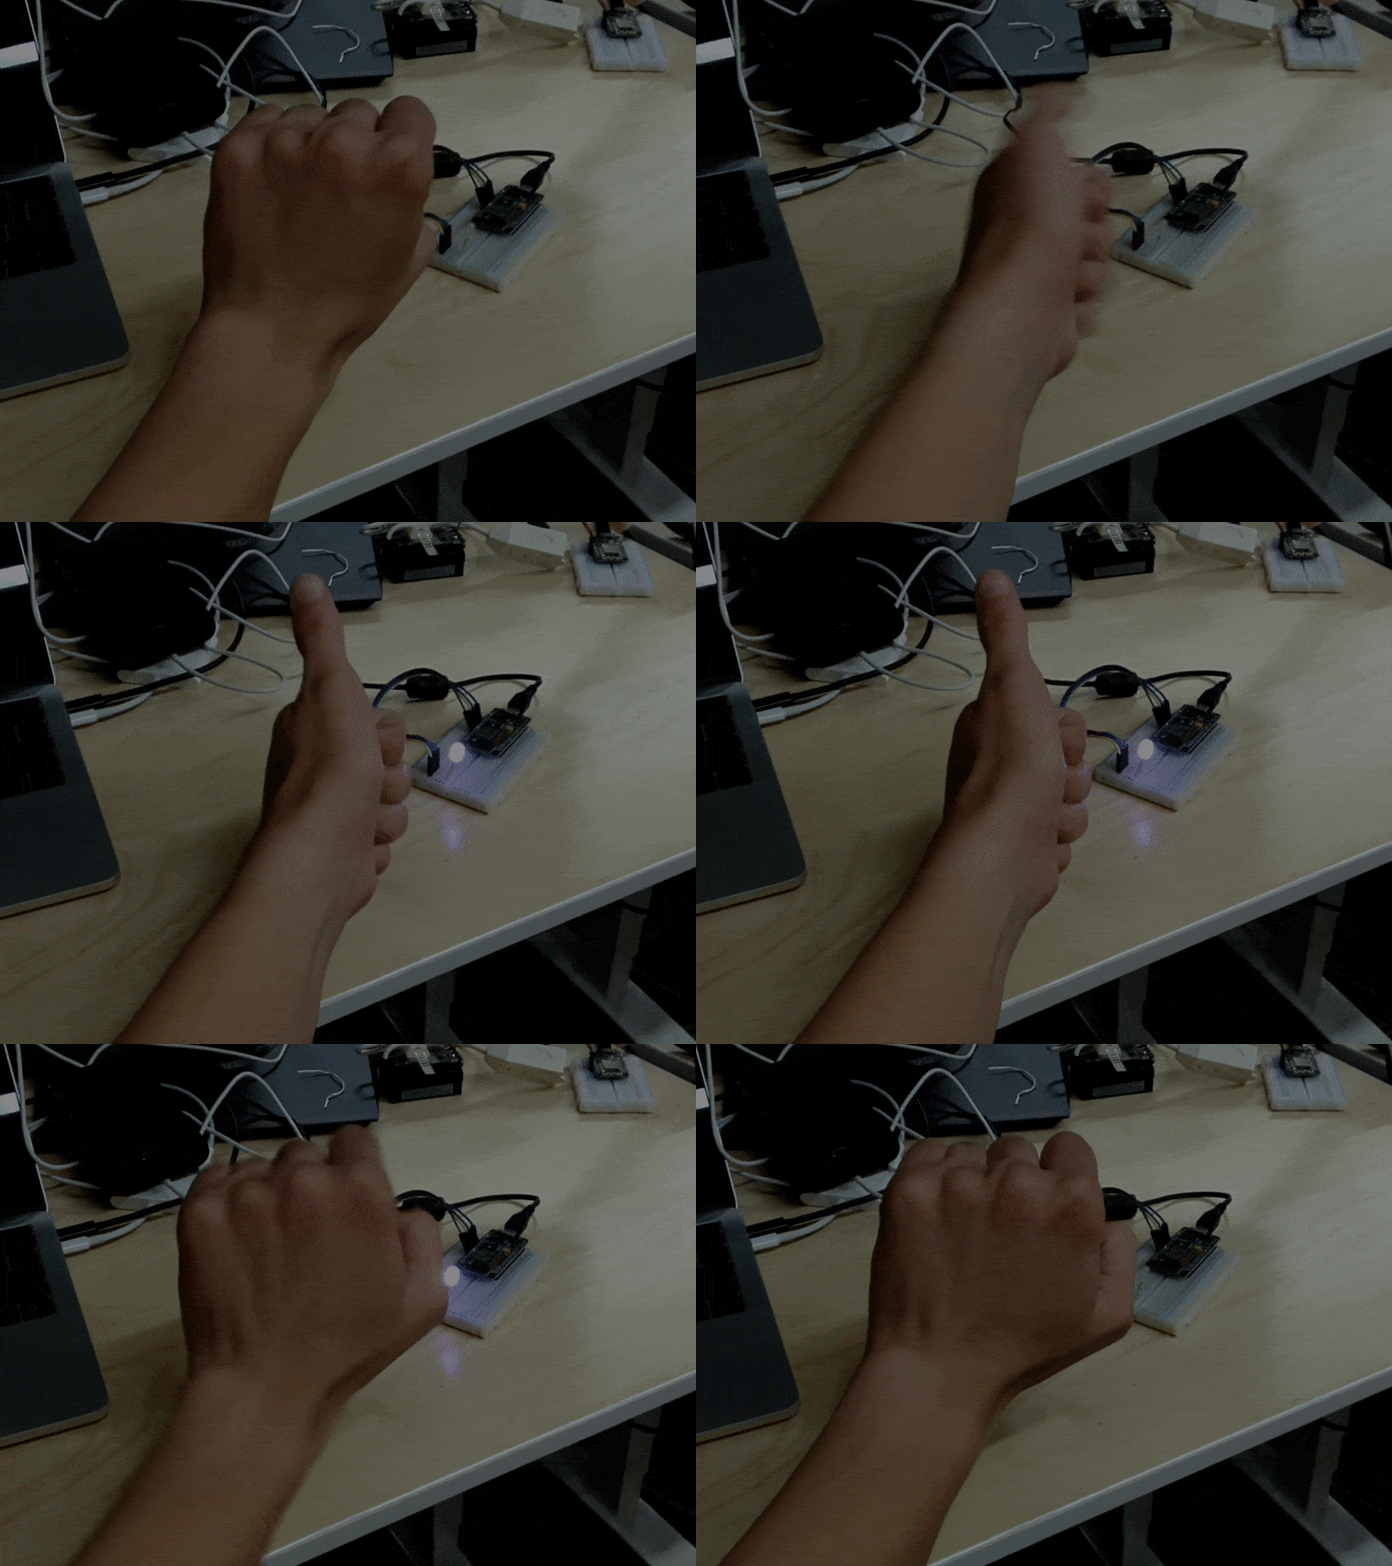
- Try making a thumb, fist, or finger gesture and observe the LED.
- Thumb gesture turns the LED on.
- Fist gesture turns the LED off.
- Finger gesture cycles through the LED colors.
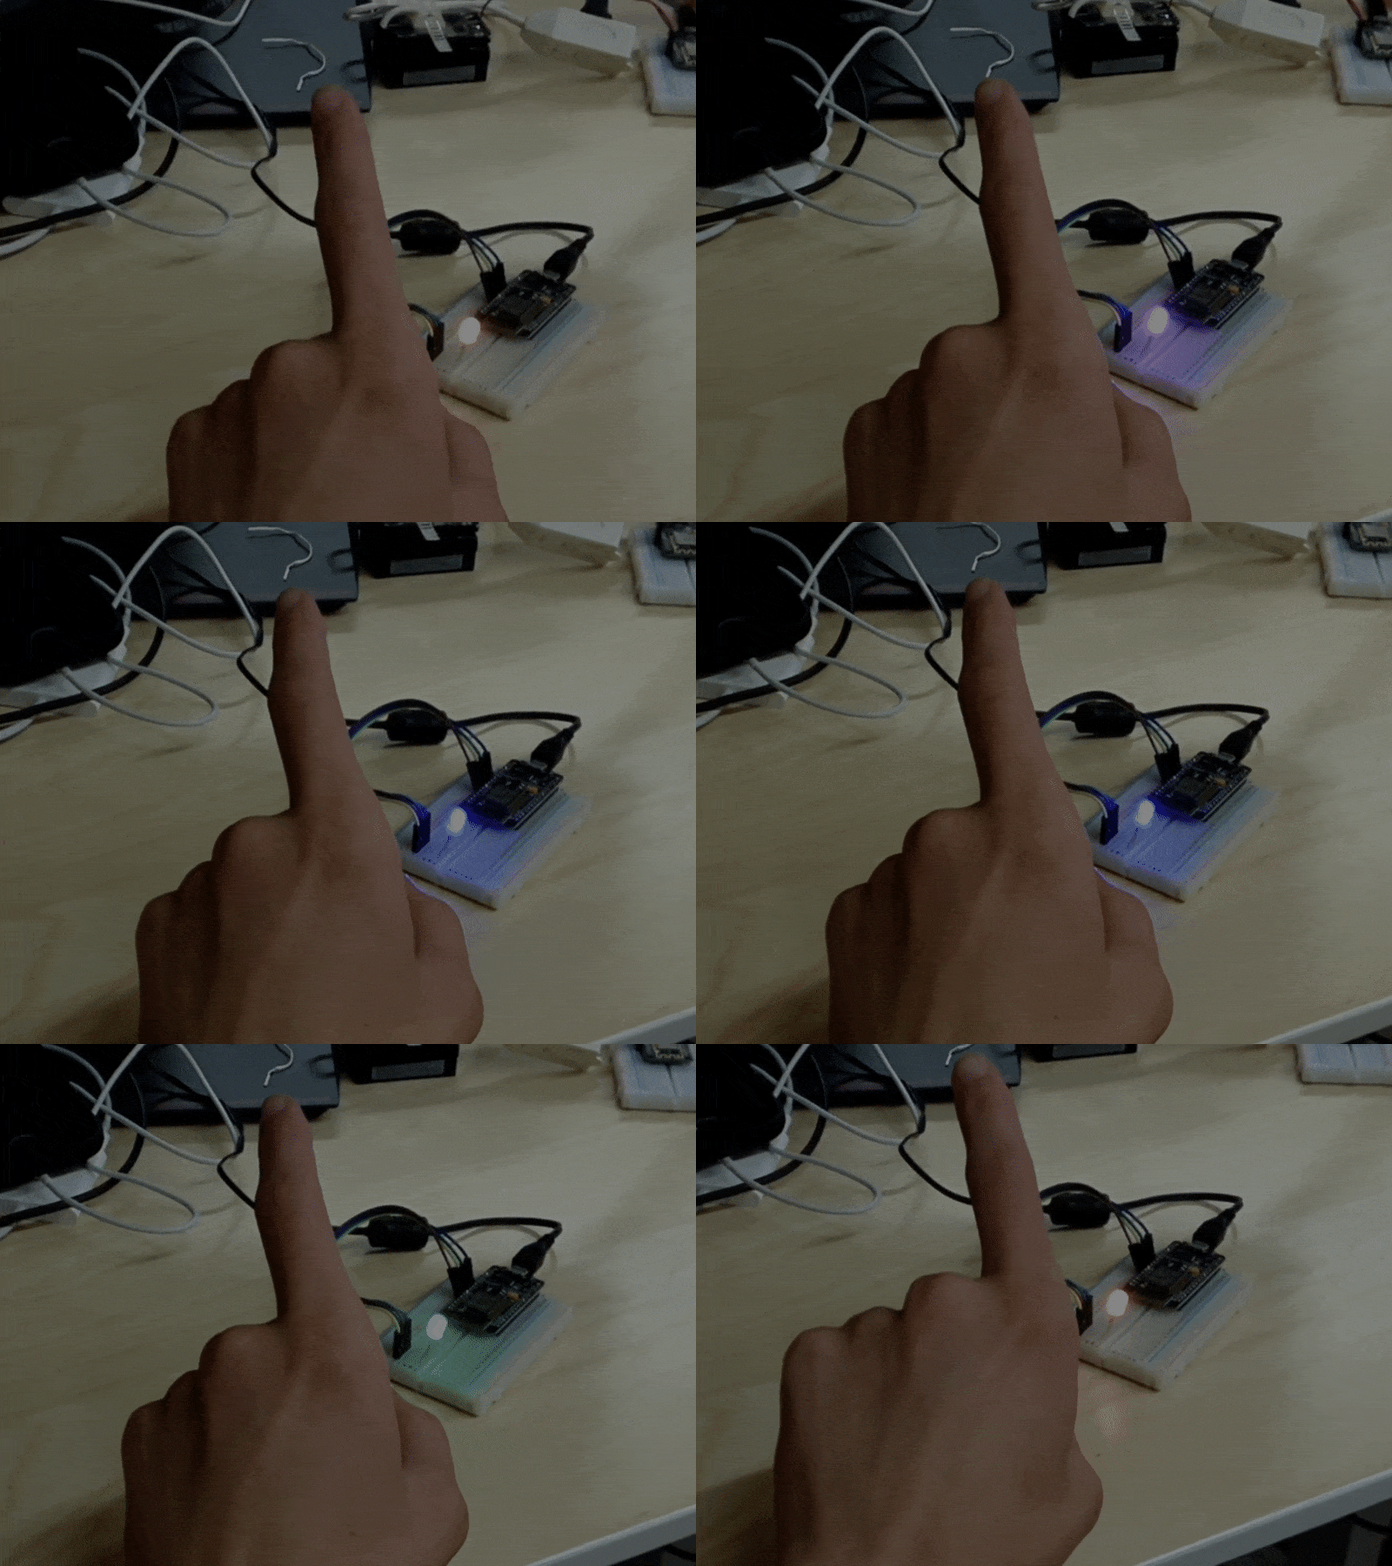
Finger Gesture Changing LED Color Mode.
- Not working?
- Make sure your PubNub keys are set in both the Unity app and in the Arduino sketch.
- Make sure your WiFi is configured in the Arduino sketch.
- Still not working?
- Go to your PubNub Admin Dashboard, select your app, and select your keyset.
- Click “Debug Console” and create a client with “Default Channel” set to “control”. Keep this window open when you test your app.
- Confirm you receive messages when you make a gesture.
- Confirm the LED responds when you send an “on” or “off” message.

What’s Next?
Use this project as a seed to build your own Magic Leap IoT application. A few ideas:
- Use an IR blaster to control your TV or game console.
- Use weather sensors and stream the information to a HUD on the Magic Leap device.
- Replace the LED with a relay to control high voltage devices like a lamp or fan (always be careful with high voltage electronics).

Power strip control with Magic Leap IoT App.
Have suggestions or questions about the content of this post? Reach out at devrel@pubnub.com.
This is part two of our Magic Leap series. Check out the other posts Getting Started with Magic Leap and PubNub and Create a Multiplayer Augmented Reality Game with Magic Leap and Unity.

