IN THIS ARTICLE
 The canvas in HTML5 is very unique and rich element for web development. As web browser vendors have implemented GPU acceleration and the performance has improved so much, you can develop beautiful graphics and games with canvas without losing much quality. So what if you want to create some multiplayer games using canvas with realtime connection only with front-end web technology?
This tutorial shows you how to create a very simple doodling web app that allows multiple users draw on the canvas at the same time, using PubNub JavaScript SDK.
Want to see it in action? Check out the HTML5 canvas drawing demo here.
Or continue reading blog for the HTML5 canvas source code and the simplified code on Codepen to follow the basic tutorial to fork and tweak by yourself.
If nobody else is online, try opening the demo on a different browser or devices!
UPDATE: We added a tutorial on building history into our HTML5 canvas application, enabling you to save brush strokes, even when a browser is closed. Check out that tutorial on HTML5 Canvas Storage here.

Prerequisites for HTML5 Canvas
You will need basic to intermediate knowledge of JavaScript, also basic understanding of HTML5 canvas for this tutorial.
What you are going to do
In this tutorial, you will:
- create a simple canvas that allows a user to draw
- publish the drawing path data to PubNub data stream
- subscribe the data from other users from the data stream, and draw on the canvas
- display the number of user online
Creating Basic Interactive Drawing with HTML5 Canvas
Let’s create a HTML5 canvas drawing board!
You’ll first need to sign up for a PubNub account. Once you sign up, you can get your unique PubNub keys in the PubNub Developer Portal. Once you have, clone the GitHub repository, and enter your unique PubNub keys on the PubNub initialization, for example:
Now, take a user input to make the canvas drawable. This is how it works: Free-drawing action is initiated when a user clicked on the canvas. A line is drawn dynamically as long as the user is holding the mouse down, and ends when it is released.
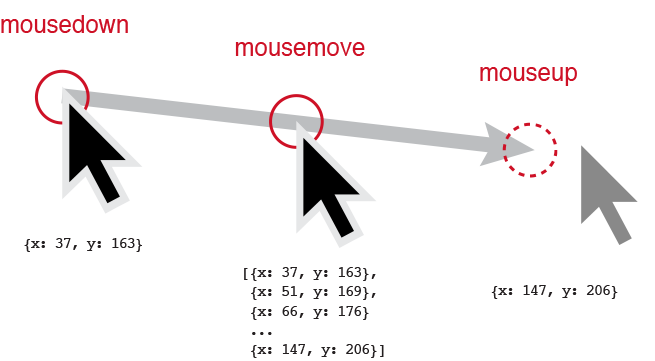
Let’s create some functions, which should be called upon the mouse events on canvas. The events to be observed are mousedown, mousemove, and mouseup:
We are only focusing on mouse (including trackpad) as an input device for this part of the tutorial. You can add touch support later, if you want.

Now, you are going to write a draw function, which traces the mouse path by collecting the canvas coordinates into an array, then starts drawing the path on canvas with beginPath() method, connect each coordinate with lineTo(), andstroke() to complete drawing the path, while a flag, isActive is set true.
Connecting all the (x, y) coordinates and draw a line by using canvas methods.
Write other two functions to toggle the flag. Also empty the array after each line is drawn.
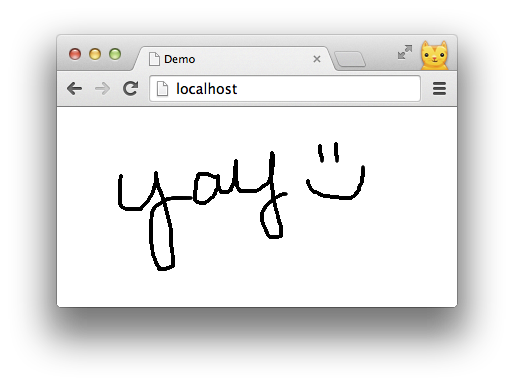
Yay, you just have create a very simple drawing web app! Go on to the next step to make it even more interactive.

Making It Collaborative with Multiple Users
Here’s the fun part- you are going to make it as a multi-user app by publishing and subscribing the drawing path to data stream. Get your PubNub API keys ready, if you don’t have one yet, sign up to get your own unique keys.
When you are ready, include the PubNub JavaScript libraries in your HTML to begin.
Initialize the API.
Publish and Subscribe
In the last step, you have created an array that hold all canvas coordinates. In this step, you are going to send one user’s drawing path data to PubNub network, also receive path data from other users.

To retrieve the published data, you simply need subscribe().
Once you successfully retrieve the data object from the stream, call the callback function to draw lines from the received array data on canvas, just like you did in the last step.
Displaying Occupancy
You can also display the number of users online with Presence Detection API. presence() receives user events including Join/Leave status changes.
To use the optional API, you need to enable the feature on your Admin dashboard.
Let’s add these lines to subscribe with presence, and display in DOM.
Ta-da, you just have create a simple multi-user canvas app!
Try this code on this CodePen, and tweak as you want:
  See the Pen CoDoodler: Simplified version by Tomomi Imura) on CodePen
1
I hope you enjoyed the tutoria!. If you would like to explore this demo and add more features such as touch support and CSS for the UI, see the entire source code of the demo.
Get Started
Sign up for free and use PubNub to power
multiplayer collaboration!


