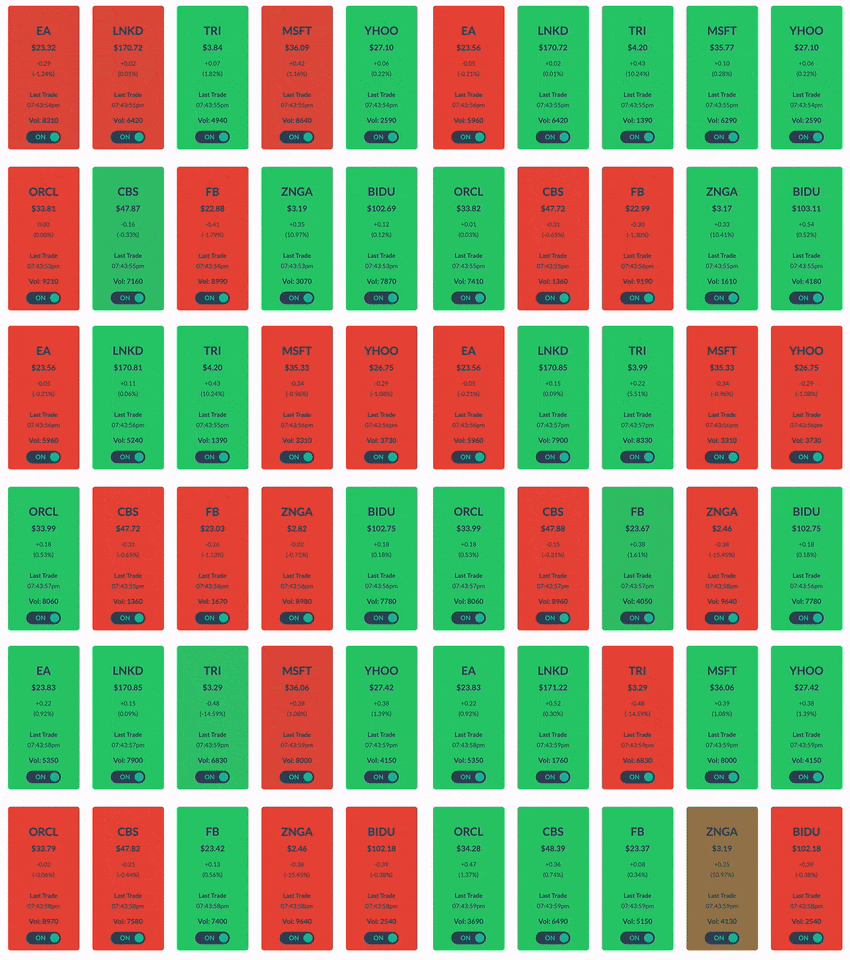
WebSockets are an excellent technology selection when you are designing your realtime app. Imagine an app user interface where you see realtime stock prices. The faster a user learns about a stock price’s change, the faster they can react, and execute a buy or sell order. Money is on the line.

What is a WebSocket?
WebSocket is its own layer 7 protocol, similar to HTTP. WebSockets create a full-duplex connection for sending messages from client to server, or server to client at any instant. This pattern is far superior to HTTP request-response when an application requires systems to get the latest data ASAP.
When Should I Write WebSocket Code?
Besides a realtime stock or cryptocurrency tracker app, other common realtime use cases for WebSockets are:
- Chat apps
- Live geolocation tracking on a map
- Live audience interaction
- Online auctions bid submission
- IoT device updates
- WebRTC call orchestration
WebSockets create a TCP socket connection between multiple devices or processes. Similar functionality can be implemented using HTTP Long Polling or using a service like PubNub. Let’s go over some basic socket and WebSocket programming with Node.js.
Node.js Socket Example
Let’s say you need to write a server application, and you chose Node.js as your programming language. Your users can be any type of client, like a web browser, mobile app, IoT device, Node.js client, or anything that knows TCP.
You need to serve assets to your users over HTTP, but you also need to provide them with streams for bi-directional messaging. We can accomplish this in a single Node.js server app!
The code from the video, and also this article is available in my Node.js WebSocket Examples GitHub Repository.
First we’ll go over some plain socket code, followed by WebSocket code. If you already serve assets with something like Express.js, Hapi, or the native Node.js HTTP library, we can jump into the socket code.
Socket Server JavaScript Code
- // Node.js socket server script
- const net = require('net');
- // Create a server object
- const server = net.createServer((socket) => {
- socket.on('data', (data) => {
- console.log(data.toString());
- });
- socket.write('SERVER: Hello! This is server speaking.<br>');
- socket.end('SERVER: Closing connection now.<br>');
- }).on('error', (err) => {
- console.error(err);
- });
- // Open server on port 9898
- server.listen(9898, () => {
- console.log('opened server on', server.address().port);
- });
This script runs a Node.js socket server on port 9898. Whenever a client connects to this server app (IP_ADDRESS:9898) the server sends the client a string over the open socket. It says “SERVER: Hello! This is server speaking.” Whenever the client sends some data to the server, the Node.js script logs the contents in the ‘data’ event handler.
Socket Client JavaScript Code
Here we have our Node.js socket client script, which can connect to the Node.js socket server above.
- // Node.js socket client script
- const net = require('net');
- // Connect to a server @ port 9898
- const client = net.createConnection({ port: 9898 }, () => {
- console.log('CLIENT: I connected to the server.');
- client.write('CLIENT: Hello this is client!');
- });
- client.on('data', (data) => {
- console.log(data.toString());
- client.end();
- });
- client.on('end', () => {
- console.log('CLIENT: I disconnected from the server.');
- });
The client script attempts to connect to localhost:9898. If the connection succeeds, then the client sends a string to the server over the open socket. It says “CLIENT: Hello this is client!” Whenever the server sends some data to the client, the client logs it in the ‘data’ event handler.
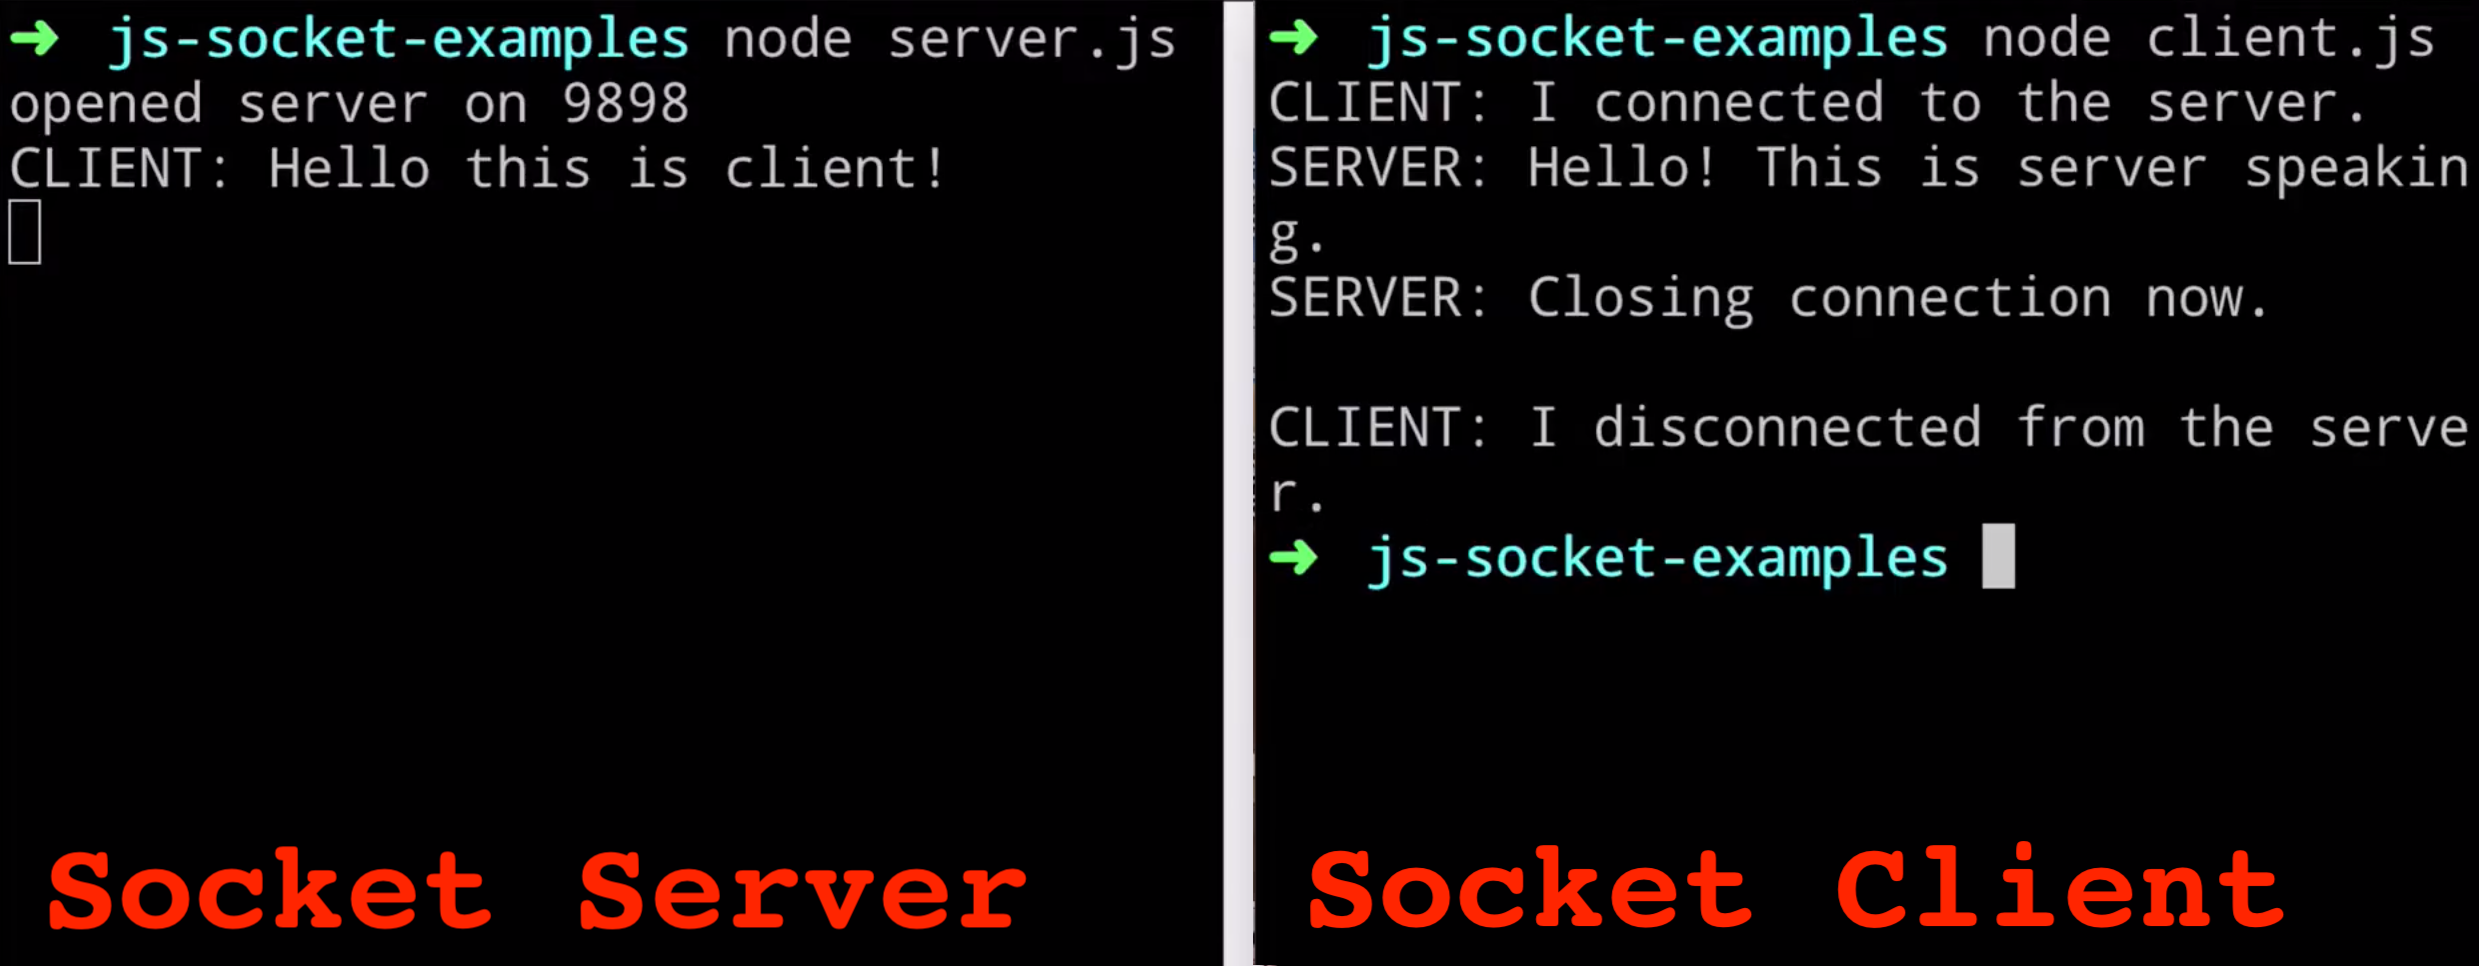
This is what the output looks like for client and server Node.js socket scripts running on the command line.

Node.js WebSocket Example
Writing socket code is fun, but when you’re trying to implement it in a web browser, it’s kind of complicated. This issue has been addressed by all major browsers in their action to support the WebSocket protocol out of the box! This way, web pages that use sockets can load really fast because the front end libraries for handling the protocol are already in the browser applications. No need to fetch big JS libraries whenever a user visits your realtime app web page.
Node.js WebSocket Server
Let’s swap out our Node.js socket server code for WebSocket server code! This way, we will be able to easily serve our web browser users. We’ll go over some vanilla JS for WebSockets that can be implemented in something like a React.js application.
This code uses the Node.js native “http” library and a 3rd party WebSocket NPM package to create a WebSocket server. It has the same functionality as the socket script we wrote earlier. This time, we are using the official WebSocket protocol to bi-directionally send our data between client and server.
- // Node.js WebSocket server script
- const http = require('http');
- const WebSocketServer = require('websocket').server;
- const server = http.createServer();
- server.listen(9898);
- const wsServer = new WebSocketServer({
- httpServer: server
- });
- wsServer.on('request', function(request) {
- const connection = request.accept(null, request.origin);
- connection.on('message', function(message) {
- console.log('Received Message:', message.utf8Data);
- connection.sendUTF('Hi this is WebSocket server!');
- });
- connection.on('close', function(reasonCode, description) {
- console.log('Client has disconnected.');
- });
- });
Node.js WebSocket Browser Client
Next, we have our HTML file that loads up in client web browsers. Notice that the WebSocket class in the browser JS has no declaration. This is because modern browsers give developers automatic access to this class in their front-end JavaScript!
- <!DOCTYPE html>
- <html>
- <head>
- <title>WebSocket Playground</title>
- </head>
- <body>
- </body>
- <script>
- const ws = new WebSocket('ws://localhost:9898/');
- ws.onopen = function() {
- console.log('WebSocket Client Connected');
- ws.send('Hi this is web client.');
- };
- ws.onmessage = function(e) {
- console.log("Received: '" + e.data + "'");
- };
- </script>
- </html>
We can get our fun client-server handshake example going fast! Here’s what the output for the server script and the web browser JS console look like:

Peer-to-Peer Message Passing
The above samples are intuitive code implementations for realtime application development. What if we want to stream data from user to user? What if we want to do this without implementing the complicated routing logic on our server to connect two or more users? We can accomplish all of this cheaply, securely, and without having to spin-up expensive infrastructure.
We have access to awesome, hosted, realtime infrastructure with PubNub. We can infinitely scale to any user volume. PubNub offers low cost, transaction-based pricing with easy to use messaging APIs. Let’s take a look at an example for peer-to-peer messaging. By the way, this can also be implemented to stream data from client to server, or server to client, in addition to peer-to-peer.
Before you try the following scripts you must get your free PubNub API keys. They work for up to 1 million free transactions per month, forever. Use this form to get free API keys right now.
PubNub Data Streaming
We can bi-directionally send data between services, clients, or server apps using the PubNub global data stream network. There is an SDK for every popular language and device. Here is the basic browser JS or Node.js code for utilizing the Pub/Sub network. This publishes a message whenever the user hits the return key.
- const PubNub = require('pubnub'); // or in browser: <script src="https://cdn.pubnub.com/sdk/javascript/pubnub.4.24.4.js"></script>
- const pubnub = new PubNub({
- publishKey: 'your_pubnub_publish_api_key_here',
- subscribeKey: 'your_pubnub_subscribe_api_key_here'
- });
- pubnub.subscribe({
- channels: ['my_channel']
- });
- pubnub.addListener({
- message: (pubnubMessage) => {
- console.log('New Message:', pubnubMessage.message);
- }
- });
- // Use Control + C to end the program
- process.stdin.on('data', (key) => {
- // When the user presses the return key
- if (key.toString() === '<br>') {
- pubnub.publish({
- message: 'Hello from client 1!',
- channel: 'my_channel'
- });
- }
- });
Note that the “process” object cannot be accessed in web browser JS, but a similar key press event handler can accomplish the same functionality.
- object.addEventListener('keypress',(event) => {});
PubNub Node.js SDK
Here is the documentation for the PubNub JavaScript SDK.
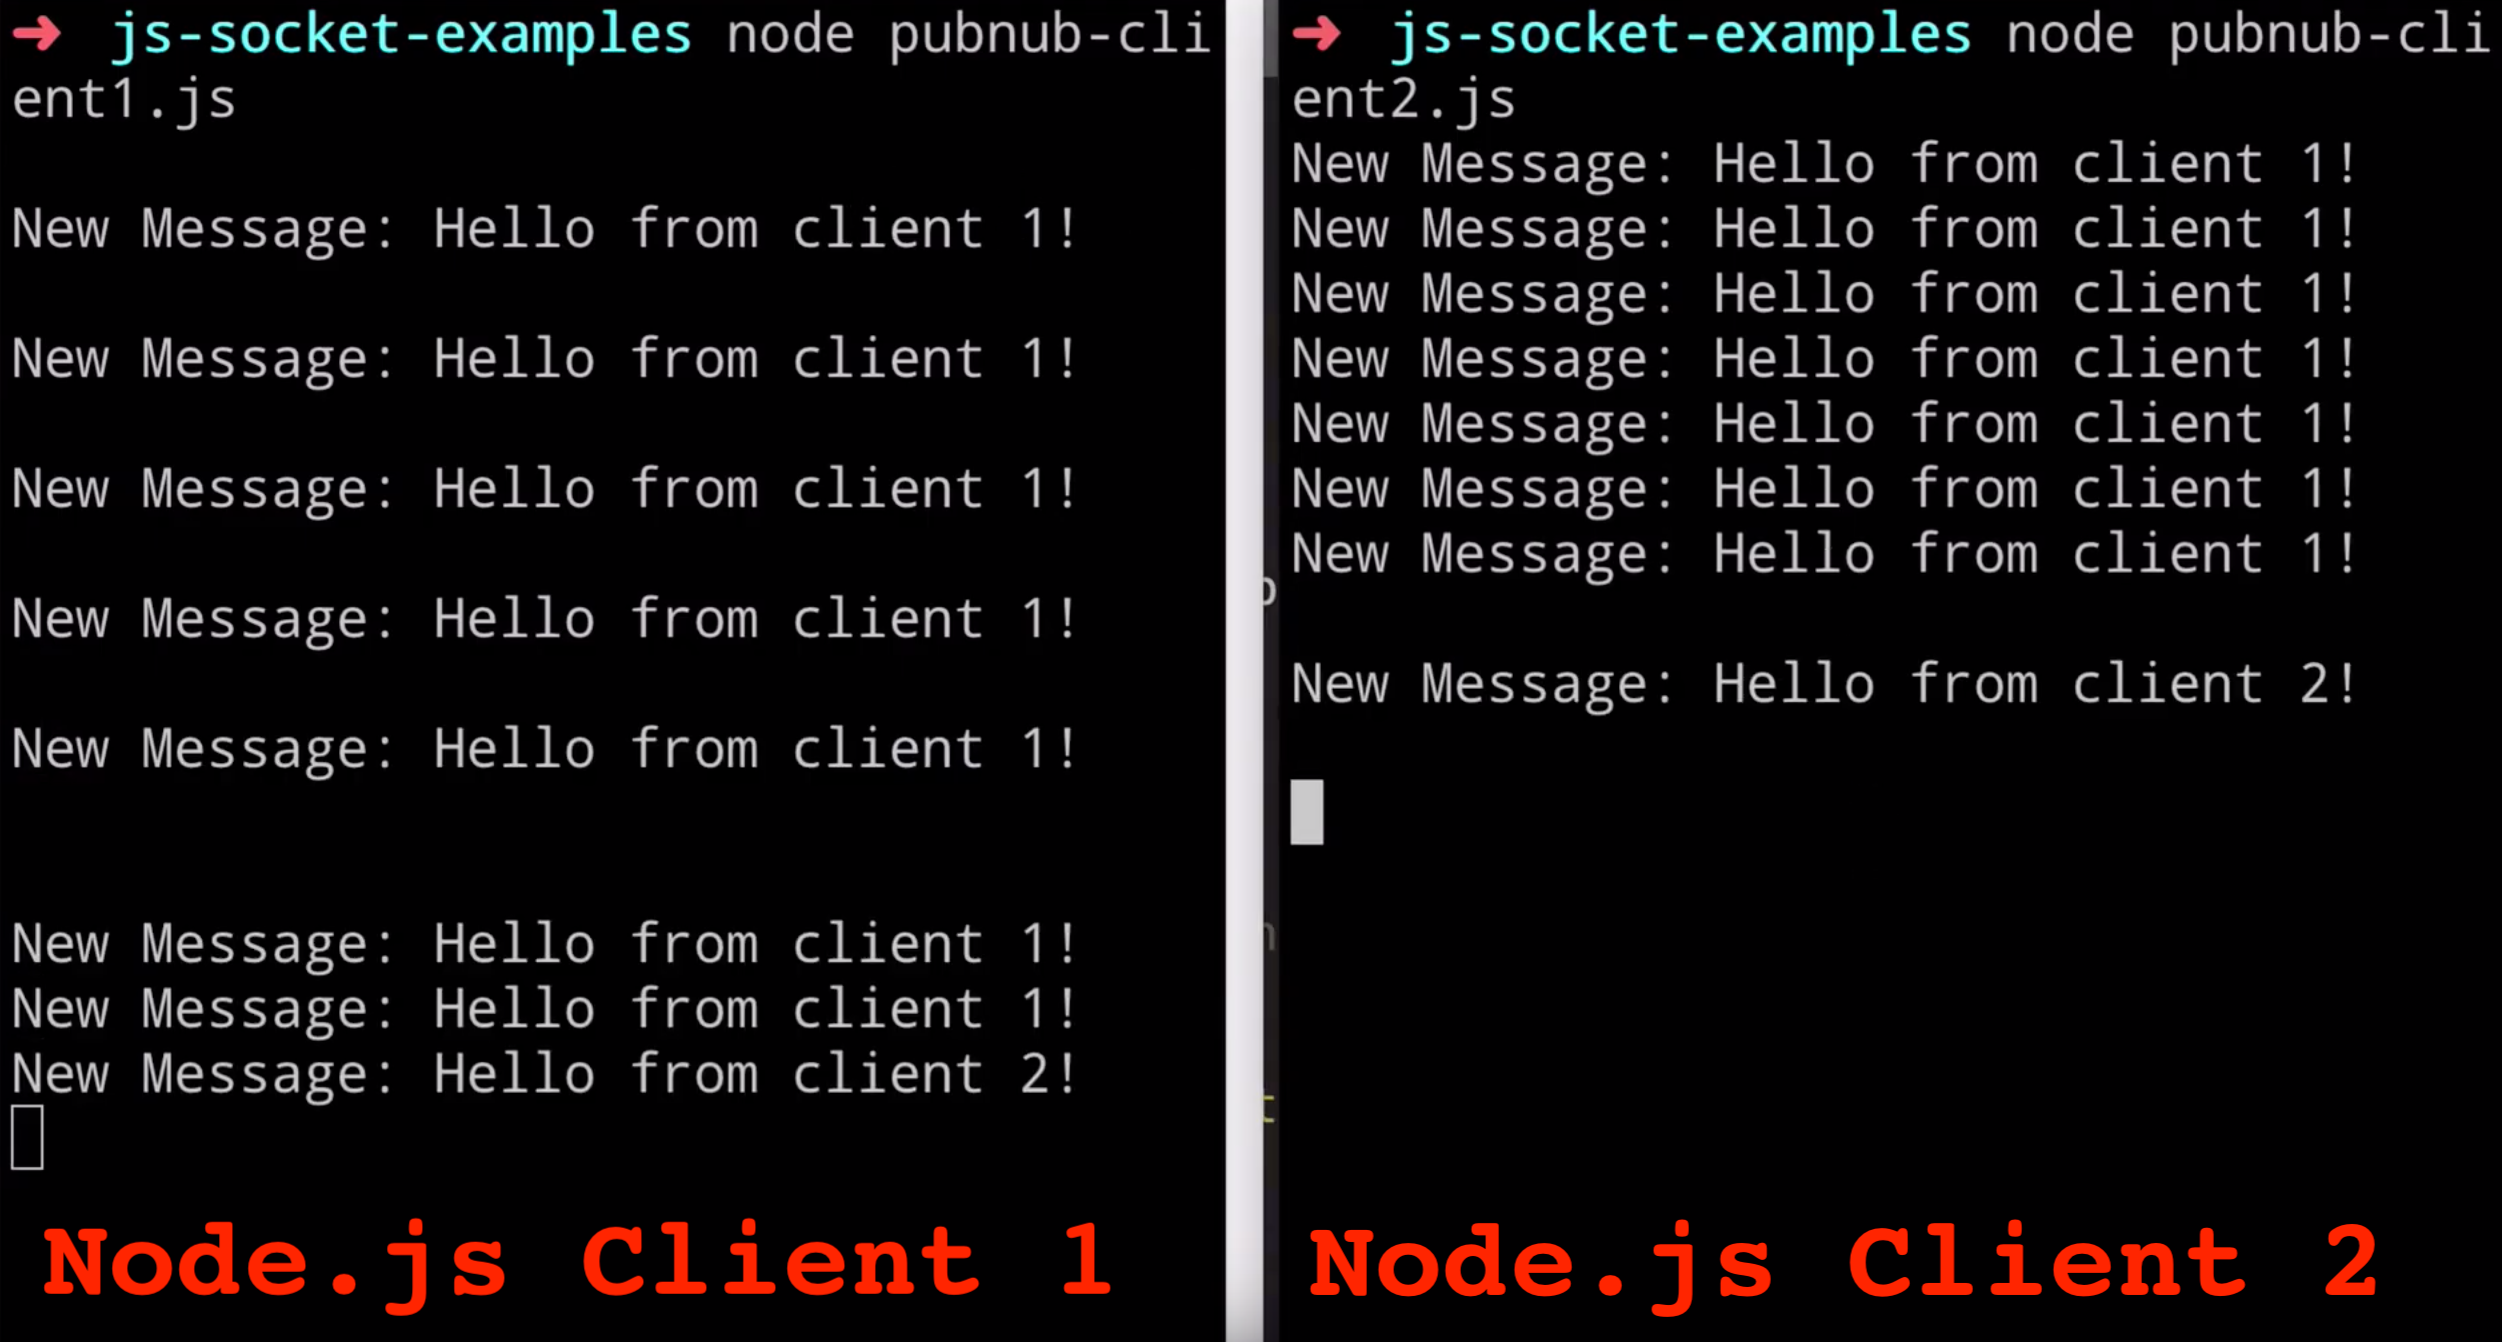
When we execute the above script in 2 terminal windows, we can see realtime Pub/Sub in action. I made a second script with the same code, except the published message indicates that it comes from client number “2.” Be sure to install the PubNub Node.js SDK before you try executing the scripts on your command line.
- npm install pubnub

That’s all there is to it. I hope you were able to glean some valuable insights from this peer-to-peer, client-to-server, and server-to-client WebSocket data streaming tutorial. Please reach out to us at devrel@pubnub.com if you need assistance or have some questions about building a realtime application. We love hearing your ideas!
For more on implementing JavaScript with PubNub, take a look at our React Native blog post tutorials for realtime geolocation tracking, a realtime chat app, and more! There is also a blog post about socket programming in Python. Thanks for reading! If you liked this post, subscribe to our newsletter!


