

IN THIS ARTICLE
This tutorial was originally published on rexstjohn.com. Rex St John is a mobile software engineer living in Seattle’s Capitol Hill neighborhood who has worked on a wide variety of enterprise and consumer mobile applications including touch walls, games, mobile sales tools and more.
What follows is a tutorial outlining how to get up and running with PubNub on a Raspberry Pi running Raspbian. I have created this tutorial to walk through the process of getting up and running with PubNub for the purpose of connected device / embedded device demonstrations at the upcoming Wearable Computing AT&T Hackathon.
Step 1: Have a Raspberry Pi configured and running Raspbian
This should be relatively straightforward, your OS does not honestly have to be Raspbian but that is what I am using to go through this process. More than likely any common Linux distribution will be fine.
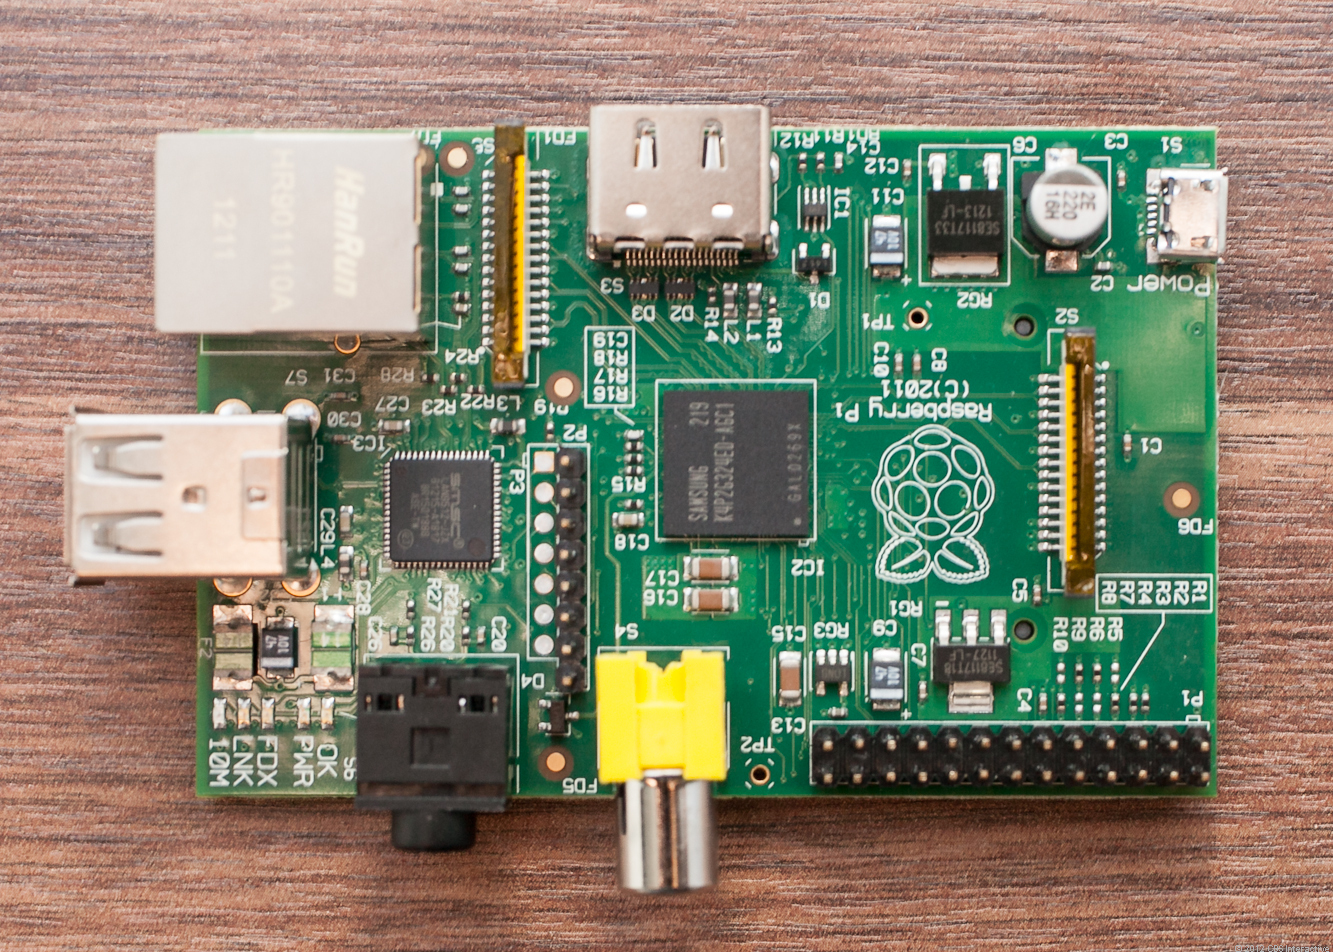
In my case I ordered a basic Raspberry Pi development kit which comes complete with an HDMI cable, an SD card, a mini-usb power supply and a plastic shell to keep you from shorting out the motherboard.
You will need to have a PubNub account…logged in and activated as a developer (free!).
Also make sure you have (obviously) some type of internet connection whether it be a WiFi Nub or ethernet cable. Assuming your Pi is plugged in, turned on and connected to the internet…proceed from there.
Step 2: Clone into the PubNub C-Library GitHub Account
Create and navigate to a folder on your Desktop or other such desired location in the terminal. Much of this information can already be found on the GitHub page for the Raspberry Pi C client for PubNub here: https://github.com/pubnub/c.
On your standard command line run:
| git clone https://github.com/pubnub/c.git |
You will also need to run the following commands to install the libraries necessary to “make” or build the PubNub C libary
| sudo apt-get update (just in case you are out of date) | |
| sudo apt-get install libevent-dev libjson0-dev libcurl4-openssl-dev libssl-dev |
Next, browse to your “C” folder which you just cloned from GitHub where the PubNub C libraries now should reside
| sudo make (to make the library) | |
| sudo make install (to install it) |
Step 3: Test Your Pub / Sub Connection
Time to try a publish / subscribe communication between your Pi and PubNub.
| cd examples/sync-demo (from the Git directory of your PubNub folder) |
Open example-sync-demo.c with your favorite editor
Now change the following lines to match your PubNub pub / sub credentials. These credentials should be on your PubNub API dashboard:

Replace the demo publish and subscribe tags below with your actual credentials in the example-sync-demo.c file.
| struct pubnub_sync *sync = pubnub_sync_init(); | |
| struct pubnub *p = pubnub_init( | |
| /* publish_key */ "demo", | |
| /* subscribe_key */ "demo", | |
| /* pubnub_callbacks */ &pubnub_sync_callbacks, | |
| /* pubnub_callbacks data */ sync); | |
| json_object *msg; |
Next, customize your message which you are publishing to something you will recognize (line 27):
| json_object_object_add(msg, "str", json_object_new_string("\"Hello, AT&T Hackers!\" she said.")); |
Next, you will need to build a “.o” file by running “make” while in the examples directory. The result should be example-sync-demo.o.
Run this file in the terminal with: ./example-sync-demo
You should see the following:
| pubnub subscribe ok, no news | |
| pubnub subscribe [my_channel]: {"num":42, "str": "\\"Hello, AT&T Hackers!\" she said.} |
Trackbacks/Pingbacks
Try PubNub today!


