IN THIS ARTICLE
This tutorial will walk you through how to install React Native, create a new project with native code, and set up remote push notifications for both iOS and Android. There are a few requirements before you can get started:
- iOS development requires building on macOS.
- iOS push notifications require paid enrollment in the Apple Developer Program.
- You’ll first need to sign up for a PubNub account. Once you sign up, you can get your unique PubNub keys from the PubNub Admin Dashboard.
Install React Native
If you already have React Native installed, skip to the ‘Creating a New React Native App’ section below.
These instructions are based on the Getting Started guide for building React Native projects with native code from the React Native docs. Refer to the Getting Started guide if you have trouble installing React Native or need more information about the following steps.
Install Node and Watchman using Homebrew.
brew install node
brew install watchman
Install React Native CLI.
npm install -g react-native-cli
iOS Projects Setup
If you are only developing for Android, you can skip setting up React Native for iOS development.
Install Xcode from the Mac App Store. Installing Xcode will also install the iOS Simulator and all the necessary tools to build your iOS app.
Install Xcode Command Line Tools. Open Xcode and choose “Preferences…” from the Xcode menu. Go to the Locations panel. Install the tools by selecting the most recent version in the Command Line Tools drop-down.
Android Projects Setup
If you are only developing for iOS, you can skip setting up React Native for Android development.
Install the Java SE Development Kit (JDK 8 or never).
Download and install Android Studio. Choose a “Custom” setup when prompted to select an installation type and check these boxes:
- Android SDK
- Android SDK Platform
- Performance (Intel ® HAXM)
- Android Virtual Device
Building a React Native app with native code requires the Android 6.0 (Marshmallow) SDK. On the “Welcome to Android Studio” screen click on “Configure”, then select “SDK Manager”. Click the “SDK Platforms” tab and check the box next to “Show Package Details” in the bottom right corner. Find and expand the ‘Android 6.0 (Marshmallow)’ entry, then make sure the following are checked:
- Google APIs
- Android SDK Platform 23
- Intel x86 Atom_64 System Image
- Google APIs Intel x86 Atom_64 System Image
Click the “SDK Tools” tab and check the box next to “Show Package Details” in the bottom right corner. Find and expand the “Android SDK Build-Tools” entry. Make sure that “23.0.1” is selected. Click “Apply” to download and install the Android 6.0 (Marshmallow) SDK and build tools.
Edit your .bash_profile using the Nano text editor with the command nano $HOME/.bash_profile.
Paste these entries in your .bash_profile:
export ANDROID_HOME=$HOME/Library/Android/sdk
export PATH=$PATH:$ANDROID_HOME/tools
export PATH=$PATH:$ANDROID_HOME/tools/bin
export PATH=$PATH:$ANDROID_HOME/platform-tools
Load the config into your current shell and check that those entries were added to your path with the commands:
source $HOME/.bash_profile
echo $PATH
Video Walkthrough of React Native Push Notifications Using PubNub
In addition to this tutorial, you can follow along with walkthrough of how to create a new React Native project with native code and setup remote push notifications for both iOS and Android.
Create a New React Native App
If you are integrating push notifications into an existing React Native app, you can skip this section.
Run the following commands to create a new React Native project called “PushApp”:
react-native init PushApp
Get Started Using PubNub
Navigate into the directory for the app and install the PubNub React V4 SDK.
cd PushApp/
npm install --save pubnub pubnub-react
If you haven’t already, create a PubNub account.
Create a new app in the PubNub Admin Dashboard.
Select the app you just created and create a new keyset. Record the Publish Key and Subscribe Key so you can use them later.
Integrate Push Notifications
Install the React Native Push Notifications library.
npm install --save react-native-push-notification
react-native link
Integrate iOS Push Notifications
If you are only developing for Android, you can skip this section for integrating iOS push notifications.
Open the Xcode project in the located in the “ios” directory of the app project.
Sign in into Xcode with an Apple ID that has paid enrollment in the Apple Developer Program by clicking “Xcode” and selecting “Preferences”. At the top of the window select Accounts. Click on the “+” on the lower left corner and select “Apple ID” as the type of account.
Navigate to general settings for your project by main project file (the one that represents the .xcodeproj with the blue icon) in the Project Navigator.
Set the Bundle Identifier to a unique string, such as “com.[company].pushapp”. Make sure your Apple developer account or team is selected under the Team dropdown. Allow Xcode to automatically manage signing. Repeat this step for the Tests target in your project.
Navigate back to the general settings for your project and click on “Capabilities”. Toggle the switch for “Push Notifications” to “ON”.
Manually link the PushNotificationIOS library. Refer to the React Native Manual Linking Guide for more information about linking libraries with native capabilities.
- Right click on “Libraries” in the Project Navigator. Click “Add Files to [Project Name]” and add “node_modules/react-native/Libraries/PushNotificationIOS/RCTPushNotification.xcodeproj”.
- Navigate to general settings for your project then select “Build Phases”.
- Under “Link Binary With Libraries” drag in “libRCTPushNotification.a” from inside “Libraries/PushNotificationIOS/RCTPushNotification.xcodeproj/Products/” .
- Add
#import <React/RCTPushNotificationManager.h>to the top of “AppDelegate.m”. - In your AppDelegate implementation register for notifications and handle notification events.
// Required to register for notifications
 - (void)application:(UIApplication *)application didRegisterUserNotificationSettings:(UIUserNotificationSettings *)notificationSettings
 {
  [RCTPushNotificationManager didRegisterUserNotificationSettings:notificationSettings];
 }
 // Required for the register event.
 - (void)application:(UIApplication *)application didRegisterForRemoteNotificationsWithDeviceToken:(NSData *)deviceToken
 {
  [RCTPushNotificationManager didRegisterForRemoteNotificationsWithDeviceToken:deviceToken];
 }
 // Required for the notification event. You must call the completion handler after handling the remote notification.
 - (void)application:(UIApplication *)application didReceiveRemoteNotification:(NSDictionary *)userInfo
                                                        fetchCompletionHandler:(void (^)(UIBackgroundFetchResult))completionHandler
 {
   [RCTPushNotificationManager didReceiveRemoteNotification:userInfo fetchCompletionHandler:completionHandler];
 }
 // Required for the registrationError event.
 - (void)application:(UIApplication *)application didFailToRegisterForRemoteNotificationsWithError:(NSError *)error
 {
  [RCTPushNotificationManager didFailToRegisterForRemoteNotificationsWithError:error];
 }
 // Required for the localNotification event.
 - (void)application:(UIApplication *)application didReceiveLocalNotification:(UILocalNotification *)notification
 {
  [RCTPushNotificationManager didReceiveLocalNotification:notification];
 }
Go to the Apple Developer Portal and click “Certificates, IDs & Profiles”.
Click on “Keys” and add a new key by clicking on the “+” button in the upper right. Select the “APNs” toggle on the key creation page and enter a name. Click “Continue” and “Confirm”.
Download your key and record the Key ID so you can use it later.
Get your Team ID by clicking on your team name in the upper right, then select “View Account”. Record the Team ID so you can use it later.
Go to your PubNub Admin Dashboard, select your app, and then select your keyset.
Scroll down to “Mobile Push Notifications”, enable the Push Notifications add-on, and upload the key file you obtained from the Apple Developer Portal. Enter your Key ID and Team ID. Save your changes.
Integrate Android Push Notifications
If you are only developing for iOS, you can skip this section for integrating Android push notifications.
Firebase Cloud Messaging (FCM) is a rebranding of Google Cloud Messaging (GCM) and there is no functional difference to handle it in PubNub. PubNub server still expects a “pn_gcm” as part of the payload.
Add permissions at the top of “android/app/src/main/AndroidManifest.xml”.
<uses-permission android:name="android.permission.WAKE_LOCK" />
<permission
   android:name="${applicationId}.permission.C2D_MESSAGE"
   android:protectionLevel="signature" />
<uses-permission android:name="${applicationId}.permission.C2D_MESSAGE" />
<uses-permission android:name="android.permission.VIBRATE" />
<uses-permission android:name="android.permission.RECEIVE_BOOT_COMPLETED"/>
Add configuration in “android/app/src/main/AndroidManifest.xml” within and at the top of <application ....>.
<receiver android:name="com.dieam.reactnativepushnotification.modules.RNPushNotificationPublisher" />
<receiver android:name="com.dieam.reactnativepushnotification.modules.RNPushNotificationBootEventReceiver">
    <intent-filter>
        <action android:name="android.intent.action.BOOT_COMPLETED" />
    </intent-filter>
</receiver>
<service android:name="com.dieam.reactnativepushnotification.modules.RNPushNotificationRegistrationService"/>
<service
    android:name="com.dieam.reactnativepushnotification.modules.RNPushNotificationListenerService"
    android:exported="false" >
    <intent-filter>
        <action android:name="com.google.firebase.MESSAGING_EVENT" />
    </intent-filter>
</service>
Go to the Firebase console.
Add a new project and then click “Add Firebase to app”.
Enter the package name and click “Register app”. You can find the package name for your app at the top of “android/app/src/main/java/com/[YourAppName]/MainApplication.java”
Download the config file into your Android app module root directory. The file should be located in “android/app/”. Do not add the Firebase SDK.
Go to your PubNub Admin Dashboard, select your app, and then select your keyset.
Scroll down to “Mobile Push Notifications”, enable the Push Notifications add-on (if not already enabled), and enter the API key for the app you just created in the Firebase console. You can find your API key (listed as Server key in the Firebase console) by going to “Project Overview” in the left sidebar, click on the kebob menu button (“⋮“) located at the top right of your app’s metrics, click on “Settings”, and select the “Cloud Messaging” tab. Additionally, Record the Sender ID so you can use it later.
Get Device Token and Associate with a Channel
Import PubNub and push notifications in “App.js”.
import PushNotificationIOS from 'react-native';
import PubNubReact from 'pubnub-react';
var PushNotification = require('react-native-push-notification');
Add the constructor inside the App component and before the render() function. Inside is where PubNub is initialized and where push notifications are configured and initialized.
constructor(props) {
    super(props);
    this.pubnub = new PubNubReact({
        publishKey: 'YOUR_PUBNUB_PUBLISH_KEY_HERE',
        subscribeKey: 'YOUR_PUBNUB_SUBSCRIBE_KEY_HERE'
    });
    this.pubnub.init(this);
    PushNotification.configure({
      // Called when Token is generated.
      onRegister: function(token) {
          console.log( 'TOKEN:', token );
          if (token.os == "ios") {
            this.pubnub.push.addChannels(
            {
              channels: ['notifications'],
              device: token.token,
              pushGateway: 'apns'
            });
            // Send iOS Notification from debug console: {"pn_apns":{"aps":{"alert":"Hello World."}}}
          } else if (token.os == "android"){
            this.pubnub.push.addChannels(
            {
              channels: ['notifications'],
              device: token.token,
              pushGateway: 'gcm' // apns, gcm, mpns
            });
            // Send Android Notification from debug console: {"pn_gcm":{"data":{"message":"Hello World."}}}
          }
      }.bind(this),
      // Something not working?
      // See: https://support.pubnub.com/support/solutions/articles/14000043605-how-can-i-troubleshoot-my-push-notification-issues-
      // Called when a remote or local notification is opened or received.
      onNotification: function(notification) {
        console.log( 'NOTIFICATION:', notification );
        // Do something with the notification.
        // Required on iOS only (see fetchCompletionHandler docs: https://facebook.github.io/react-native/docs/pushnotificationios.html)
        // notification.finish(PushNotificationIOS.FetchResult.NoData);
      },
      // ANDROID: GCM or FCM Sender ID
      senderID: "sender-id",
  });
}
Get your unique PubNub keys from your PubNub Admin Dashboard. If you don’t have a PubNub account, sign up for a PubNub account for free. Replace “YOUR_PUBNUB_PUBLISH_KEY_HERE” and “YOUR_PUBNUB_SUBSCRIBE_KEY_HERE” with your Publish Key and Subscribe Key.
Replace “sender-id” with the Sender ID you obtained previously from the firebase console.
Refer to the React Native Push Notifications repo for more information about configuration options with Push Notifications.
The app is now ready to receive push notifications.
Building the App and Testing Push Notifications
You should test notifications for both Android and iOS on a physical device. However, if you want to test your app on a Android Virtual Device or in the iOS Simulator you can refer to the React Native Getting Started guide.
Testing on an iOS Device
Connect your iOS device to your Mac and open the Xcode project in the located in the “ios” directory of the app project.
You may need to register your device for development if this is your first time running an app on your iOS device from Xcode. Open “Product” in the menubar and then click “Destination”. Select your device from the list and Xcode should register your device for development.
Navigate to general settings for your project by main project file (the one that represents the .xcodeproj with the blue icon) in the Project Navigator.
Make sure your Apple developer account or team is selected under the Team dropdown. Allow Xcode to automatically manage signing. Repeat this step for the Tests target in your project.
Click “Run” (⌘R) in the Product menu.
Your app will launch on your device shortly.
Please see the Running on Device guide for iOS if you have trouble installing onto your device or for information on how to build your app for production.
Testing on an Android Device
By default most Android devices can only install and run apps downloaded from Google Play. You must enable USB Debugging on your device in order to install your app during development.
Enable USB debugging on your device by first enabling the “Developer options” menu. Go to “Settings” and then “About Phone”. Tap the Build number row at the bottom seven times. You should get a message that the menu is available.
Go back to the main settings menu and tap “Developer options” to enable “USB debugging”.
Connect your Android device to your Mac and run react-native run-android inside your React Native project folder.
Your app will launch on your device shortly.
Please see the Running on Device guide for Android if you have trouble installing onto your device or for information on how to build your app for production.
Sending Push Notifications
You can send push notifications with PubNub by publishing a message to the channel or channels that the devices were added to. It’s important to note that the devices don’t need to subscribe to a channel to receive notifications for that channel. The devices only need to register to the channel for push notifications and then they will receive push notifications for any messages that have push notifications keys for that device type.
- Associated APNS devices will receive only the data within the
pn_apnskey. - Associated GCM/FCM devices will receive only the data within the
pn_gcmkey. - Native PubNub subscribers will receive the entire object literal, including the
pn_apnsandpn_gcmkeys.
In this tutorial you registered the device to the “notifications” channel in the push notification configuration above. Any messages sent to that channel with pn_apns or pn_gcm keys will be sent as a push notification to registered devices.
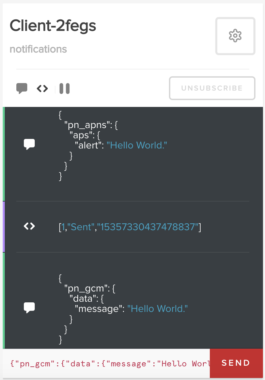
The easiest way to test push notifications is to send them from the PubNub Debug Console from within the PubNub Admin Dashboard.
Go to your PubNub Admin Dashboard, select your app, and then select your keyset.
Click “Debug Console” and create a client with “Default Channel” set to notifications.
With the client you just created you can send a notification to your device by sending a message containing the pn_apns or pn_gcm keys.
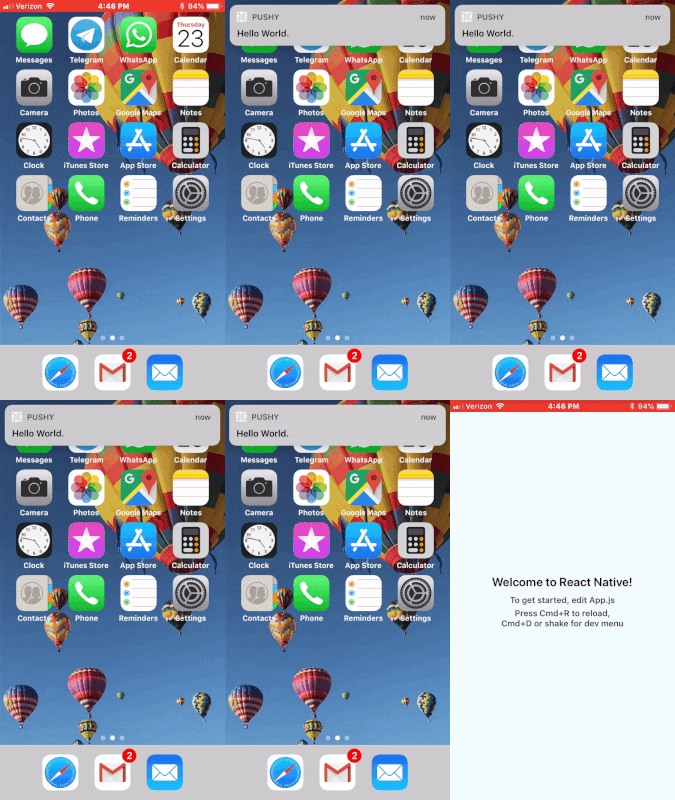
Send an iOS push notification: {"pn_apns":{"aps":{"alert":"Hello World."}}}
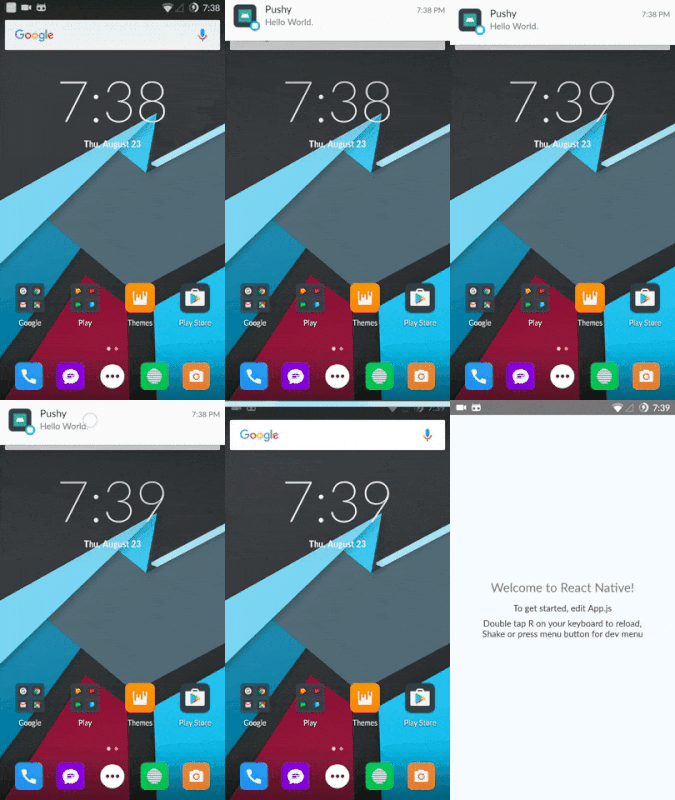
Send an Android push notification: {"pn_gcm":{"data":{"message":"Hello World."}}}
Refer to the troubleshooting guide if you have issues sending push notifications.
Have suggestions or questions about the content of this post? Reach out at devrel@pubnub.com.


