IN THIS ARTICLE
Developers and consumers, get ready! The world of Artificial Intelligence is exploding. As the amount of compute power available to developers increases and the underlying technology of AI advances in leaps and bounds, we are seeing more and more applications of artificial intelligence in daily life.
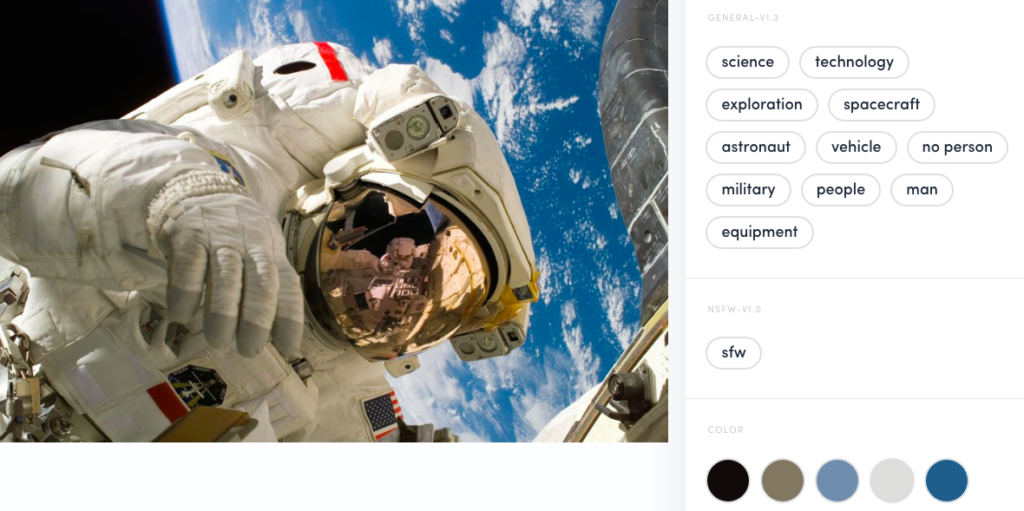
Enter Clarifai, a phenomenal platform for building image recognition into realtime applications. With Clarifai, it’s possible to give your application custom-trained general or domain-specific “eyes” to detect features in images with extremely low latency.
Realtime Image Recognition
Image Recognition refers to the ability to “tag” images with categories, generally with associated probabilities. This can be useful in a variety situations, such as automatic categorization, image moderation, customer service, and accessibility features for users with varying abilities. This is an extremely challenging field due to the wide range of images and concepts – it is difficult to train computerized models in a way that is general, accurate, yet not overly specific. Fortunately, the Clarifai APIs simplify much of this complexity to provide a solution for developers out of the box!
In this article, we present a moderately sophisticated example of how to enable realtime image recognition in an AngularJS web application with a modest 69-line PubNub JavaScript BLOCK and 78 lines of HTML and JavaScript.
How do we bring PubNub data streams together with the Clarifai image recognition? In this case, we take advantage of BLOCKS, the powerful new PubNub feature that allows us to execute functions on data in-motion. We create a PubNub BLOCK of JavaScript that runs entirely in the network and adds image recognition analysis data into the messages so that the web client UI code can stay simple and just display the analysis and original image. With PubNub BLOCKS, it’s super easy to integrate third-party applications into your data stream processing. You can find the complete catalog of pre-made BLOCKS, including Clarifai services, here.
As we prepare to explore our sample AngularJS web application with image recognition features, let’s take a couple seconds to check out the underlying Clarifai APIs
Clarifai Image Recognition APIs
There are a ton of APIs available in the Clarifai platform – in this article, we just focus on one API that should be useful to get you started. Tagging is the one – it allows you to translate an image URL into a set of tags and associated probabilities. There are additional APIs available for giving feedback on existing models, training new models, and even retrieving the dominant colors in an image. In our case, using the Tagging API, we’re adding a ton of functionality with minimal code. You can check out the API guide to learn more.
Before we start, make sure you already have your PubNub account setup with a new app and keys. Also make sure the application corresponding to your publish and subscribe key has the Presence add-on enabled if you’d like to use Presence features for tracking device connection state and custom attributes.
Note that while the PubNub Javascript SDK is currently up to v4, for compatibility with the PubNub AngularJS SDK, our UI code will use the PubNub JavaScript v3 API syntax.
Getting Started with Clarifai
The next thing you’ll need to get started with Clarifai services is a Clarifai developer account to take advantage of the image recognition APIs.
- Step 1: Sign up for Clarifai.
- Step 2: Go to the Clarifai applications page and create a new application. For this application, we used the “food” image recognition model – you may use an alternate model for your own specific case.
- Step 3: Go to the “application detail” page from the applications list and make note of the client credentials to update the BLOCK below.
Overall, it’s a pretty quick process. And free to get started, which is a bonus!
Setting up the BLOCK
With PubNub BLOCKS, it’s really easy to create code to run in the network. Here’s how to make it happen:
- Step 1: Go to the application instance on the PubNub Admin Dashboard.
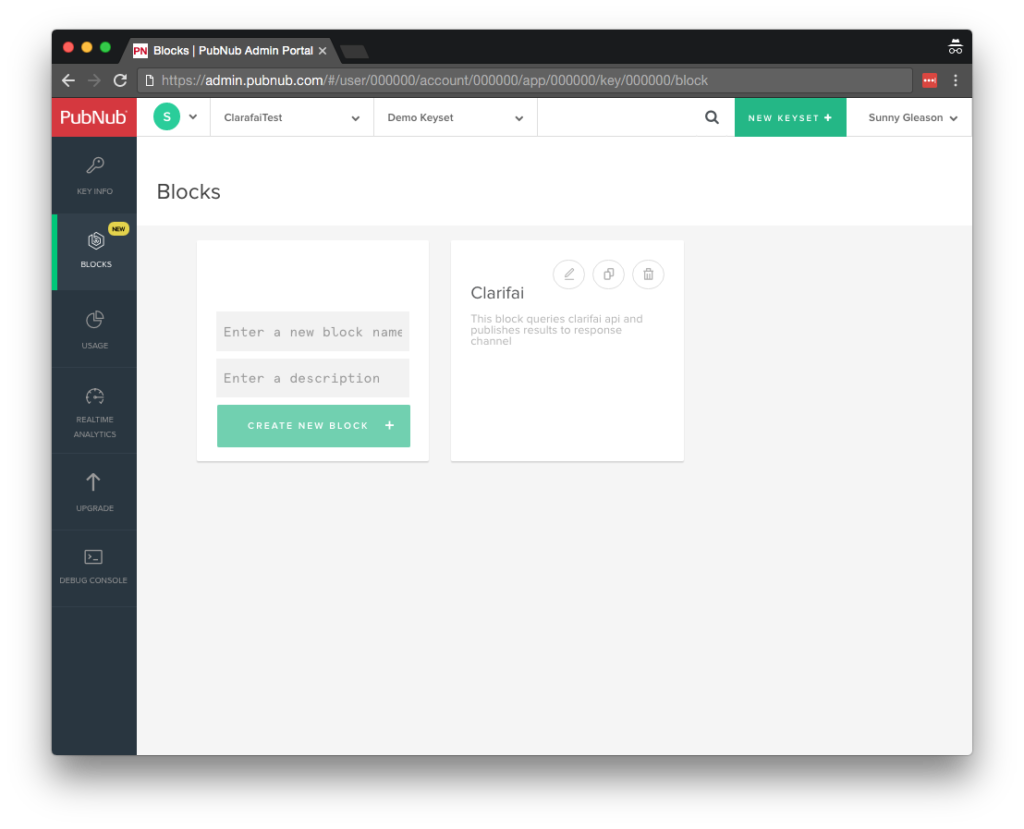
- Step 2: Create a new BLOCK.
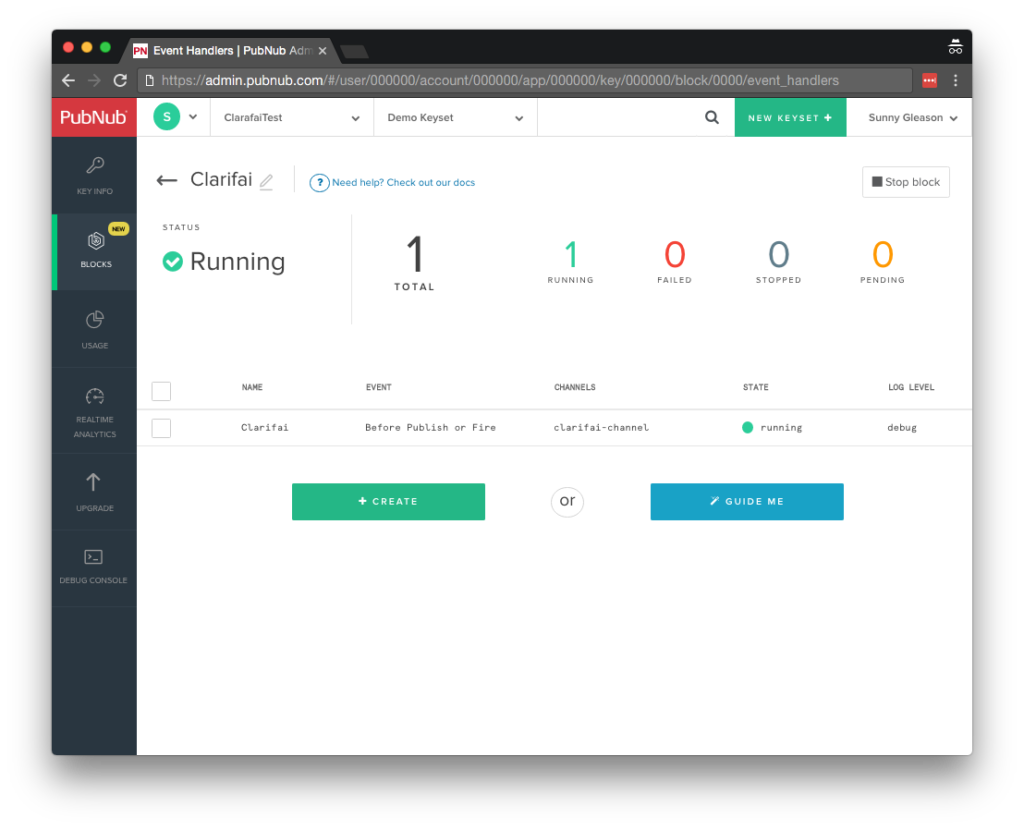
- Step 3: Paste in the BLOCK code from the next section and update the credentials with the Clarifai credentials from the previous steps above.
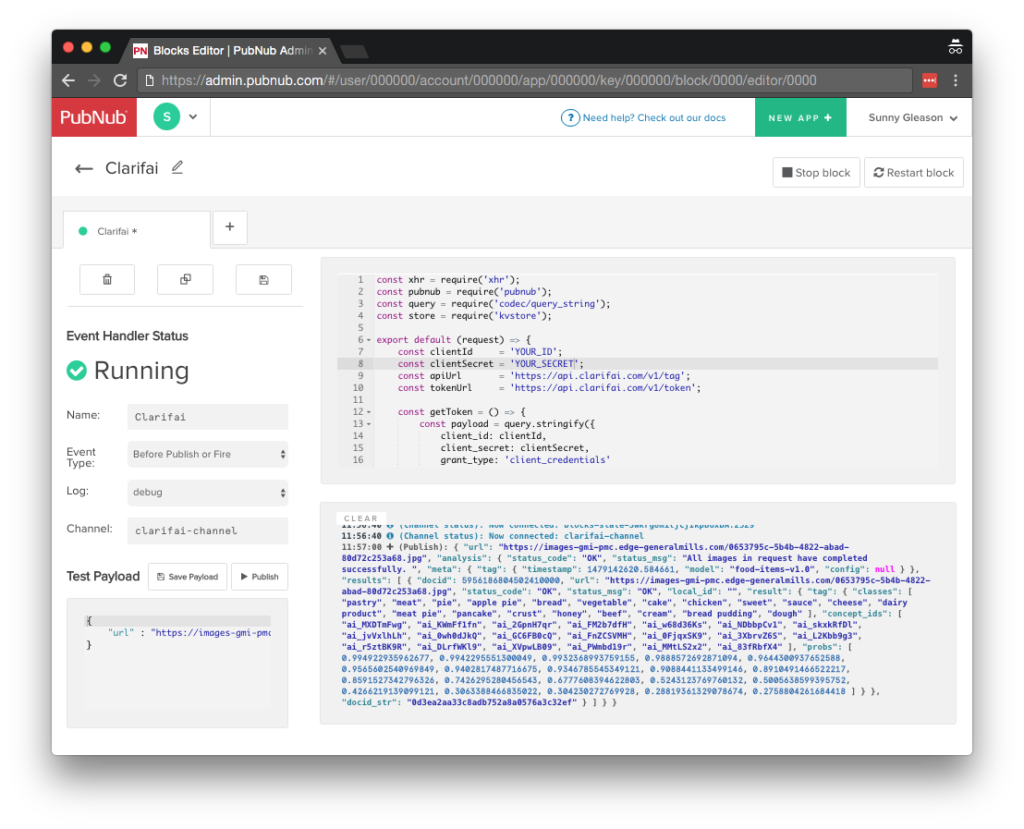
- Step 4: Start the BLOCK, and test it using the “publish message” button and payload on the left-hand side of the screen.
That’s all it takes to create your serverless code running in the cloud!
Diving into the Code – the BLOCK
You’ll want to grab the 69 lines of BLOCK JavaScript and save them to a file, say, pubnub_clarifai.js. It’s available as a Gist on GitHub for your convenience.
First up, we declare our dependencies: xhr (for HTTP requests), query (for query string encoding), and kvstore (for the PubNub BLOCKS KV Store API).
const xhr = require('xhr');
const query = require('codec/query_string');
const store = require('kvstore');
Next, we create a method to handle incoming messages, declare the credential for accessing the Clarifai services, and set up the URLs for talking to the remote web services.
export default (request) => {
    const clientId     = 'YOUR_ID';
    const clientSecret = 'YOUR_SECRET';
    const apiUrl       = 'https://api.clarifai.com/v1/tag';
    const tokenUrl     = 'https://api.clarifai.com/v1/token';
We declare a function that can retrieve an access token from the Clarifai authentication API when we need it. Using the XHR module, we POST the JSON data and receive a JSON result that includes an access_token attribute.
    const getToken = () => {
        const payload = query.stringify({
            client_id: clientId,
            client_secret: clientSecret,
            grant_type: 'client_credentials'
        });
        const httpOptions = {
            headers: {
                'Content-Type': 'application/x-www-form-urlencoded',
                Accept: 'application/json'
            },
            body: payload,
            method: 'post'
        };
        return xhr.fetch(tokenUrl, httpOptions)
        .then(r => {
            const body = JSON.parse(r.body || r);
            return store.set('access_token', body.access_token).then(() => {
                return body.access_token;
            });
        });
    };
Next up, we declare a function that can submit an image URL to the API, receive the result, and decorate the original message with the image recognition data. Note that in some cases, the access token may have expired, so we call the preceding getToken() function to get a new one.
    const getResult = (accessToken) => {
        const queryParams = {
            access_token: accessToken,
            url: request.message.url
        };
        return xhr.fetch(apiUrl + '?' + query.stringify(queryParams))
        .then((r) => {
            const body = JSON.parse(r.body || r);
            if (body.status_code && body.status_code === 'TOKEN_EXPIRED') {
                return store.set('access_token', null).then(() => {
                    return getResult(getToken());
                });
            }
            request.message.analysis = body;
            return request.ok();
        })
        .catch((e) => {
            console.error(e);
        });
    };
Since creating an access token is a heavyweight operation, we use the PubNub KV store to save the access_token and use it when available. If the value is not set, we retrieve a new one.
    return store.get('access_token').then((accessToken) => {
        if (!accessToken) {
            return getResult(getToken());
        } else {
            return getResult(accessToken);
        }
    });
};
OK, let’s move on to the UI!
Diving into the Code – the User Interface
You’ll want to grab the 78 lines of HTML & JavaScript and save them to a file, say, pubnub_clarifai_ui.html.
The first thing you should do after saving the code is to replace two values in the JavaScript:
- YOUR_PUB_KEY: with the PubNub publish key mentioned above.
- YOUR_SUB_KEY: with the PubNub subscribe key mentioned above.
If you don’t, the UI will not be able to communicate with anything and probably clutter your console log with entirely too many errors.
For your convenience, this code is also available as a Gist on GitHub, and a Codepen as well. Enjoy!
Dependencies
First up, we have the JavaScript code & CSS dependencies of our application.
<!doctype html>
<html>
<head>
  <script src="https://cdn.pubnub.com/pubnub-3.15.1.min.js"></script>
  <script src="https://ajax.googleapis.com/ajax/libs/angularjs/1.5.6/angular.min.js"></script>
  <script src="https://cdn.pubnub.com/sdk/pubnub-angular/pubnub-angular-3.2.1.min.js"></script>
  <script src="https://cdnjs.cloudflare.com/ajax/libs/underscore.js/1.8.3/underscore-min.js"></script>
  <link rel="stylesheet" href="//netdna.bootstrapcdn.com/bootstrap/3.0.2/css/bootstrap.min.css" />
  <link rel="stylesheet" href="https://maxcdn.bootstrapcdn.com/font-awesome/4.6.3/css/font-awesome.min.css" />
</head>
<body>
For folks who have done front-end implementation with AngularJS before, these should be the usual suspects:
- PubNub JavaScript client: to connect to our data stream integration channel.
- AngularJS: were you expecting a niftier front-end framework? Impossible!
- PubNub Angular JavaScript client: provides PubNub services in AngularJS quite nicely indeed.
- Underscore.js: we could avoid using Underscore.JS, but then our code would be less awesome.
In addition, we bring in 2 CSS features:
- Bootstrap: in this app, we use it just for vanilla UI presentation.
- Font-Awesome: we love Font Awesome because it lets us use truetype font characters instead of image-based icons. Pretty sweet!
Overall, we were pretty pleased that we could build a nifty UI with so few dependencies. And with that… on to the UI.
The User Interface
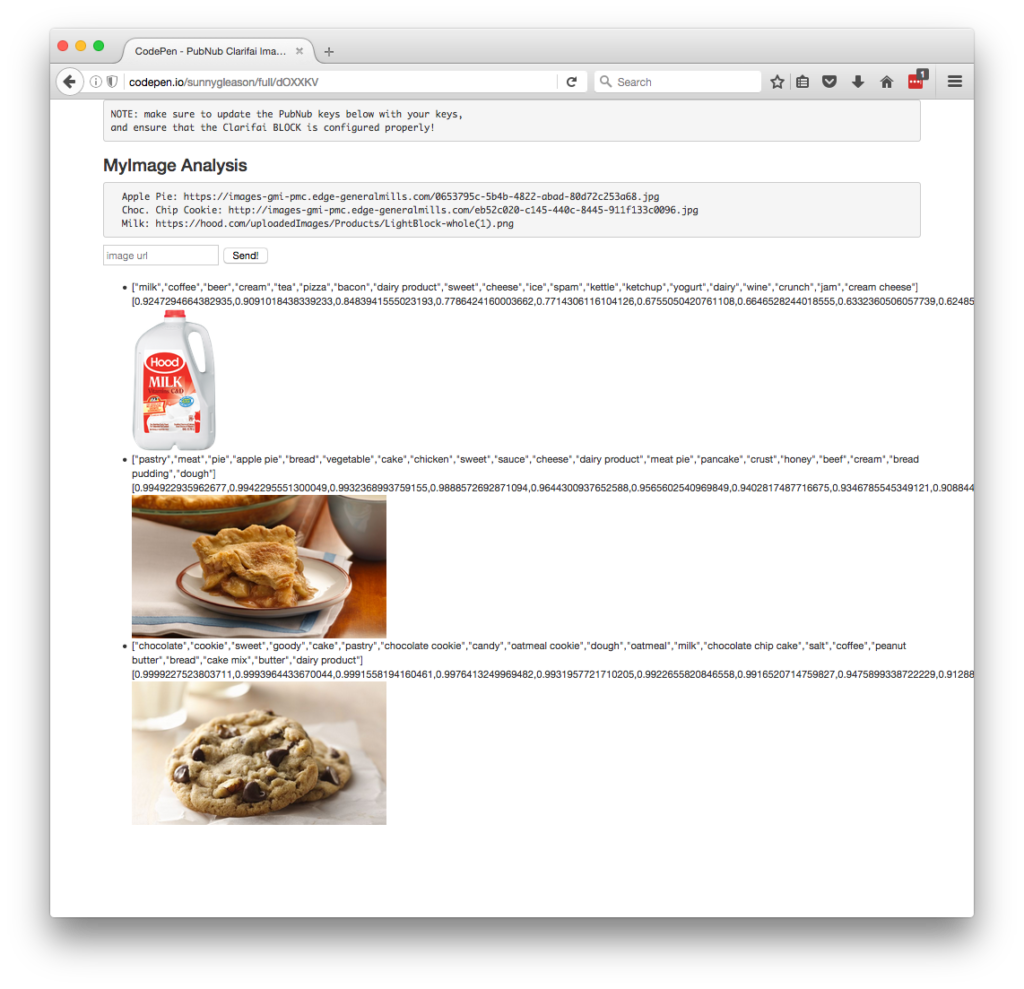
Here’s what we intend the UI to look like:
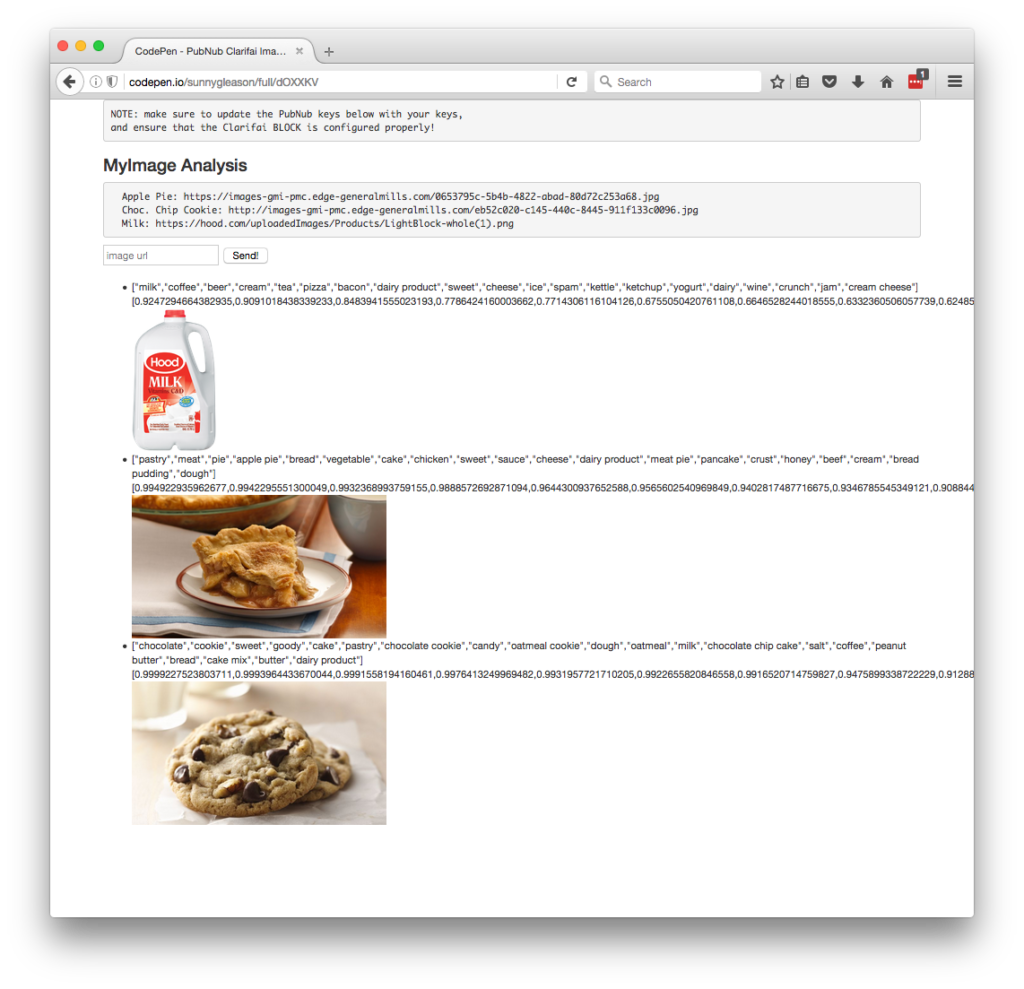
The UI is pretty straightforward – everything is inside a div tag that is managed by a single controller that we’ll set up in the AngularJS code. That h3 heading should be pretty self-explanatory. We also include a few image URLs for testing.
<div class="container" ng-app="PubNubAngularApp" ng-controller="MyImgCtrl">
<pre>
NOTE: make sure to update the PubNub keys below with your keys,
and ensure that the Clarifai BLOCK is configured properly!
</pre>
<h3>MyImage Analysis</h3>
<pre>
  Apple Pie: https://images-gmi-pmc.edge-generalmills.com/0653795c-5b4b-4822-abad-80d72c253a68.jpg
  Choc. Chip Cookie: http://images-gmi-pmc.edge-generalmills.com/eb52c020-c145-440c-8445-911f133c0096.jpg
  Milk: https://hood.com/uploadedImages/Products/LightBlock-whole(1).png
</pre>
We provide a simple text input for an image URL to send to the PubNub channel as well as a button to perform the publish() action.
<input ng-model="toSend" placeholder="image url" />
<input type="button" ng-click="publish()" value="Send!" />
Our UI consists of a simple list of messages. We iterate over the messages in the controller scope using a trusty ng-repeat. Each message includes the image, image recognition tags, and the associated probabilities.
<ul>
  <li ng-repeat="message in messages track by $index">
    {{message.analysis.results[0].result.tag.classes}}
    <br />
    {{message.analysis.results[0].result.tag.probs}}
    <br />
    <img ng-src="{{message.url}}" height="200"></img>
  </li>
</ul>
And that’s it – a functioning realtime UI in just a handful of code (thanks, AngularJS)!
The AngularJS Code
Now we’re ready to dive into the AngularJS code. It’s not a ton of JavaScript, so this should hopefully be pretty straightforward.
The first lines we encounter set up our application (with a necessary dependency on the PubNub AngularJS service) and a single controller (which we dub MyImgCtrl). Both of these values correspond to the ng-app and ng-controller attributes from the preceding UI code.
<script>
angular.module('PubNubAngularApp', ["pubnub.angular.service"])
.controller('MyImgCtrl', function($rootScope, $scope, Pubnub) {
Next up, we initialize a bunch of values. First is an array of message objects which starts out empty. After that, we set up the msgChannel as the channel name where we will send and receive realtime structured data messages.
Note: make sure this matches the channel specified by your BLOCK configuration.
  $scope.messages     = [];
  $scope.msgChannel   = 'clarifai-channel';
We initialize the Pubnub object with our PubNub publish and subscribe keys mentioned above, and set a scope variable to make sure the initialization only occurs once. NOTE: this uses the v3 API syntax.
  if (!$rootScope.initialized) {
    Pubnub.init({
      publish_key: 'YOUR_PUB_KEY',
      subscribe_key: 'YOUR_SUB_KEY',
      ssl:true
    });
    $rootScope.initialized = true;
  }
The next thing we’ll need is a realtime message callback called msgCallback; it takes care of all the realtime messages we need to handle from PubNub. In our case, we have only one scenario – an incoming message containing the image URL and image recognition data.
We push the message object onto the scope array; that push() operation should be in a $scope.$apply() call so that AngularJS gets the idea that a change came in asynchronously.
  var msgCallback = function(payload) {
    $scope.$apply(function() {
      $scope.messages.push(payload);
    });
  };
The publish() function takes the contents of the text input, publishes it as a structured data object to the PubNub channel, and resets the text box to empty.
  $scope.publish = function() {
    Pubnub.publish({
      channel: $scope.msgChannel,
      message: {url:$scope.toSend}
    });
    $scope.toSend = "";
  };
Lastly, in the main body of the controller, we subscribe() to the message channel (using the JavaScript v3 API syntax) and bind the events to the callback function we just created.
Pubnub.subscribe({ channel: [$scope.msgChannel], message: msgCallback });
We mustn’t forget close out the HTML tags accordingly.
});
</script>
</body>
</html>
Not too shabby for about eighty lines of HTML & JavaScript!
Conclusion
Thank you so much for joining us in exploring the capabilities of Clarifai image recognition embedded into a realtime data stream application using PubNub! Hopefully it’s been a useful experience learning about these AI-enabled technologies that will guide the way towards adoption of additional groundbreaking services to give your own custom applications a leg up in the physical world.
We’ve been pleasantly surprised by how easy it is to integrate these features into our applications, and we can’t wait to see what interesting applications the wider community comes up with next!


