IN THIS ARTICLE
SendGrid is a powerful service that developers can use to send customized transactional emails to users who interact with input fields on a website or mobile application.
Transactional Email Templates allow businesses to design custom HTML and CSS styled emails in the SendGrid Admin Portal, which can be triggered and sent out with a simple API call. And now, developers can use the SendGrid Transactional Email Templates Block to easily signal the SendGrid API to send an email by simply passing a name and email. In this post, you will learn how to send your first automated email with SendGrid in a couple steps.
Create a Dynamic Transactional Template in SendGrid
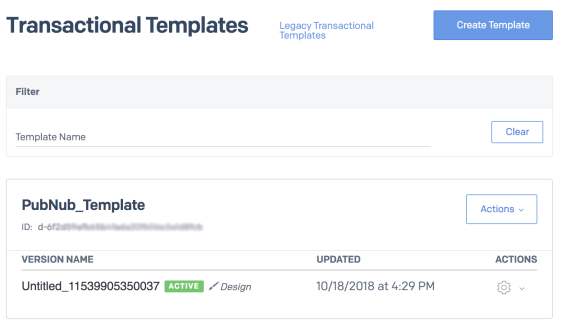
To create your first custom email Template, visit SendGrid, and sign up for a free account. You may have to skip through the getting started tutorial, but once you have reached the main administrative dashboard, you can select the Templates option on the left sidebar. Click the Create Template button, which will generate your unique template ID which can be found where the blurred text is located in the screenshot below.
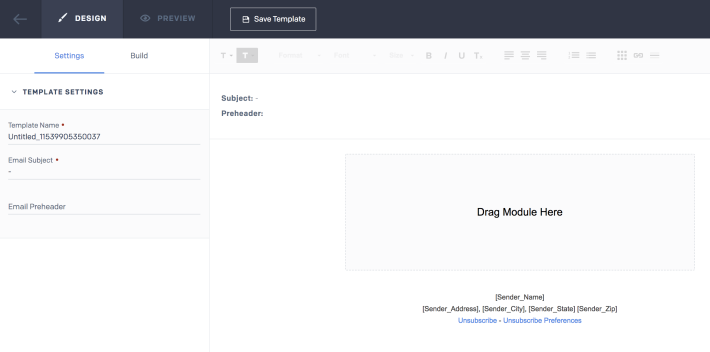
After you create your template, you can edit the design and layout by using the template creator. You can also use HTML and CSS to customize your template, and use variable substitutions to pass the users name, email etc. In order to test out to see if your transactional template is working correctly, you can enter your API Key on the SendGrid Create Template Documentation Page and see if your user profile settings are set up correctly.
Send an Automatic Email with SendGrid
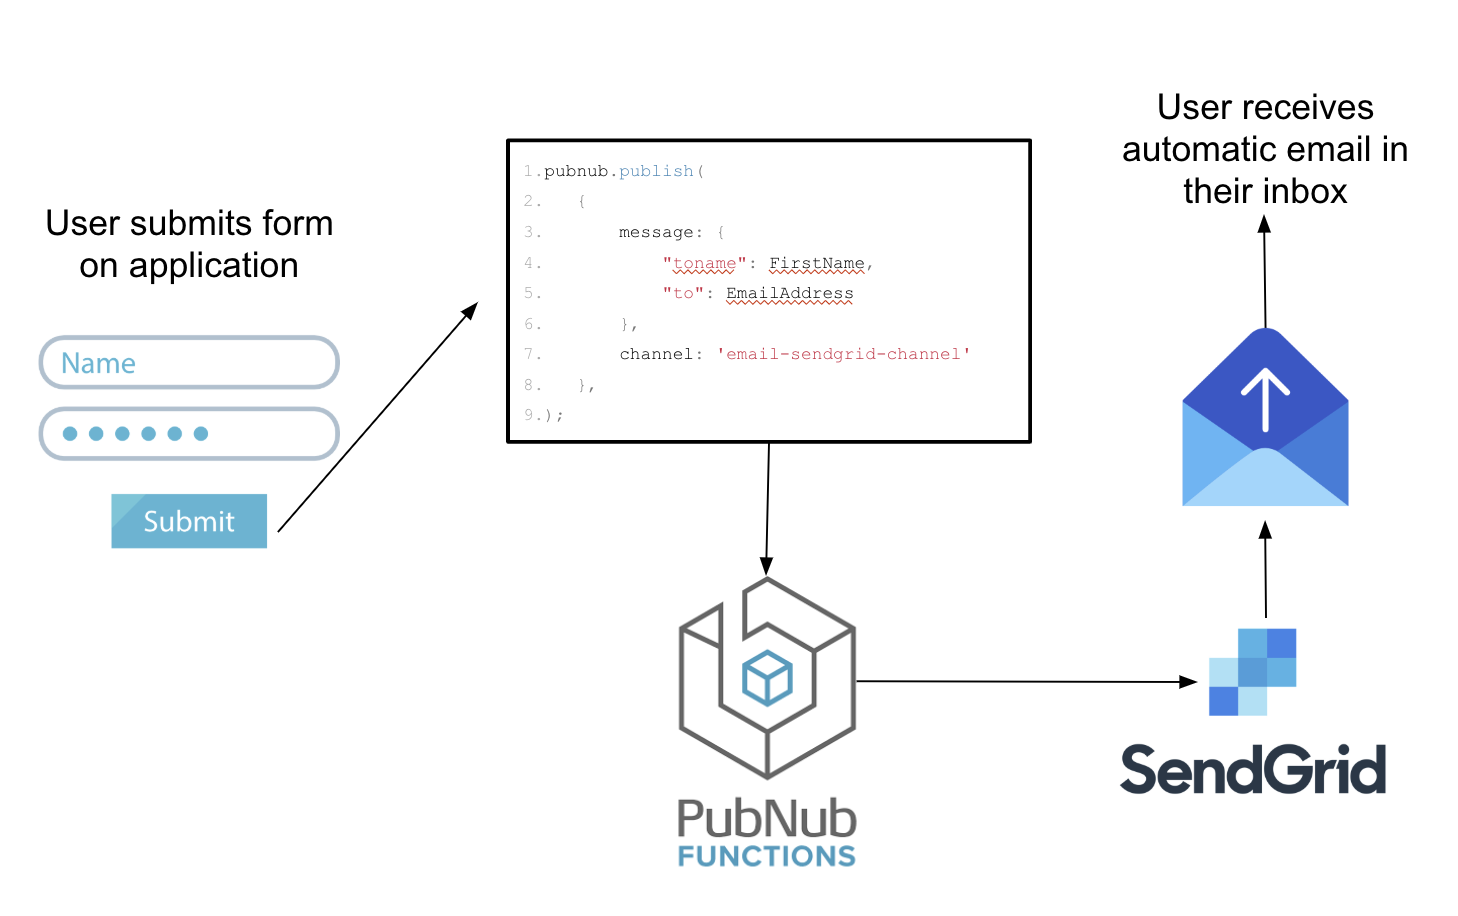
The chart below explains the flow of how your application is going to communicate with SendGrid in order to send out an automatic email to your users. When a user submits the web form containing their name and email, a PubNub publish message is sent which is intercepted by a serverless PubNub Function. The PubNub Function picks apart the data, and formats it into an XHR POST which is then used by SendGrid to send the automated email to the right destination.
Once you have successfully created your dynamic template, the next step is implementing PubNub into your application and sending your first publish message. To get started, sign up for a free PubNub account by Registering below, which will generate your Publish/Subscribe keys:
Once you have your keys, import the PubNub JavaScript SDK into your project and initiate PubNub.
<script src="https://cdn.pubnub.com/sdk/javascript/pubnub.4.21.6.js"></script>
<script>
    var pubnub = new PubNub({
        publishKey : 'pub-c-xxxxxxxxxxxxx',
        subscribeKey : 'sub-c-xxxxxxxxxxxxx'
    })
</script>
Next, send a PubNub publish message which includes the name and email of the individual you want to receive the automated email:
pubnub.publish(
    {
        message: {
            "toname": FirstName,
            "to": EmailAddress
        },
        channel: 'email-sendgrid-channel'
    },
    function(status, response){
        if(status.error){
            console.log(status)
        }
    }
);
After you have written your front-end code, visit the PubNub Blocks Catalog and deploy the SendGrid Block under your newly created PubNub application.
In order to send your first email, add your SendGrid API key to your PubNub Function Vault by clicking My Secrets on the left-hand side of the screen. To add your API Key, add Bearer in front of your API Key and then click the save button.
Once your API Key has been added to the PubNub Vault, add your Template ID in the JSON body of the PubNub Function located in the SendGrid Portal. Fill in the email you want it to be sent by, and what email users will reply to when they try replying to the email. All of those settings can be set by you manually in the PubNub Function below.
const xhr = require('xhr');
const vault = require('vault');
/*
* Sends an email using SendGrid’s v3 Dynamic Template API
* You must set up a transactional template in your SendGrid admin panel.
* This event handler is an After Publish or Fire event handler.
* The request.message object that is send via PubNub publish should look like:
   {
       'toname': 'Full Name',
       'to': 'MyEmail@gmail.com'
   }
*/
export default (request) => {
   const apiUrl = 'https://api.sendgrid.com/v3/mail/send';
   // Add your SendGrid API key to the PubNub Vault as a string
   // Key should be SENDGRID_API_KEY and value should be 'Bearer SG.apixxx'
   return vault.get('SENDGRID_API_KEY').then((API_KEY) => {
       const http_options = {
           'method': 'POST',
           'headers': {
               'Content-Type': 'application/json',
               'Authorization': API_KEY
            },
           'body': JSON.stringify({
             'personalizations': [
               {
                 'to': [
                   {
                     'email': request.message.to,
                     'name': request.message.toname
                   }
                 ],
                 'dynamic_template_data': {
                   'guest': request.message.toname,
                   'english': true,
                 }
               }
             ],
             'from': {
               'email': 'your@email.com',
               'name': 'Your Company Name'
             },
             'reply_to': {
               'email': 'yourreply@email.com',
               'name': 'Your Company Name'
             },
             'template_id': 'd-ddxxxxxxxxxxxxxxxxx'
            })
       };
       // Get the template ID at https://sendgrid.com/dynamic_templates
       return xhr.fetch(apiUrl, http_options).then((sendGridApiResponse) => {
           if (sendGridApiResponse.status > 300) console.error(JSON.stringify(sendGridApiResponse));
           return request.ok();
       })
   });
};
Testing your Email Automation Script
Once your PubNub Function has been created, Start the module and test out the application. ![]()
You should now see that everytime a PubNub publish is sent with the desired JSON data, it will automatically send out an email with the template you created in the SendGrid portal. If you have any questions on SendGrids V3 API, or PubNub’s integration, feel free to reach out to us at devrel@pubnub.com


