

IN THIS ARTICLE
When building mobile applications, it is tough to think of a use case where you don’t need to notify users with realtime updates. For example, let’s consider the following scenario: You are developing a realtime sports application which feeds its users critical news during a game. A key feature to the app would be to send reliable push notifications to the users as soon as their favorite team scores.
Each mobile operating system provides its own solution for native application push notifications and it can be tricky to integrate push notifications into your app. In Android, the mechanism native applications use for push notifications is Firebase Cloud Messaging (FCM) notifications. PubNub has taken FCM one step further and integrated the use of Firebase Cloud Messaging notifications into the PubNub Data Stream Network.
When an app is in the foreground, PubNub’s channels will do a great job of providing realtime data streams. The tricky case happens when the app is in the background, when the user has their phone locked, and especially when the user has intermittent access to an internet connection via WiFi or LTE. To cope with these tricky cases, the easiest solution is to implement mobile push notifications.
How does FCM for Push Notifications Work?
FCM is a free service from Google that lets users reliably deliver push notifications at no cost.
You can send two types of messages to your app with FCM:
- Notification messages, sometimes thought of as “display messages.” These are handled by the FCM SDK automatically.
- Data messages, which are handled by the client app.
- Notification messages contain a predefined set of user-visible keys and can contain an optional data payload.
- Data messages contain only your user-defined custom key-value pairs.
- Maximum payload for both message types is 4KB.
You can send a data message, notification message, or both, but it does matter if you only send a data message because your code is explicitly responsible for displaying the push notification. A notification message will be automatically handled by FCM to display the notification payload.
You should use notification messages when you want FCM to handle displaying a notification on your client app’s behalf and you should use data messages when you want to process the messages on your client app. You can send a notification message including an optional data payload and FCM will handle displaying the notification payload while your client app handles the data payload.
The FCM system considers 3 parties:
- The client application.
- Google’s FCM servers.
- Your 3rd party push server.
When a user installs an application, it must register itself to enable FCM. Here is the FCM workflow for sending a notification:
-
- Your 3rd party push server sends the push notification to Google’s FCM servers. This is the part PubNub can replace and simplify.
- These servers relay the message to all your registered mobile applications.
- Messages are stored for devices that are offline.
- As soon as a device comes back online, FCM servers relay the queued message.
- The messages are received on the user’s device and presented according to the platform-specific implementation.
How is PubNub Used With Push Notifications?
If you are using PubNub Realtime Messaging, you are already communicating in realtime with all of your devices – but if you want to send push notifications for a native Android experience, FCM is a great ally.
If your application is destined for multiple platforms, PubNub makes your life easier by supporting Apple Push Notification Service (APNs) and FCM out of the box. Even if you don’t support multiple platforms yet, using the PubNub support for FCM will streamline your code by using a single set of libraries for PubNub Data Streams as well as FCM notifications.
PubNub has an easy integration with FCM. A PubNub channel replaces the third party servers which send these notifications to Google’s FCM servers. You may have any registered endpoint send a push notification to your connected devices.
This allows the application to send push notifications to devices registered on specific channels in no time. It combines the native Android Notification API from Google with the realtime data stream network of PubNub. Your notifications will be natively understood by any Android device. If you already have FCM on your application and are considering using PubNub, you’ll hardly have to change anything about your app, most likely removing code!
Going back to the sports news app scenario, you can have your sports critic send the score in realtime from their phone and trigger a push notification to the rest of the audience’s devices. PubNub makes it simple – additional servers that you have to operate can be ruled out of the equation and with auto-scaling managed by PubNub!
Firebase Cloud Messaging (FCM) is a rebranding of Google Cloud Messaging (GCM) and there is no functional difference to handle it in PubNub. FCM should be used instead if you see references to GCM.
Getting Started
Want to download the completed project? Find it in my PubNub Android Notifications Repository.
In this tutorial, we’ll create a new Android app, setup FCM push notifications, enable PubNub push notifications, and configure the PubNub Android SDK to receive push notifications. You’ll first need to sign up for an always free PubNub account. Once you sign up, create a new app, and then get your unique PubNub keys from the PubNub Admin Dashboard. Record the Publish Key and Subscribe Key so you can use them later.

Create a New Android App
Skip this section if you already have an app that you want to use with FCM and PubNub.
Install the Java SE Development Kit (JDK 8 or never).
Download and install Android Studio.
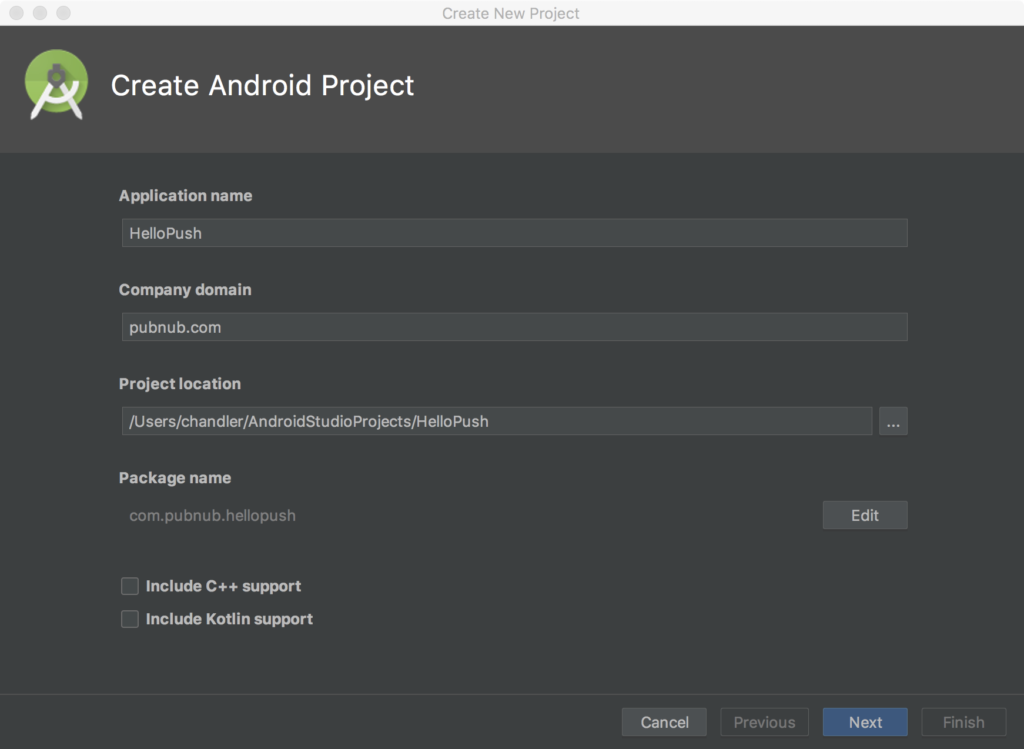
In the Welcome to Android Studio window, click “Start a new Android Studio project”.
Set the Application Name, Company Domain, and you may want to change the project location. If you want to write a Kotlin app, check the Include Kotlin support checkbox. Take note of the package name, you’ll need it later. Leave the other options as they are. Click “Next”.
Set the Minimum SDK to “API23: Android 6.0 (Mashmallow)”. Click “Next”.
Select “Empty Activity”. Click “Next”. Keep the default values and click “Finish”.
Adding Firebase Cloud Messaging
Create or log in to a Firebase account.
Click “Add project” in your Firebase console.

Set the project name and locations.

Then add firebase to your Android app.

Enter the package name and a nickname for your app. You can find the package name for your app at the top of “android/app/src/main/java/com/[YourAppName]/MainApplication.java”. Omit the SHA-1 (not needed in this tutorial). Click “Register app”.
Download the google-services.json file into your Android app module root directory. Do not add the Firebase SDK. Skip to the Firebase console and continue with the steps in this tutorial for adding the Firebase SDK and the PubNub SDK into your app.

Go to your PubNub Admin Dashboard, select your app, and then select your keyset.
Scroll down to “Mobile Push Notifications”, enable the Push Notifications add-on (if not already enabled), and enter the API key for the app you just created in the Firebase console. You can find your API key (listed as Server key in the Firebase console) by going to “Project Overview” in the left sidebar, click on the kebob menu button (“⋮“) located at the top right of your app’s metrics, click on “Settings”, and select the “Cloud Messaging” tab.
Configure FCM and PubNub
Edit your project-level build.gradle (<project>/build.gradle) file and add the following line:
buildscript {
  dependencies {
    // Add this line
    classpath 'com.google.gms:google-services:4.0.1'
  }
}
After adding this, you will see a yellow message, asking you to sync the project. Ignore it at the moment.
Edit your app-level build.gradle (<project>/<app-module>/build.gradle) file and add the following:
dependencies {
  // Add this line.
  implementation 'com.google.firebase:firebase-core:16.0.1'
  // Firebase Messaging library for sending push notifications. Add this line.
  implementation 'com.google.firebase:firebase-messaging:17.3.3'
  // PubNub Android SDK. Add this line.
  implementation group: 'com.pubnub', name: 'pubnub-gson', version: '4.20.0'
}
...
// Add to the bottom of the file
apply plugin: 'com.google.gms.google-services' Edit your MainActivity.java file to initialize the PubNub Android SDK. You also must create notification channels for Android API level 26+ to display push notifications.
package com.pubnub.hellopush;
import android.support.v7.app.AppCompatActivity;
import android.os.Bundle;
import android.app.Notification;
import android.app.NotificationChannel;
import android.app.NotificationManager;
import android.content.Context;
import android.graphics.Color;
import android.os.Build;
import com.pubnub.api.PNConfiguration;
import com.pubnub.api.PubNub;
public class MainActivity extends AppCompatActivity {
    public static PubNub pubnub; // PubNub instance
    @Override
    protected void onCreate(Bundle savedInstanceState) {
        super.onCreate(savedInstanceState);
        setContentView(R.layout.activity_main);
        initPubnub();
        createChannel();
    }
    // Creates PubNub instance with your PubNub credentials. https://admin.pubnub.com/
    // This instance will be used when we need to create connection to PubNub.
    private void initPubnub() {
        PNConfiguration pnConfiguration = new PNConfiguration();
        pnConfiguration.setPublishKey("YOUR_PUB_KEY_HERE");
        pnConfiguration.setSubscribeKey("YOUR_SUB_KEY_HERE");
        pnConfiguration.setSecure(true);
        pubnub = new PubNub(pnConfiguration);
    }
    // Creates notification channel.
    private void createChannel() {
        // Notification channel should only be created for devices running Android API level 26+.
        if (Build.VERSION.SDK_INT >= Build.VERSION_CODES.O) {
            NotificationManager notificationManager = (NotificationManager) getSystemService(Context.NOTIFICATION_SERVICE);
            NotificationChannel chan1 = new NotificationChannel(
                    "default",
                    "default",
                    NotificationManager.IMPORTANCE_NONE);
            chan1.setLightColor(Color.TRANSPARENT);
            chan1.setLockscreenVisibility(Notification.VISIBILITY_SECRET);
            notificationManager.createNotificationChannel(chan1);
        }
    }
}
Get your unique PubNub keys from the PubNub Admin Dashboard. Replace “YOUR_PUB_KEY_HERE” and “YOUR_SUB_KEY_HERE” with your keys from the PubNub Admin Dashboard.
You need to add a service to get the device token and a method to send the token to your registration server (PubNub). Using the PubNub Android SDK associate a channel to a registration token. To be able to process data messages or handle displaying notification messages while in the foreground, you must also add a service which extends FirebaseMessagingService.
In the project explorer, expand the “app > java > [package name]” directories. Then right click and select “New > Java Class”. Name the class “MyFirebaseMessageService.Java”.
package com.pubnub.hellopush;
import android.util.Log;
import com.google.firebase.messaging.FirebaseMessagingService;
import com.google.firebase.messaging.RemoteMessage;
import com.pubnub.api.callbacks.PNCallback;
import com.pubnub.api.enums.PNPushType;
import com.pubnub.api.models.consumer.PNStatus;
import com.pubnub.api.models.consumer.push.PNPushAddChannelResult;
import java.util.Arrays;
public class MyFirebaseMessagingService extends FirebaseMessagingService {
    private static final String TAG = "FirebaseService";
    @Override
    public void onNewToken(String token) {
        super.onNewToken(token);
        Log.d(TAG,"NEW_TOKEN: "+token);
        sendRegistrationToPubNub(token);
    }
    @Override
    public void onMessageReceived(RemoteMessage remoteMessage) {
        // If the application is in the foreground handle or display both data and notification FCM messages here.
        // Here is where you can display your own notifications built from a received FCM message.
        super.onMessageReceived(remoteMessage);
        Log.d(TAG, "From: " + remoteMessage.getFrom());
        if (remoteMessage.getData().size() > 0) {
            Log.d(TAG, "Message data payload: " + remoteMessage.getData());
        }
        if (remoteMessage.getNotification() != null) {
            Log.d(TAG, "Message Notification Body: " + remoteMessage.getNotification().getBody());
        }
        // displayNotification(remoteMessage.getNotification().getBody());
    }
    private void sendRegistrationToPubNub(String token) {
        // Configure PubNub push notifications.
        MainActivity.pubnub.addPushNotificationsOnChannels()
            .pushType(PNPushType.GCM)
            .channels(Arrays.asList("HelloPush", "TestPushChannel"))
            .deviceId(token)
            .async(new PNCallback<PNPushAddChannelResult>() {
                @Override
                public void onResponse(PNPushAddChannelResult result, PNStatus status) {
                    Log.d("PUBNUB", "-->PNStatus.getStatusCode = " + status.getStatusCode());
                }
            });
    }
}
Add the class into your AndroidManifest.xml file.
<service android:name=".MyFirebaseMessagingService">
    <intent-filter>
        <action android:name="com.google.firebase.MESSAGING_EVENT"/>
    </intent-filter>
</service>
Add these permissions in your AndroidManifest.xml file before the <application> tag.
<uses-permission android:name="android.permission.INTERNET" />
<uses-permission android:name="android.permission.ACCESS_NETWORK_STATE"/>
Sending Push Notifications From PubNub
Build and run your app on an Android device or with an Android emulator.
You can send push notifications with PubNub by publishing a message to the channel or channels that the devices were added to. It’s important to note that the devices don’t need to subscribe to a channel to receive notifications for that channel. The devices only need to register to the channel for push notifications and then they will receive push notifications for any messages that have push notifications keys for that device type.
- Associated FCM devices will receive only the data within the
pn_gcmkey. - Native PubNub subscribers will receive the entire object literal, including the notification keys.
In this tutorial, you registered the device to the “Notifications” channel. Any messages sent to that channel with pn_gcm keys will be sent as a push notification to registered devices.
The easiest way to test push notifications is to send them from the PubNub Debug Console from within the PubNub Admin Dashboard.
Go to your PubNub Admin Dashboard, select your app, and then select your keyset.
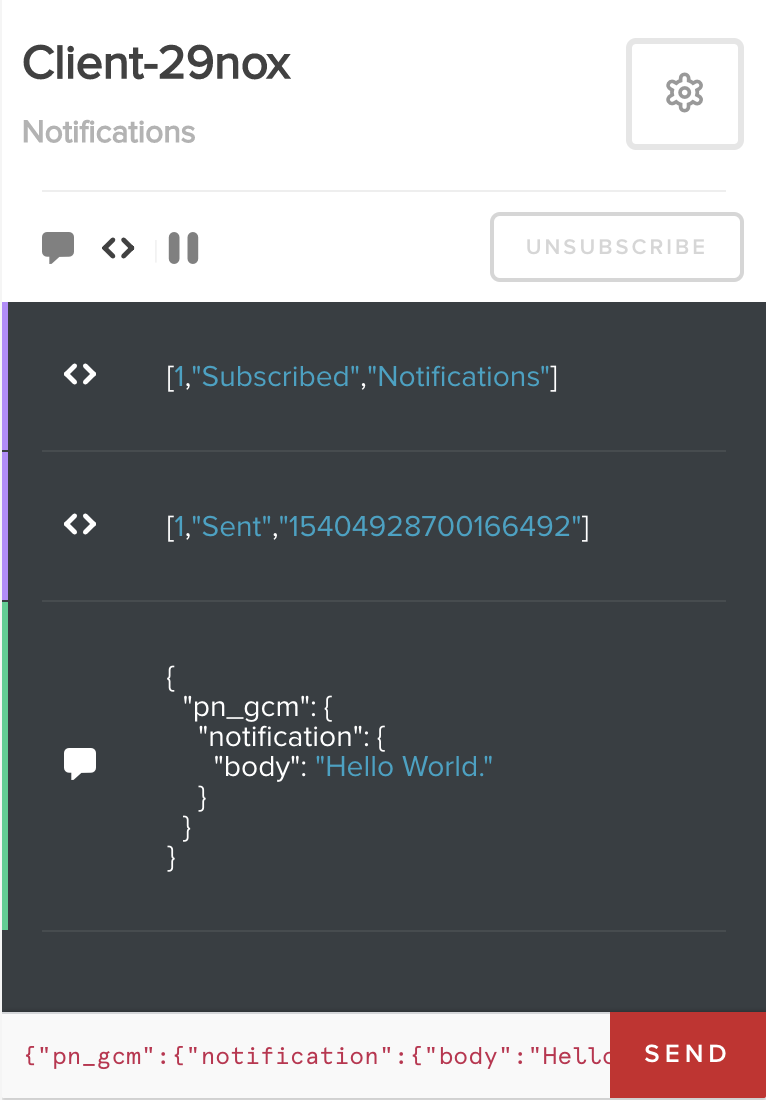
Click “Debug Console” and create a client with “Default Channel” set to Notifications.
With the client you just created you can send a notification to your device by sending a message containing the pn_gcm keys.
Send an Android push notification using the notification key:
{"pn_gcm":{"notification":{"body":"Hello World."}}} Refer to the troubleshooting guide if you have issues sending push notifications.
Have suggestions or questions about the content of this post? Reach out at devrel@pubnub.com.
Try PubNub today!


