IN THIS ARTICLE
 As a novice to the Raspberry Pi world, I thought it might be fun to tinker with the Raspberry Pi and connect it to live, streaming data on PubNub.
Spoiler alert: it was fun!
I created a Raspberry Pi LED display that lights up based on simulated market orders. So if the order quantity is between 100-200, a green light turns on. If the quantity changes to greater than 200 or greater than 400, a yellow and red light turn on respectively.
LED Market Quote Application
It’s a random use case but you could imagine that these triggers could be based on individual stock pricing throughout the day. Day traders may want to start buying under a certain price point signified by a green light and sell over a certain price, or when the red light turns on.
For those of you out there that might also want to create your own DIY PubNub + Raspberry Pi project, I’ve listed out the steps I took for my demo below.
Feel free to download the code and try it out yourself. And, if you have your own embedded device projects using PubNub, Tweet me @rohinip because I’d love to hear about it!
Step 1: Boot Up and Connect to the Raspberry Pi
First things first, you’ll need a Raspberry Pi with the right SD card, cables, power supply, Internet connection, and peripherals. Raspberry Pi has a great quick start guide on it’s website that outlines all of these requirements in more detail.
Step 2: Learn the Basic Commands
The best way I found to learn the command line interface for the Raspberry Pi was to step through their online Raspberry Pi demos.
Step 3: Get a PubNub Account
Got all that so far? Okay, so now you have your Raspberry Pi and it’s alive.
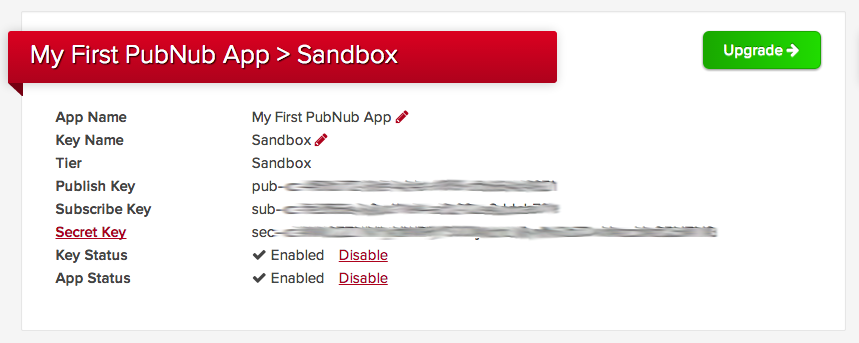
Next, you’ll have to create a free PubNub account if you don’t already have one. Don’t worry, it’s free and takes about 2 minutes to get started. From your PubNub Admin Dashboard, you’ll need your account’s publish key later on to finish this demo. We’ll come back to this in a bit.
Step 4: Wire Everything Up
Now let’s take a moment to reassess. You have your Raspberry Pi and PubNub components ready for action.
So let’s get the lights in place! Grab some LEDs, resistors, jumper wires, and a breadboard. If you don’t already have these pieces, you should be able to find a starter kit with everything included at your favorite online store.
To connect these components and get everything wired up, I used the first two sections of this tutorial:
- https://projects.drogon.net/raspberry-pi/gpio-examples/tux-crossing/gpio-examples-1-a-single-led/
- https://projects.drogon.net/raspberry-pi/gpio-examples/tux-crossing/2-two-more-leds/
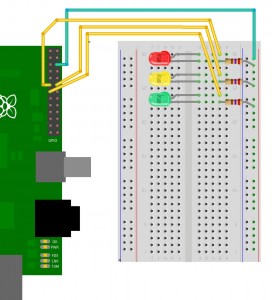
Now you should have a breadboard that looks something like this:
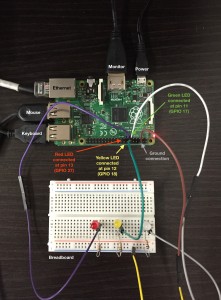
To give myself a little more room on the board, I connected my LEDs to different pins further down than the diagram above. As long as you know which programmable GPIO pins control which LEDs, that’s fine. (A cheatsheet of the pin numbers should come with your Raspberry Pi and look something like this).
Hopefully through the tutorial pages listed above you can now turn lights on and off from the command line!
Step 5: Clone the PubNub Raspberry Pi Client
Next, install the PubNub Python client with pip:
pip install pubnub Step 6: Copy the Market Orders Python Script
On my Raspberry Pi, I created a new Python file called ‘pnLED.py’ which you can view below and download here. This script uses the same GPIO controls that you tested in step #4 above (lines 6-16). Remember to change the pin numbers according to your own breadboard setup.
In line 19, replace the Publish key with your own personal key available in your PubNub Admin Dashboard (the same one that was created with your new PubNub account in step #3 above).
For this particular demo, we will be leveraging the simulated Market Orders data stream available for free from PubNub. The output message payload of this stream includes a key called ‘order_quantity’. This is what we will use as a trigger point to turn on the green, yellow, and red LED lights (lines 32-37 in the code).
Step 7: Run the Code
Once you’ve saved the pnLED.py file on your own Raspberry Pi, you can run the code in the command line like so:
python pnLED.py
In your console, you should see all of the messages coming through the stream in realtime and also see your Raspberry Pi LEDs blinking the appropriate colors in unison. Yay!
Quick tip: hit Ctrl + C to stop the script and get back to the command line.
Step 8: Clean Up
Now that you’ve made the magic happen, remember to gracefully shutdown your Raspberry Pi by using the command:
sudo shutdown -h now
Step 9: Celebrate!
Ta da! You’ve now built a Raspberry Pi project using the power of the PubNub Data Stream Network!
A big thanks to @pubnubGeremy for his patience answering my random questions and for sage advice like “if you smell something burning, you’ve probably forgotten to use the resistor”.


