IN THIS ARTICLE
What is littleBits?
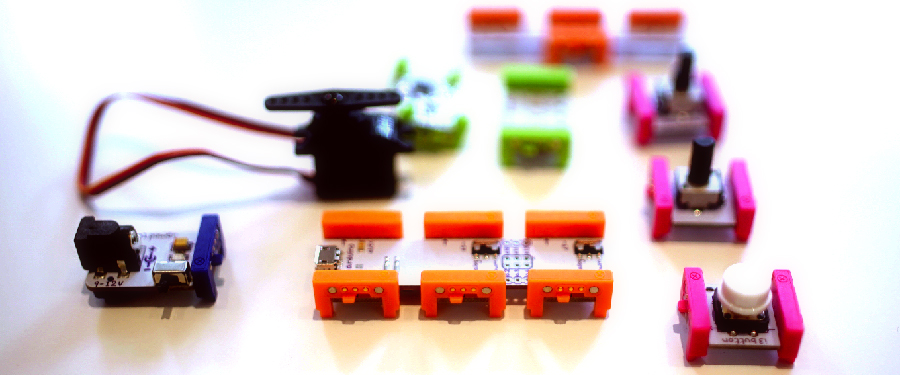
If you live in San Francisco Bay Area, you probably have seen littleBits ads all over at BART stations and have wondered what they are. These orange, pink, blue, and green Lego-like pieces are amazing tools to learn about electronics and create prototypes of your ideas.
littleBits is a open-source library of electric modules that you can snap together with magnets. There are over 60 modules and more than 150,000 possible circuit combinations. littleBits works with no programming, however, you can snap modules with Arduino and easily incorporate programming into the circuits.
I love crafty things, and have no background in electrical engineering. I can crochet but don’t know how to solder or wire. So, littleBits Arduino at Heart module was naturally my first choice of microcontroller to play with. Also, as a front-end developer, my choice of programming language is JavaScript so I decided to code in node.js, using Johnny-Five. I would like to share my experience step-by-step, so read on!
Blink an LED when somebody tweets something!
As an easy initial project, I connected Twitter to littleBits using Twitter data stream. When somebody tweets the queries that you enter from the web form, it notifies by blinking LED. Take a look at the Vine!
In this article, I will walk through the process to create a simpler version of the demo, sans the web client. However, the entire source code with front-end code is on GitHub repo, if you would like to check out!
Setting up the Arduino at Heart Board
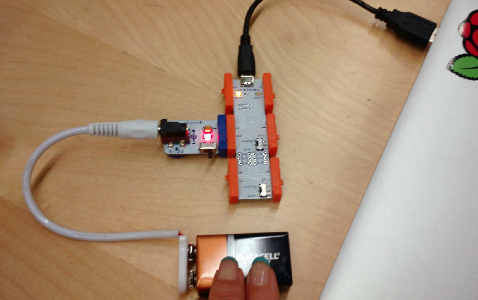
Let’s get started with littleBits with Arduino at Heart. This procedure is for the very first time use only. Skip this if you already have used littleBits before. You’ll need:
- Arduino at Heart module
- Power module
- 9V battery
- USB cable to connect to your computer
Then, connect them as shown below:
Meanwhile, download Arduino IDE and install to your computer. You will need the IDE only for the initial setup.
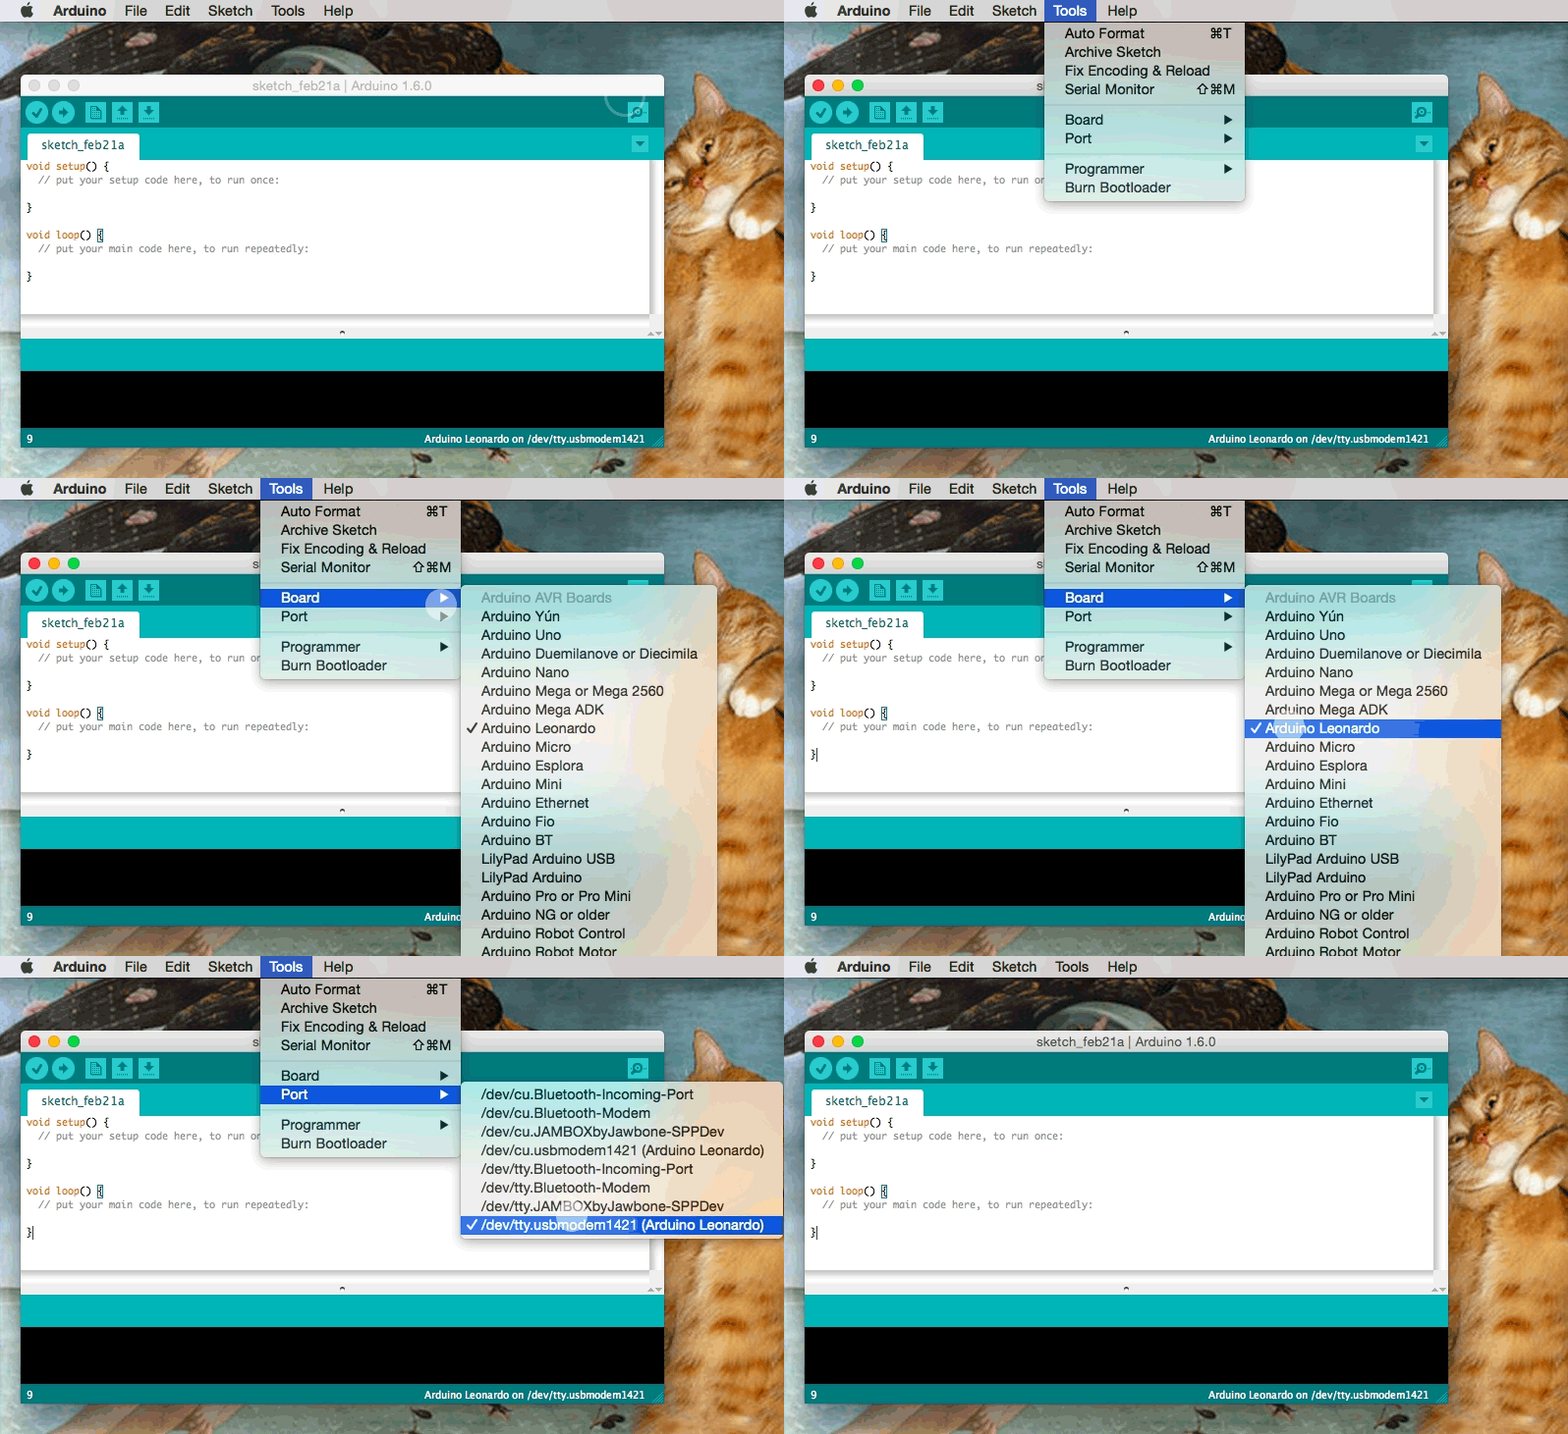
You won’t need it anymore unless you want to keep using. On Arduino IDE, go to Tools > Port and make sure the right board (“Arduino Leonard””) is connected to the right port (“tty.usbmodem…” for Mac, “cu.usbmodem…” for Windows).
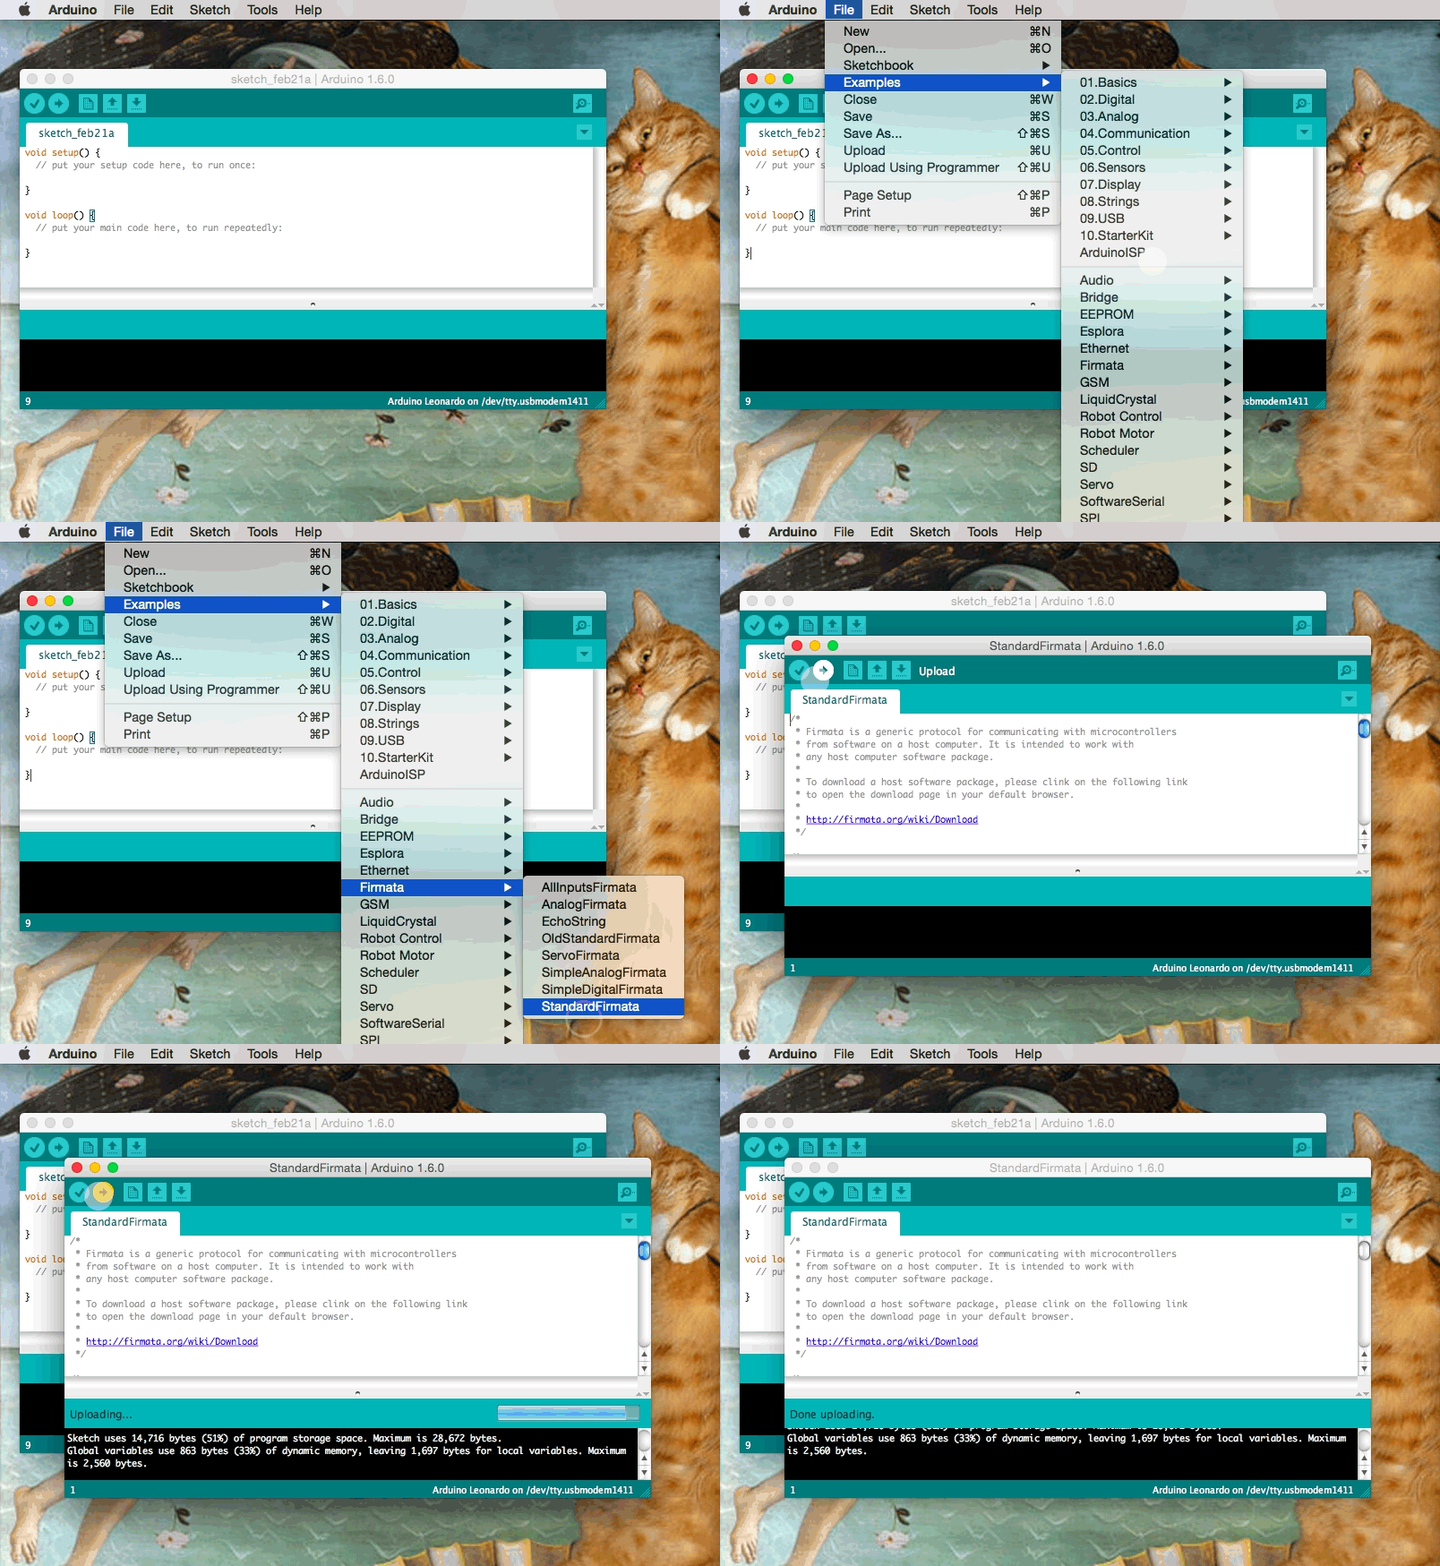
 Johnny-Five communicates with Arduino using the Firmata protocol, so you need to install StandardFirmata:
- on IDE, Open File > Examples > Firmata > StandardFirmata
- Click the upload button (arrow button)
- wait until the IDE message window says “Done uploading”
- Close the IDE and you don’t need the IDE anymore
Now you are ready to snap and code!
Using Johnny-Five to Communicate Arduino with JavaScript
Johnny-Five is an Open Source, Firmata Protocol based, IoT and Robotics programming framework for Node.js, developed by Rick Waldron of Bocoup. You already have your Arduino programmed with Firmata in the last step, so now you just need to install Johnny-Five in your project directory! (Of course, you have to install Node.js on your machine if you have not!)
$ npm install johnny-five
Blinking littleBits’ LED Module
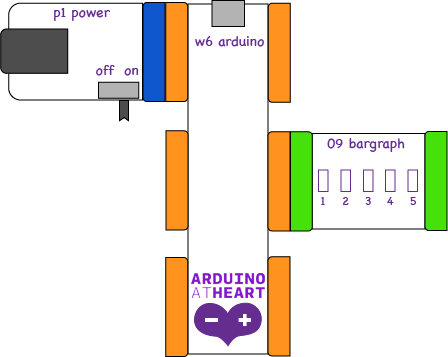
Now, it is the fun part…let’s blink an LED using node.js! Thanks to Anna Gerber, who gathered all information and sample code to start programming littleBits with Johnny-Five on her GitHub repo, we can just take her code to get started! First, assemble the circuit by connecting power to d0 on Arduino, and bargraph (or an other LED module) to d5.
Then, try this node.js code below and run. (Make sure the littleBits’ power is on!) You will see the LED lights blink for 1000 milliseconds repeatedly. Now we will tweak this basic code that interacts with LED.
Getting Realtime Tweets from the PubNub Twitter Firehose
OK, now let’s make it more fun. Instead of you manually blink LED, let’s hook it up with PubNub’s Twitter Firehose, so when somebody in the world tweet certain terms, it notifies me with blinking lights! I have written a tutorial on how to use Twitter data stream on Twitter’s Developer Blog before, but let me recap:
Installing and Initializing PubNub Node.js Module
First, install pubnub node.js module in your project directory.
$ npm install pubnub@3.15.2
Include this code below in your node.js file, let’s call it index.js. We are using a public stream called pubnub-twitter, so initialize the API with the channel name and a public key.
Subscribing to the Live Data
To retrieve the live Tweets, you simply use PubNub subscribe() API.
In my demo, the queries are actually from a user input from a web client via POST, however, to make this tutorial easy to follow, I will skip the process of creating the web application using Express. So, instead of taking a user input, we are using static strings in an array for now. Use any strings you want.
Let’s filter the firehose of tweets coming from PubNub data stream with the queries. At the callback in the code snippet above (where To-do comment is), include this code:
Communicating with littleBits
Modify the Johnny-Five code sample above, and create the blink function.
Instead of strobe, I am using pulse here. It pulses in 400ms interval, and stops after 4000ms. This function is called every time somebody in the world tweets the terms you are seeking for!
OK, let’s run the node app!
Make sure your littleBits modules are connected properly, and the power is on. LED should pulse when somebody tweets the queries you have specified!
The source code with front-end code (as seen on the VIne demo) is on GitHub repo, fork it or reference it to create your own!
Read More
- PubNub Twitter Data Stream
- Johnny-Five JavaScript Robotics and IoT programming framework
- Programming littleBits with JavaScript

