IN THIS ARTICLE
This is the final post of our 4-part series on Advanced PubNub Functions programming techniques. We’ve also talked about Encryption, Event Handler Types and the Key-Value Store.
What is the XHR Module?
The Functions XHR module enables the developer to send HTTP or HTTPS requests to a remote web server and load the response data back into the Event Handler (EH). Common applications include accessing 3rd party web services and triggering webhooks.
Tutorial Overview
The “Search Bot” is an excellent demonstration of the Functions XHR module, an efficient HTTP request library that integrates directly with Functions handlers. In this tutorial, we dive into an example of intercepting data stream message events to implement a “Search Bot” using custom serverless event handling in a realtime Angular2 web application
We’ll extend our Angular2 messaging app with a “Search Bot” handler to process message events and retrieve search results via a Web Service API. Although the example is small (using fixed commands and limited data), it could easily be extended to call additional web services for persistence, natural language detection, sentiment analysis, bridging to external message systems and more.
We’ll create a PubNub BLOCK of JavaScript that runs entirely in the network and implements the “Search Bot” feature to obtain relevant search results so that the web client UI code can stay simple and just display the data.
Functions XHR Module
PubNub makes implementing realtime systems much easier by integrating enterprise-grade security, presence, storage and other advanced features into a huge (and growing!) number of client toolkits. Check out the PubNub SDK page to see them all.
The core of PubNub is Data Streams – realtime message channels that allow an unbounded numbers of devices to publish and subscribe to messages. The Functions feature allows developers to attach custom code to those message events in one of two ways, either as a “before publish or fire” event which allows modification of message attributes, or as an “after publish or fire” event which takes place after the message has been published to the message channel. (There is also an “after presence” event for implementing Presence-related functionality). Check out our Event Handler Types post for more on those.
Using the XHR module, we create a BLOCK that intercepts the “before publish or fire” events in a message channel to implement the “Search Bot” functionality. The big question is, how do we obtain search results in the context of data streams? This is a prime use case for the Functions XHR module, which offers scalable HTTP request functionality for realtime applications. Here’s how our BLOCK works:
- We examine each message for a “text” attribute.
- Based on the
textvalue, we perform a search GET request from a third-party API. - We decorate the message with a “search_results” attribute including the result JSON.
The XHR module is extremely configurable, so it’s easy to create functionality to access just about any API you can think of. Here are a few of the considerations where XHR works best:
- The API speaks HTTP (ideally HTTPS for security).
- The API is publicly accessible (otherwise Functions can’t access it).
- The API accepts/produces JSON/form-encoded/plain text (you can do XML, it’s just slightly harder to integrate in Functions JavaScript).
- The API responds in a reasonable time, say 1-5s (the max XHR timeout is 10s).
- The API uses a reasonably easy auth scheme (such as API key, Basic Auth, etc.).
If your API follows those rough parameters, there are a ton of places where XHR can be configured to integrate:
- XHR supports HTTP methods GET, POST, PUT, OPTIONS, DELETE, PATCH.
- XHR supports getting/setting Request and Response headers.
- Codecs are available for query string, base64, and basic auth encoding.
- XHR supports configurable timeouts up to 10s for APIs that need a bit more time.
Obtaining Your PubNub Developer Keys
The first thing you’ll need before you can create a realtime application with PubNub are publish/subscribe keys. Just in case you haven’t already, you can create an account, get your keys and be ready to use the PubNub network in less than 60 seconds using the handy signup form. Your keys are in your PubNub Admin Dashboard.
Once you do that, the publish and subscribe keys look like UUIDs and start with “pub-c-” and “sub-c-” prefixes respectively. Keep those handy – you’ll need to plug them in when initializing the PubNub object in your HTML5 app below.
Setting Up the Block
With PubNub Functions, it’s really easy to create code to run in the network. Here’s how to make it happen:
First, go to the application instance on the PubNub Admin Dashboard.
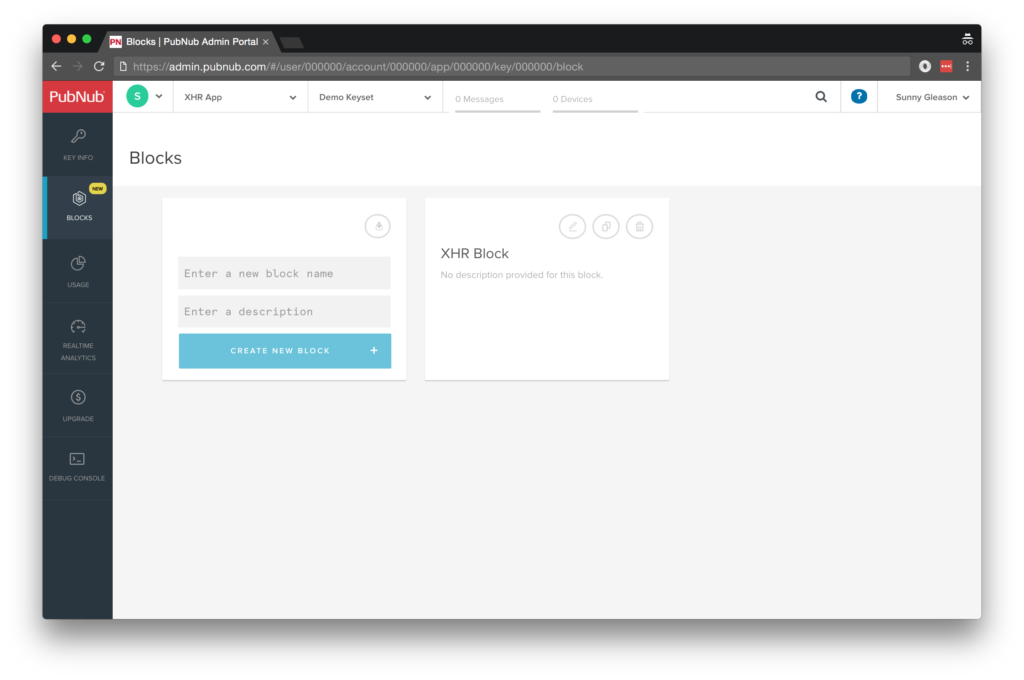
Create a new “before publish or fire” block.
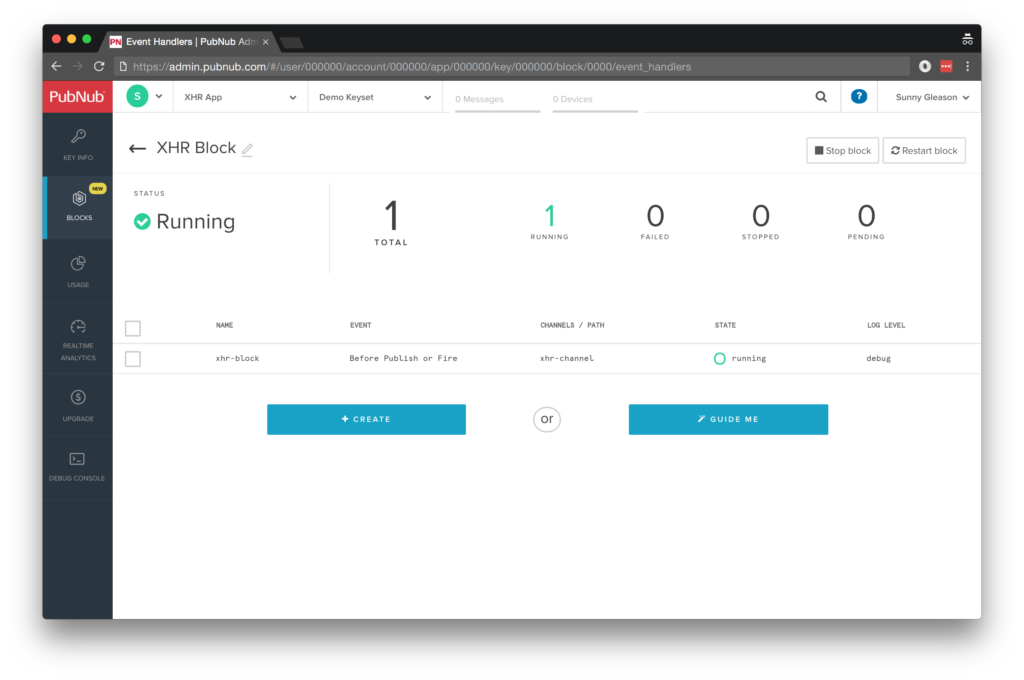
Paste in the block code from the next section.
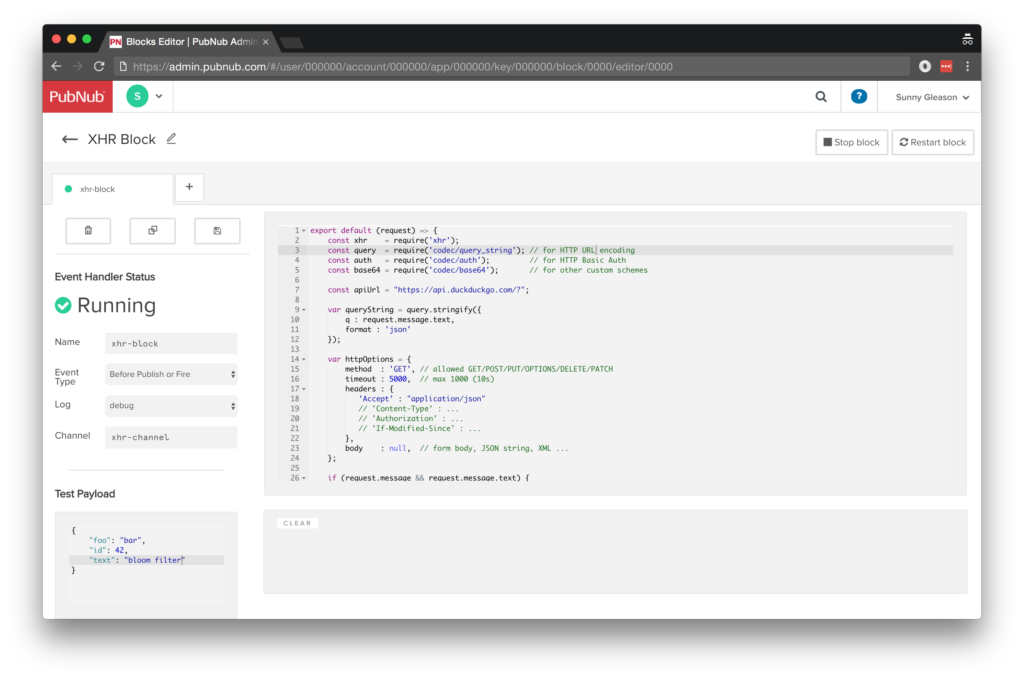 Start the block, and test it using the “publish message” button and payload on the left-hand side of the screen. That’s all it takes to create your serverless code running in the cloud!
Diving into the Code – the block
You’ll want to grab the 35 lines of BLOCK JavaScript and save them to a file, say, pubnub_xhr_block.js. It’s available as a Gist on GitHub for your convenience.
First up, we create a function to handle incoming messages. We include a dependency on the ‘xhr’ module for HTTP/HTTPS API access, ‘codec/query_string’ for query string encoding. Other common codecs to require are ‘codec/auth’ for HTTP Basic Auth encoding, and ‘codec/base64’ for base64 encoding.
export default (request) => {
    const xhr    = require('xhr');
    const query  = require('codec/query_string'); // for HTTP URL encoding
    const auth   = require('codec/auth');         // for HTTP Basic Auth
    const base64 = require('codec/base64');       // for other custom schemes
Next, we configure the API URL, query string options, and HTTP options.
const apiUrl = "https://api.duckduckgo.com/?";
var queryString = query.stringify({
    q : request.message.text,
    format : 'json'
});
var httpOptions = {
    method  : 'GET', // allowed GET/POST/PUT/OPTIONS/DELETE/PATCH
    timeout : 5000,  // max 1000 (10s)
    headers : {
       'Accept' : "application/json"
       // 'Content-Type' : ...
       // 'Authorization' : ...
       // 'If-Modified-Since' : ...
    },
    body    : null,  // form body, JSON string, XML ...
};
As you can see above, there are a ton of places to extend the XHR options with the ones that your API desires.
Finally, if the message contains a text attribute, we query the API and decorate the message with a search_results attribute containing the search results JSON. Pretty easy!
    if (request.message && request.message.text) {
        return xhr.fetch(apiUrl + queryString, httpOptions).then((result) => {
            request.message.search_results = JSON.parse(result.body);
            return request.ok();
        });
    }
    return request.ok();
}
All in all, it doesn’t take a lot of code to add a custom “Search Bot” to our application. We like that!
OK, let’s move on to the UI!
Diving into the Code – the User Interface
You’ll want to grab these 97 lines of HTML & JavaScript and save them to a file, say, pubnub_xhr_ui.html.
The first thing you should do after saving the code is to replace two values in the JavaScript:
- YOUR_PUB_KEY: with the PubNub publish key mentioned above.
- YOUR_SUB_KEY: with the PubNub subscribe key mentioned above.
If you don’t, the UI will not be able to communicate with anything and probably clutter your console log with entirely too many errors.
Dependencies
First up, we have the JavaScript code & CSS dependencies of our application.
<!DOCTYPE html>
<html>
  <head>
    <title>Angular 2</title>
    <script src="https://unpkg.com/core-js@2.4.1/client/shim.min.js"></script>
    <script src="https://unpkg.com/zone.js@0.7.2/dist/zone.js"></script>
    <script src="https://unpkg.com/reflect-metadata@0.1.9/Reflect.js"></script>
    <script src="https://unpkg.com/rxjs@5.0.1/bundles/Rx.js"></script>
    <script src="https://unpkg.com/@angular/core/bundles/core.umd.js"></script>
    <script src="https://unpkg.com/@angular/common/bundles/common.umd.js"></script>
    <script src="https://unpkg.com/@angular/compiler/bundles/compiler.umd.js"></script>
    <script src="https://unpkg.com/@angular/platform-browser/bundles/platform-browser.umd.js"></script>
    <script src="https://unpkg.com/@angular/forms/bundles/forms.umd.js"></script>
    <script src="https://unpkg.com/@angular/platform-browser-dynamic/bundles/platform-browser-dynamic.umd.js"></script>
    <script src="https://unpkg.com/pubnub@4.3.3/dist/web/pubnub.js"></script>
    <script src="https://unpkg.com/pubnub-angular2@1.0.0-beta.8/dist/pubnub-angular2.js"></script>
    <link rel="stylesheet" href="https://maxcdn.bootstrapcdn.com/bootstrap/3.3.7/css/bootstrap.min.css" />
    <link rel="stylesheet" href="https://maxcdn.bootstrapcdn.com/bootstrap/3.3.7/css/bootstrap-theme.min.css" />
  </head>
For folks who have done front-end implementation with Angular2 before, these should be the usual suspects:
- CoreJS ES6 Shim, Zone.JS, Metadata Reflection, and RxJS : Dependencies of Angular2.
- Angular2 : core, common, compiler, platform-browser, forms, and dynamic platform browser modules.
- PubNub JavaScript client: to connect to our data stream integration channel.
- PubNub Angular2 JavaScript client: provides PubNub services in Angular2 quite nicely indeed.
In addition, we bring in the CSS features:
- Bootstrap: in this app, we use it just for vanilla UI presentation.
Overall, we were pretty pleased that we could build a nifty UI with so few dependencies. And with that… on to the UI!
The User Interface
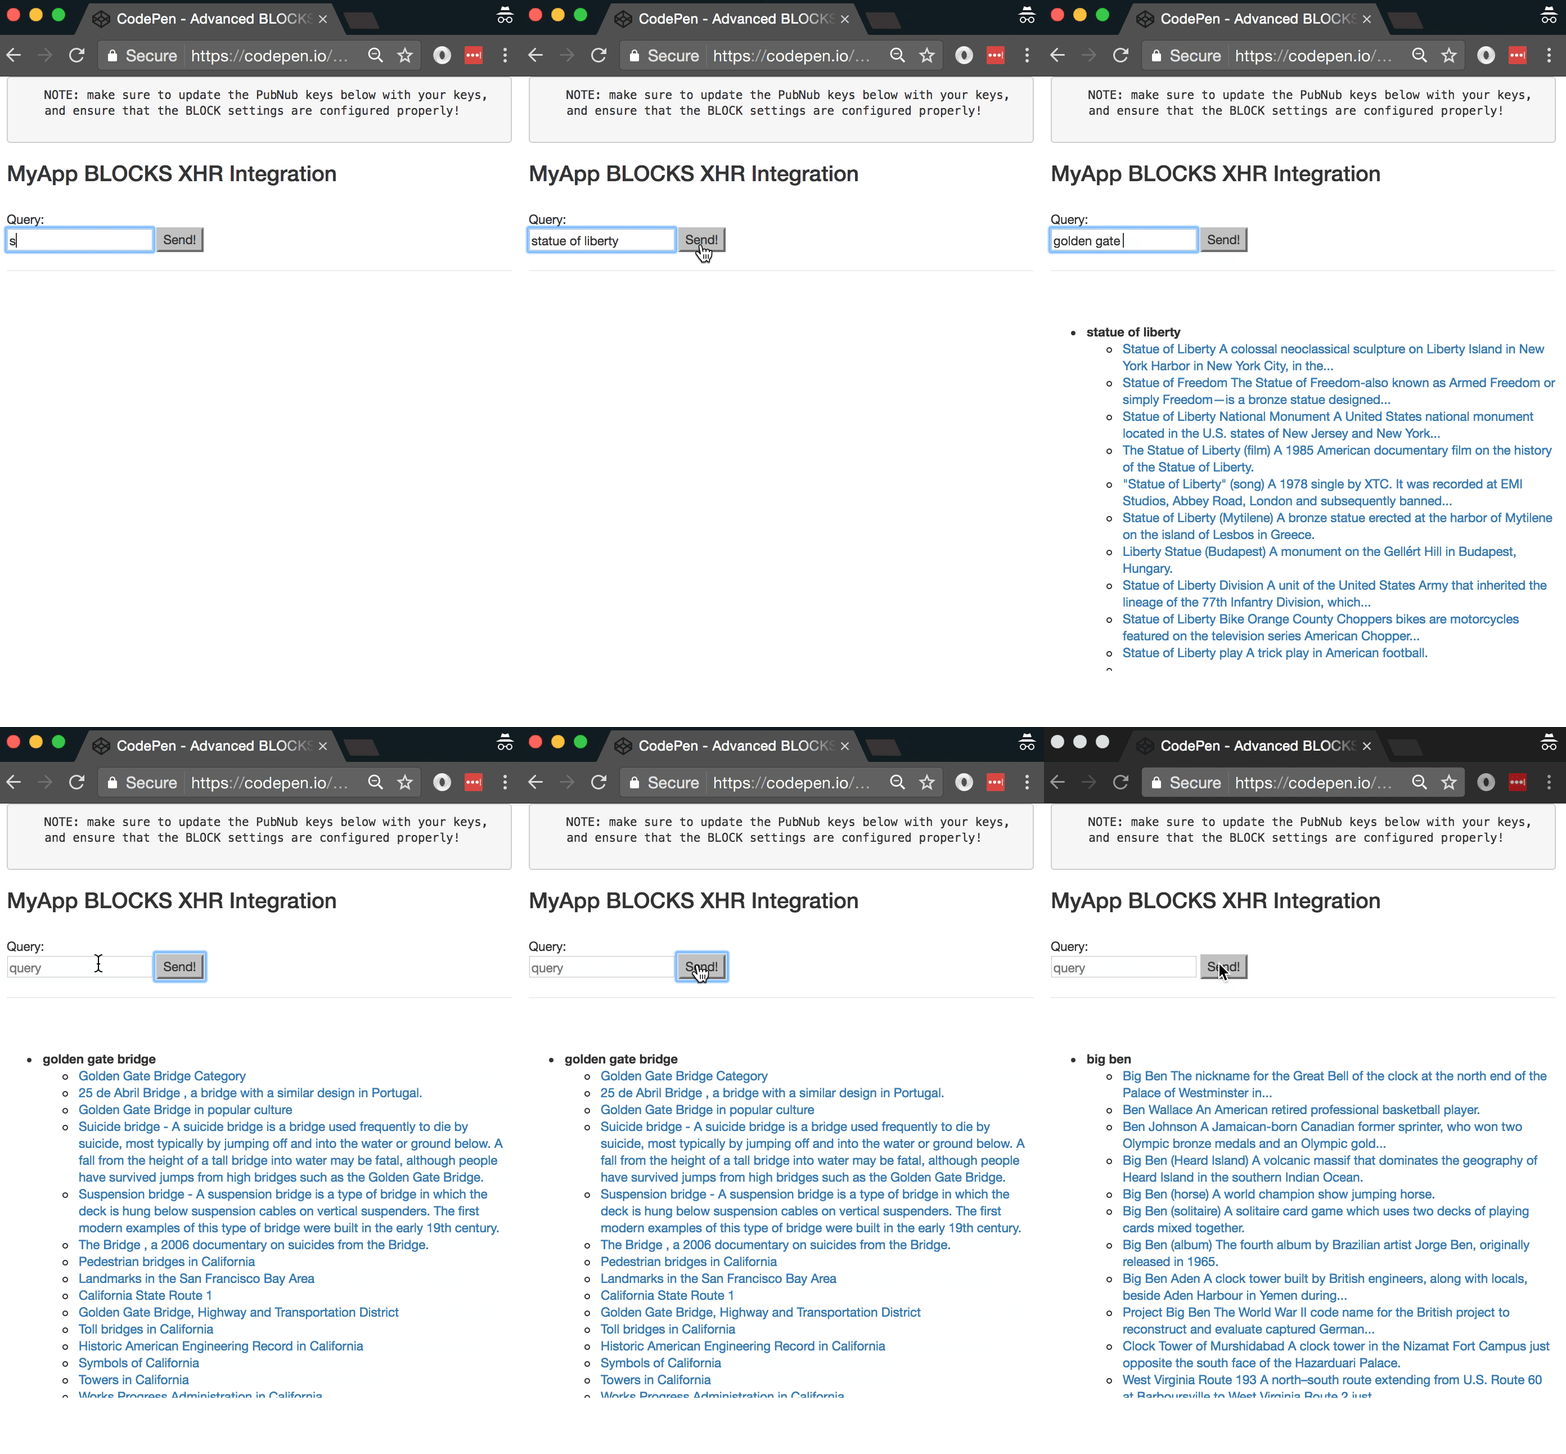
Here’s what we intend the UI to look like:
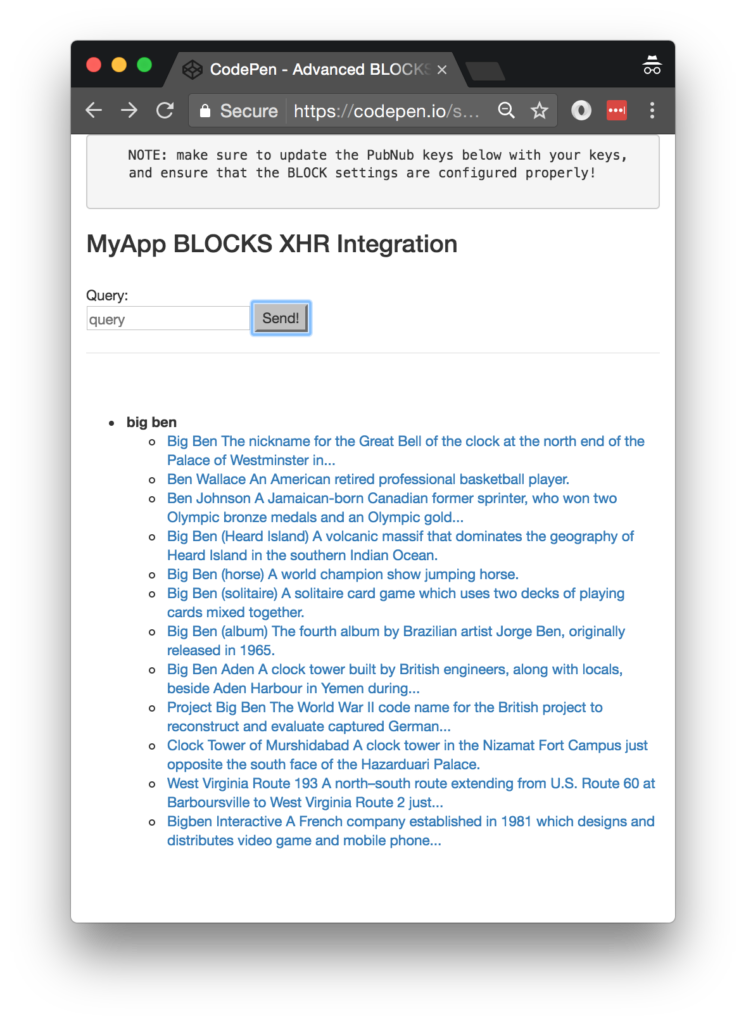
The UI is pretty straightforward – everything is inside a main-component tag that is managed by a single component that we’ll set up in the Angular2 code.
<body>
  <main-component>
    Loading...
  </main-component>
Let’s skip forward and show that Angular2 component template. The h3 heading should be pretty self-explanatory. We provide a text box for the message and a simple button to perform the publish() action to send a request to be processed by the BLOCK.
<div class="container">
    <pre>
    NOTE: make sure to update the PubNub keys below with your keys,
    and ensure that the BLOCK settings are configured properly!
    </pre>
    <h3>MyApp Functions XHR Integration</h3>
    <br />
    Query:
    <br />
    <input type="text" [(ngModel)]="toSend" placeholder="query" />
    <input type="button" (click)="publish()" value="Send!" />
    <hr/>
    <br/>
    <br/>
    <ul>
      <li *ngFor="let item of messages.slice().reverse()">
        <div><b>{{item.message.text}}</b></div>
        <ul>
          <li *ngFor="let result of item.message.search_results.RelatedTopics">
            <a [href]="result.FirstURL">{{result.Text}}</a>
          </li>
        </ul>
      </li>
    </ul>
</div>
The component UI consists of a simple list of events (in our case, the message objects). We iterate over the messages in the component scope using a trusty ngFor. Each message includes the search results from the API. We perform an additional ngFor loop to present the search results for each message.
And that’s it – a functioning realtime UI in just a handful of code (thanks, Angular2)!
The Angular2 Code
Right on! Now we’re ready to dive into the Angular2 code. It’s not a ton of JavaScript, so this should hopefully be pretty straightforward.
The first lines we encounter set up our application (with a necessary dependency on the PubNub AngularJS service) and a single component (which we dub main-component).
<script>
var app = window.app = {};
app.main_component = ng.core.Component({
    selector: 'main-component',
    template: `...see previous...`
The component has a constructor that takes care of initializing the PubNub service and configuring the channel name and initial values. NOTE: make sure the channel matches the channel specified by your BLOCK configuration and the BLOCK itself!
}).Class({
    constructor: [PubNubAngular, function(pubnubService){
        var self = this;
        self.pubnubService = pubnubService;
        self.channelName = 'xhr-channel';
        self.messages = [];
        self.toSend = "";
Early on, we initialize the pubnubService with our credentials.
pubnubService.init({
    publishKey: 'YOUR_PUB_KEY',
    subscribeKey: 'YOUR_SUB_KEY',
    ssl:true
});
We subscribe to the relevant channel, create a dynamic attribute for the messages collection, and configure a blank event handler since the messages are presented unchanged from the incoming channel.
    pubnubService.subscribe({channels: [self.channelName], triggerEvents: true});
    self.messages = pubnubService.getMessage(this.channelName,function(){
      // no handler necessary, dynamic collection of msg objects
    });
}],
We create a publish() event handler that performs the action of publishing the new message to the PubNub channel.
    publish: function(){
        this.pubnubService.publish({ channel: this.channelName, message: {text:this.toSend} });
        this.toSend = "";
    }
});
Now that we have a new component, we can create a main module for the Angular2 app that uses it. This is pretty standard boilerplate that configures dependencies on the Browser and Forms modules and the PubNubAngular service.
app.main_module = ng.core.NgModule({
    imports: [ng.platformBrowser.BrowserModule, ng.forms.FormsModule],
    declarations: [app.main_component],
    providers: [PubNubAngular],
    bootstrap: [app.main_component]
}).Class({
    constructor: function(){}
});
Finally, we bind the application bootstrap initialization to the browser DOM content loaded event.
document.addEventListener('DOMContentLoaded', function(){
    ng.platformBrowserDynamic.platformBrowserDynamic().bootstrapModule(app.main_module);
});
We mustn’t forget close out the HTML tags accordingly.
});
</script>
</body>
</html>
Not too shabby for about 97 lines of HTML & JavaScript!
Functions References & Diving Deeper
There are a couple other things worth mentioning with respect to the Functions XHR module and other Data Stream features. You can find detailed documentation on the XHR module here and Codecs here.
In this article, we touched on a couple use cases, but there are a few more XHR examples we’d like to mention:
- Storing API credentials and Using Basic Auth to access a Text-To-Speech API.
- Use POST requests and a JSON body to access a DevOps API.
- Use extended timeouts and Basic Auth to access an Image Recognition API.
Some additional Data Stream features you might find useful for your application include:
- Server-Side Filtering : using meta attributes and the Stream Controller API
- History and Replay : using the Storage & Playback APIs
- Presence : realtime status and custom state using the Presence API
All in all, we found it pretty easy to use advanced XHR features on PubNub data streams using the API, and we look forward to using some of the more advanced capabilities in our future messaging applications!
Conclusion
Thank you so much for joining us in the advanced XHR post of our Advanced Functions Techniques series! Hopefully it’s been a useful experience learning about working with different web service APIs for various use cases. In future articles, we’ll dive deeper into additional techniques for crafting Functions and integrating other nifty services in realtime web applications.
Stay tuned, and please reach out anytime if you feel especially inspired or need any help!


